Hello guys! In this post I'm going to share the process of designing and completing a childhood plaything. One day when I suddenly recall memory about my very first toy - a battery-powered tank, which was broke by me only after a few hours playing when I was 5 years old.. So I decided to redraw and recreat it again, It might not be exactly like the one from over 30 years ago, but it will definitely be something wonderful. Not only bringing us back memories, this tank also challenging our design and DIY skills.

Concept & Design Process
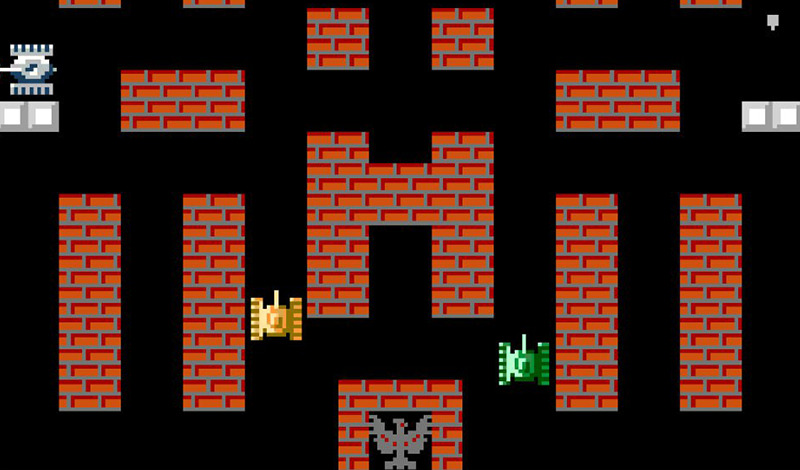
Those of us who grew up in the 80s and 90s probably remember these two classic games: Metal Slug and Tank
I only have a faint memories of these two games, with that I explored and gathered inspiration to sketch the tank below. A little bit of cuteness, friendliness, and child-friendly.
 After several iterations and refinements, this is the overall shape of the tank I aimed for - rounded and cute, instead of aggressive or intimidating. And Shapr3D on iPad until now still my go-to software for all big and small DIY projects of mine.
 Once the exterior finalized, the next step is internal details. This tank is meant to be fully function, so there are quite a lot of internal parts that needed to be designed and tested — such as track system, gearbox, gears, and the mechanisms for rotating and elevating the barrel.… At this designing stage, things gonna take lots of time and effort, but for someone who is meticulous and loves design, it's full of joy. We got to decide how every single screw going to placed, and how each component works.
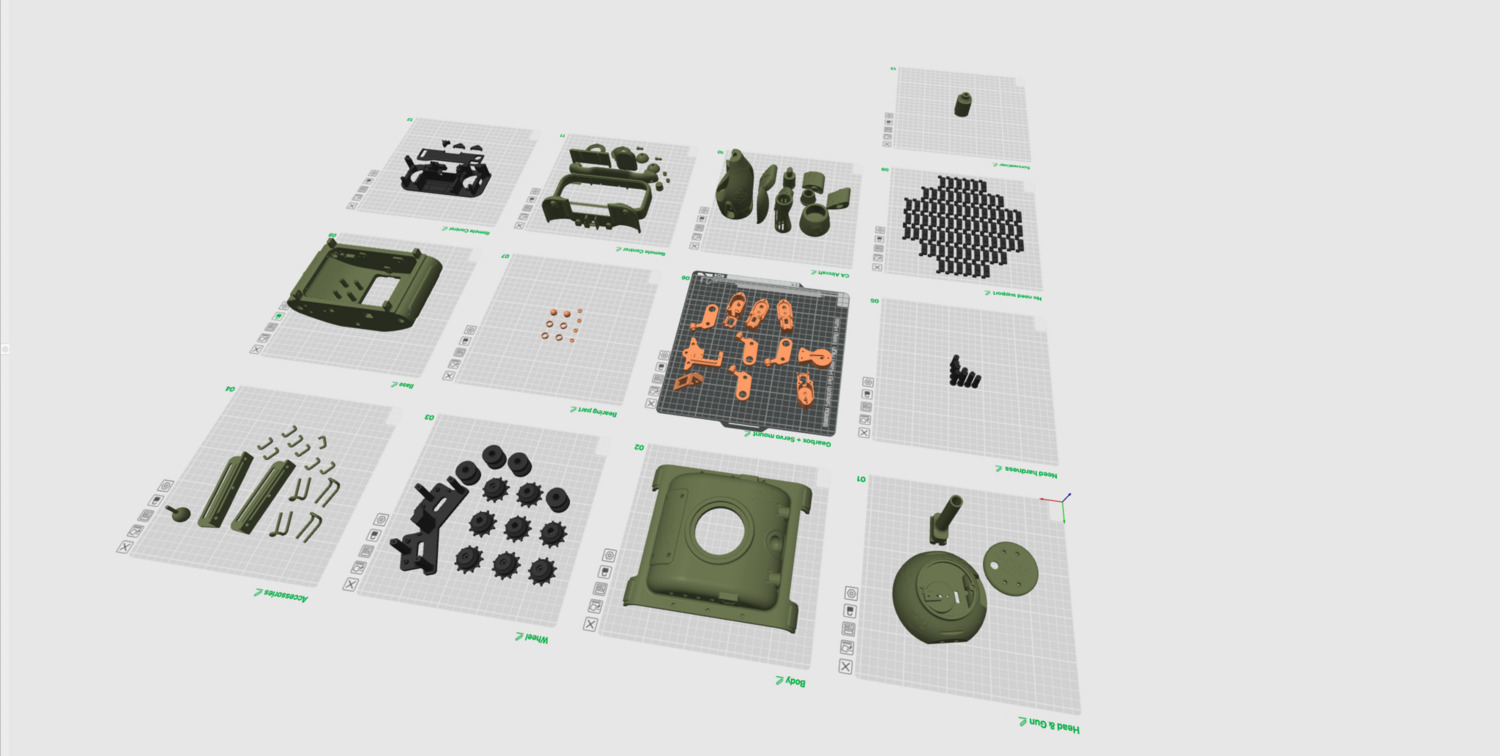
 This is a breakdown view of the internal components. At this stage, it is referred to as DFA (Design for Assembly), where the design is planned to ensure easy assembly, optimize the assembly process. After that comes DFM (Design for Manufacturing), where the design is optimized for manufacturing. In this case, I produced these details using FDM 3D printing.
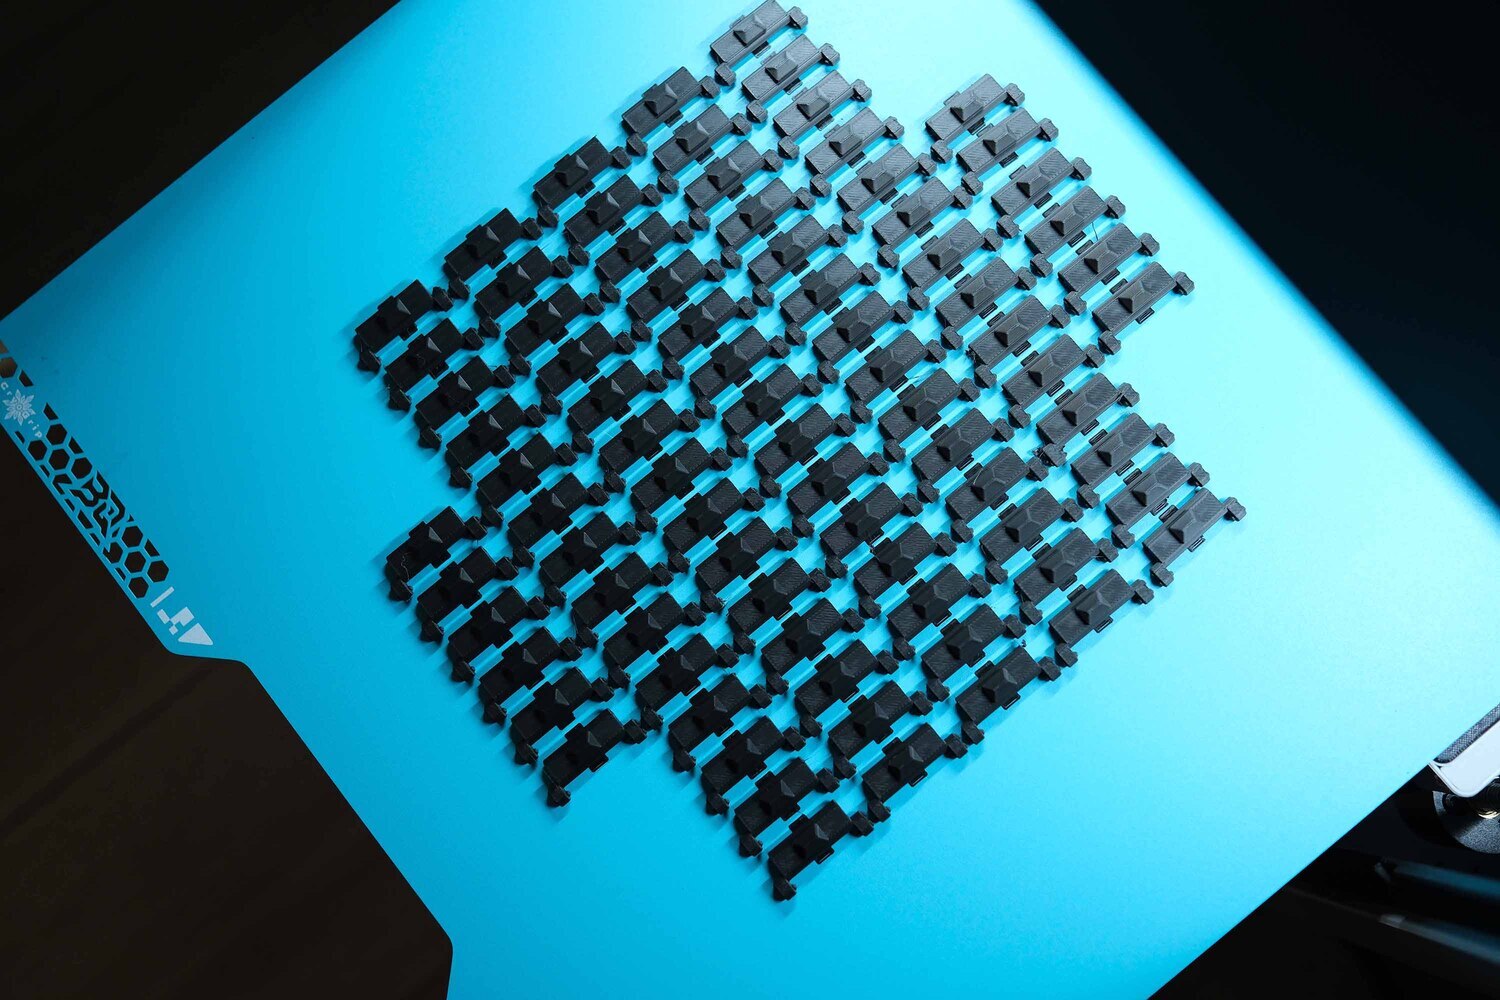 These are the individual links, printed separately and then assembled together. It may look like a lot, but actually very easy. This approach allows the length to be easily adjusted to your personal preference. There are many considerations involved in designing the internal mechanisms, but going into all of them would make this post quite long and less interesting for you, so lets move on to the next part.
Cyber Brick - Development KIT for Interactive 3D-Printed Models
I’ll be using Bambu Lab’s Cyber Brick Kit to complete this Tank. Simply put, it’s a development kit that includes all the essential electronic components, such as programmable remote-control controller, motors, servos, sensors, LEDs, gears... It works as a hardware platform that allows you to build a fully functional model. If you have programming skills, you can customize how it works. Otherwise, you can rely on the built-in control libraries, which makes everything very easy to use.
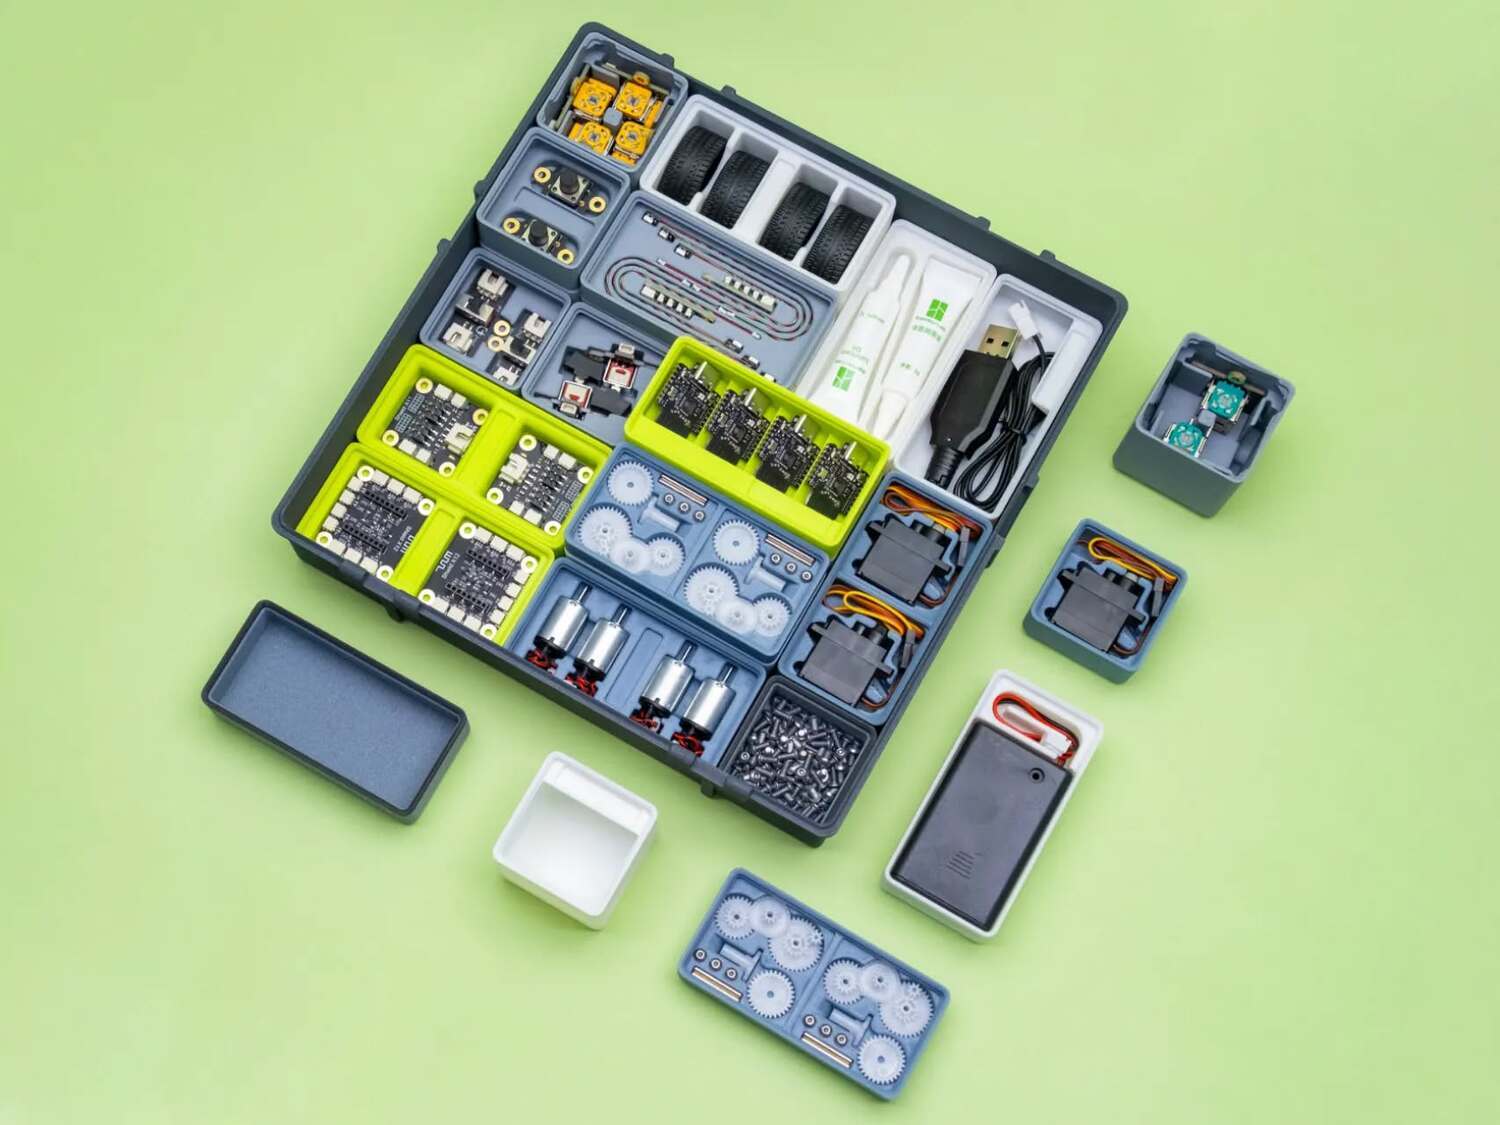
When you buy Bambu Lab’s Cyber Brick Kit, it already provides almost everything you need as a foundation to create a functional model. What’s left for you to do is to design the outer shell and integrate it with the kit. It’s like you already have the engine — you just need to decide what kind of vehicle body you want to build around it. If you’ve ever played with LEGO STEM kits before, you’ll probably know what this feels like.
For example, the kit already comes with joysticks and TX/RX boards. What you simply need to do is print the controller housing and assemble it, or design your own controller shape and use it the way you like. Bambu Lab’s library is huge, with countless designs created and shared by other Makers. Even if you don’t know how to design, you can still jump in and have fun with it.

For those who may not know, Makerworld is a platform created by Bambu Lab for people who love design and 3D printing.
It brings together Makers from all over the world, create and share designs for free. Even if you don’t know how to design, you still can use everything available on the platform. For me, I personally prefer working on designs that I create myself, so I tend to build everything from scratch.
Testing and refining the mechanisms
Once the design is complete and the electronics solution and accessories are selected, the next step is test printing the key internal components, such as the gearbox, suspension wheels, drive tracks, and assembly points...
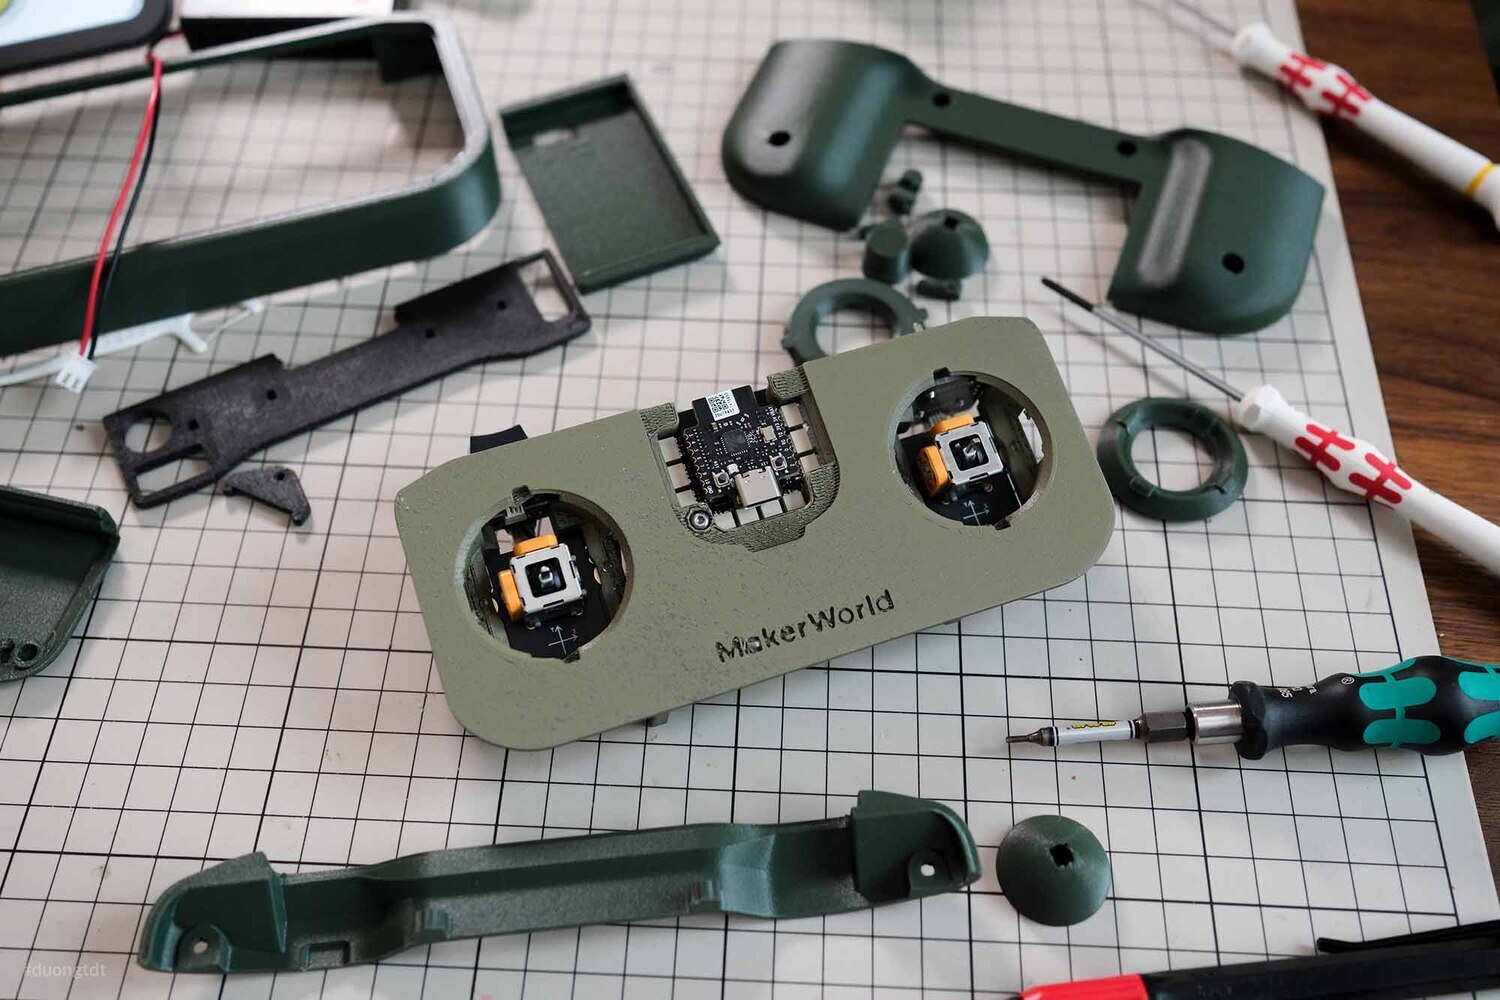
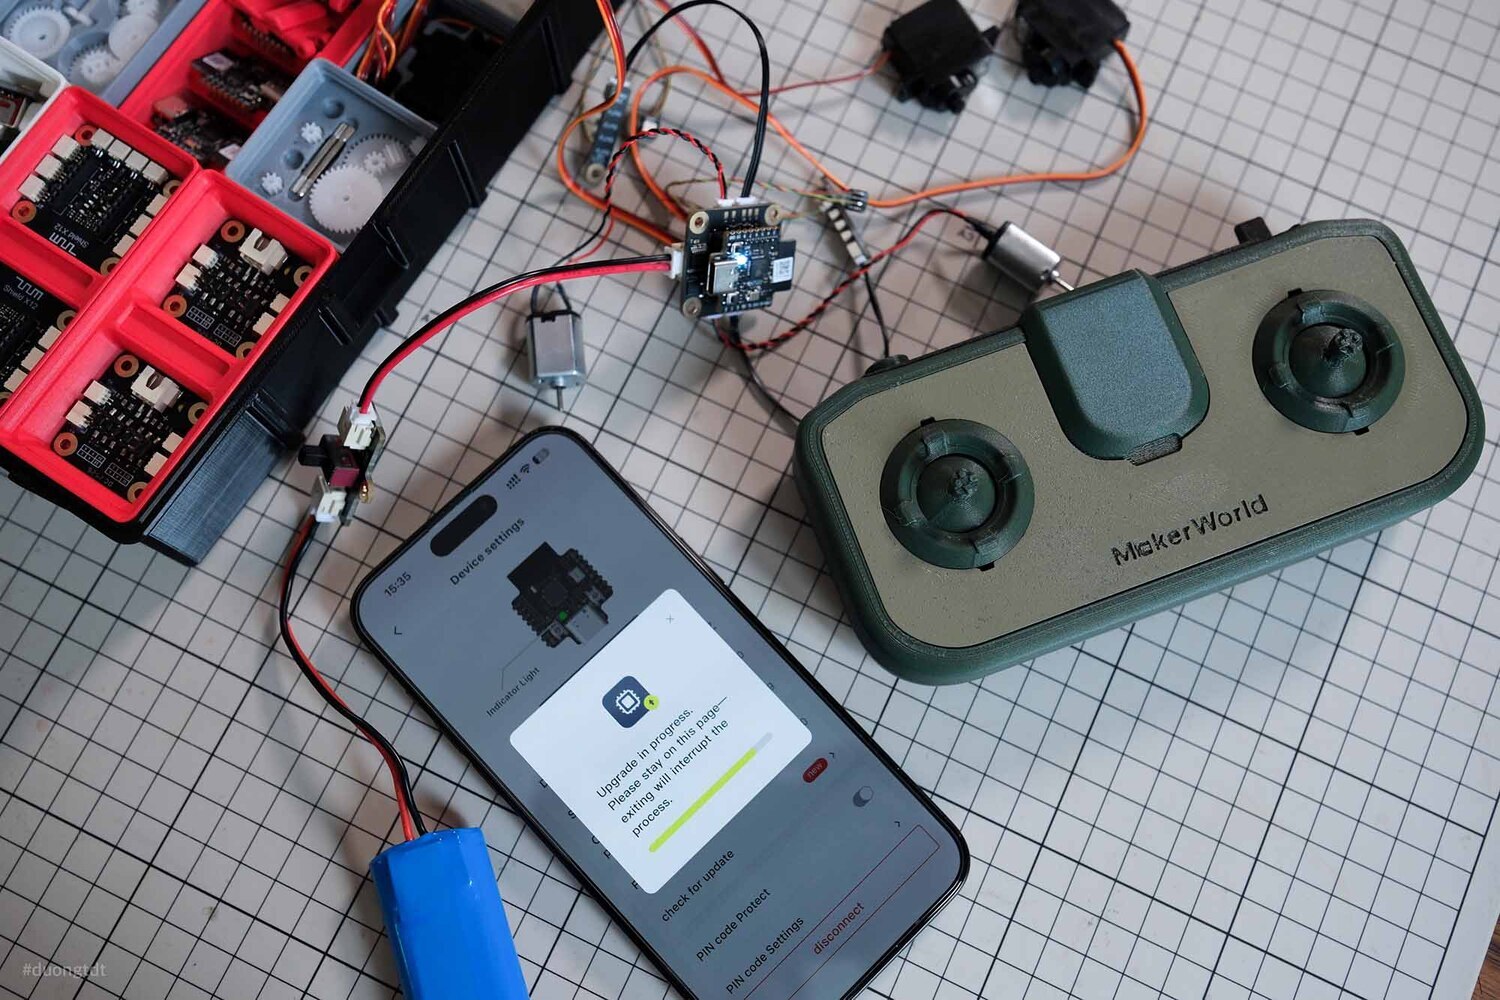
At this stage, I print out the parts for assembly and testing, to check for any misalignment and to see whether everything works as intended. In the photo above, I printed the controller housing, installed the joysticks and the TX board. This board can be programmed to control 2 motors, 4 servos, and up to 8 LEDs.
 As shown in the image above, I designed the middle pair of wheels on the Tank with a spring suspension, so it can keep the tracks tensioned while driving, also move up and down when encountering obstacles.
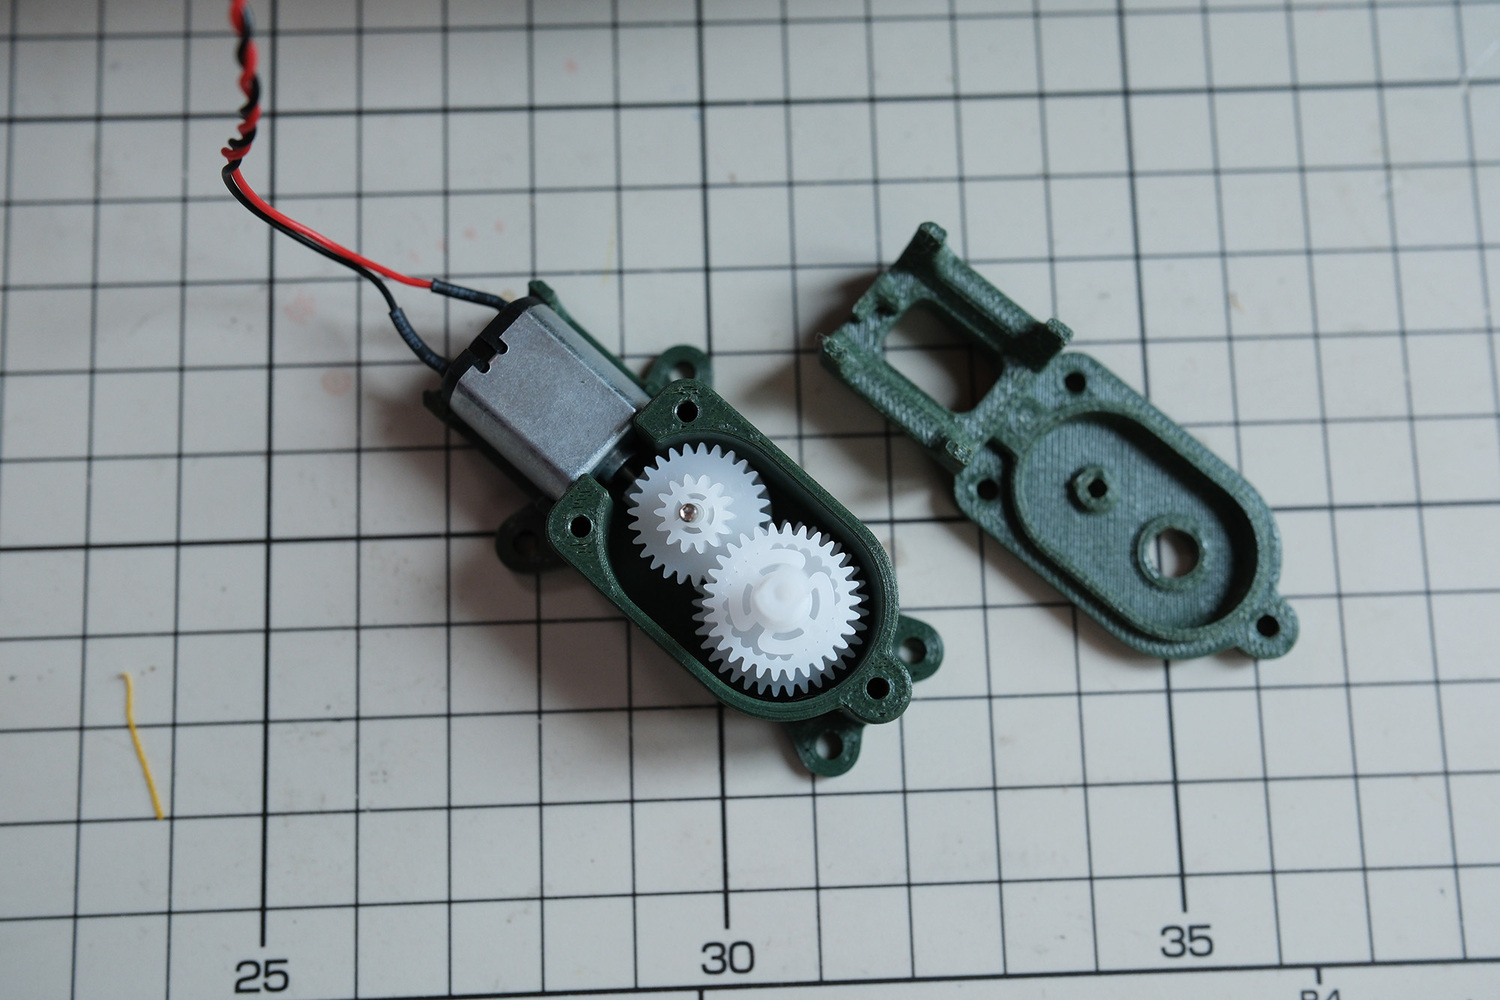 This is the gearbox that drives the two rear tracks, the internal gears are already provided in the Cyber Brick Kit. All you need to do is design the outer housing to match your own design.
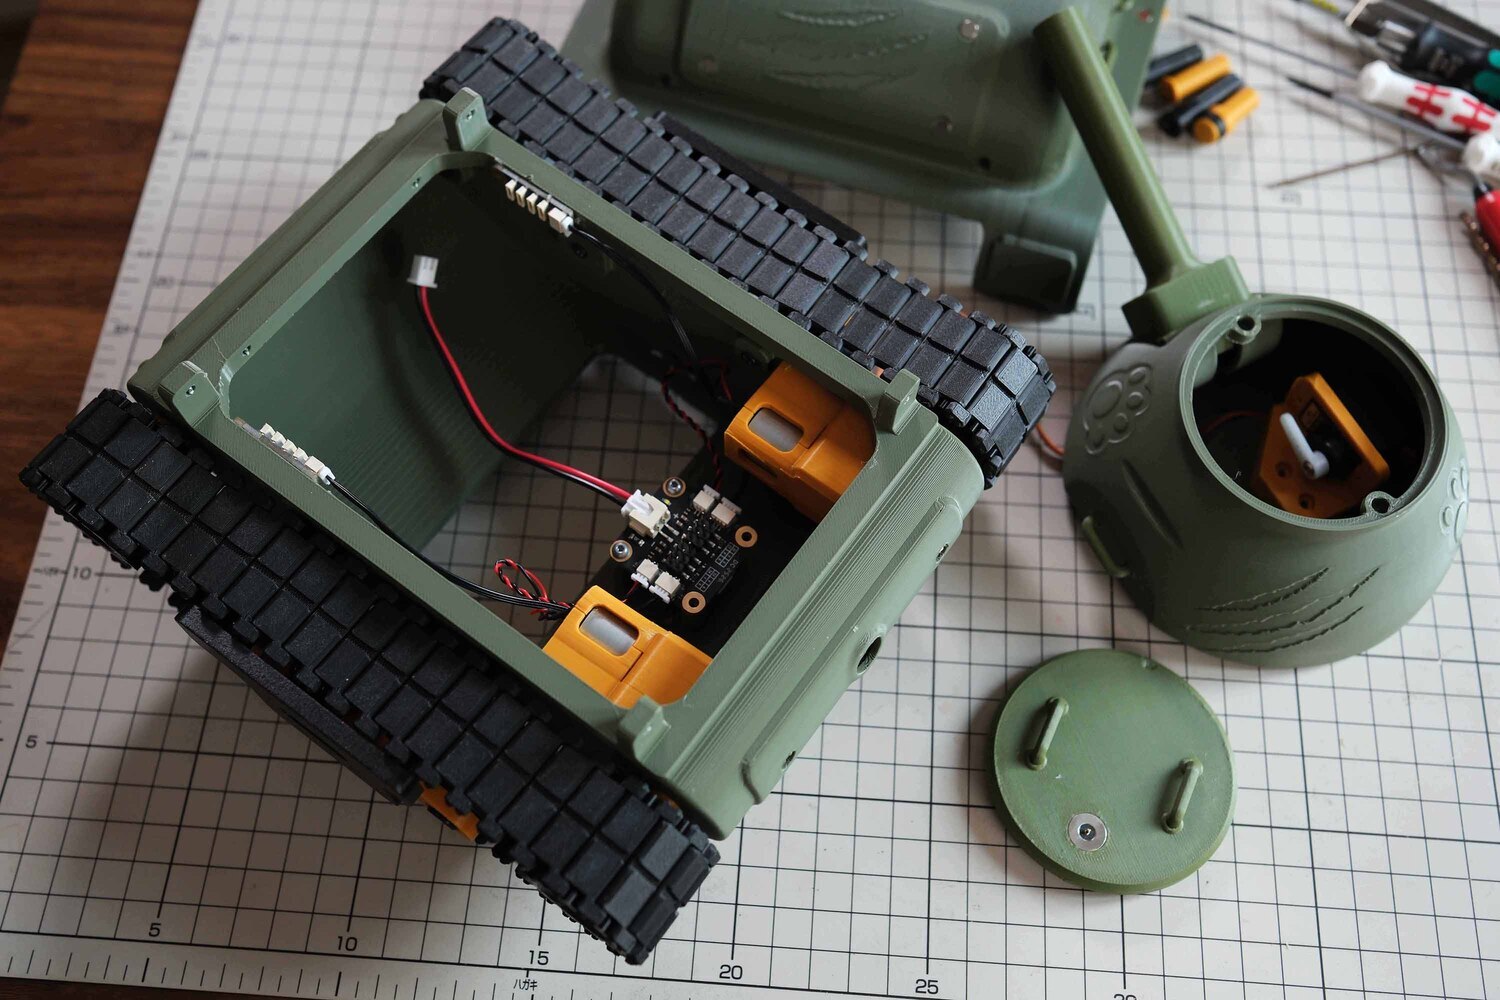
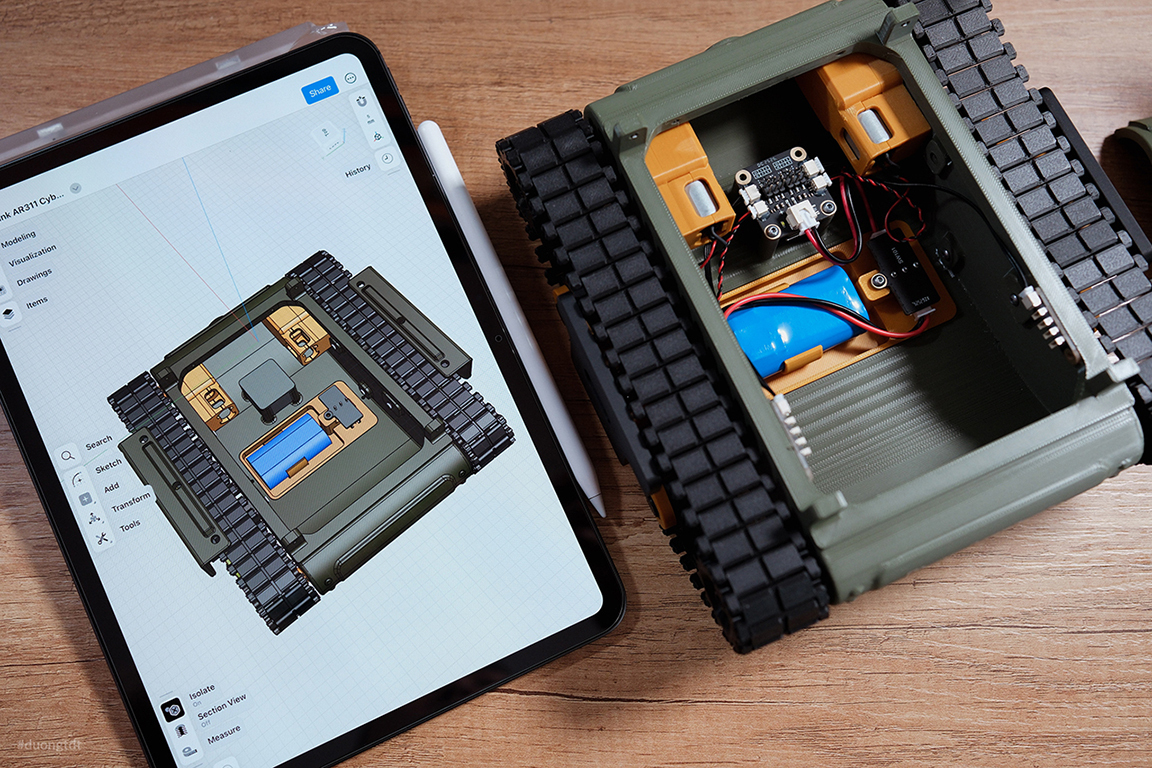
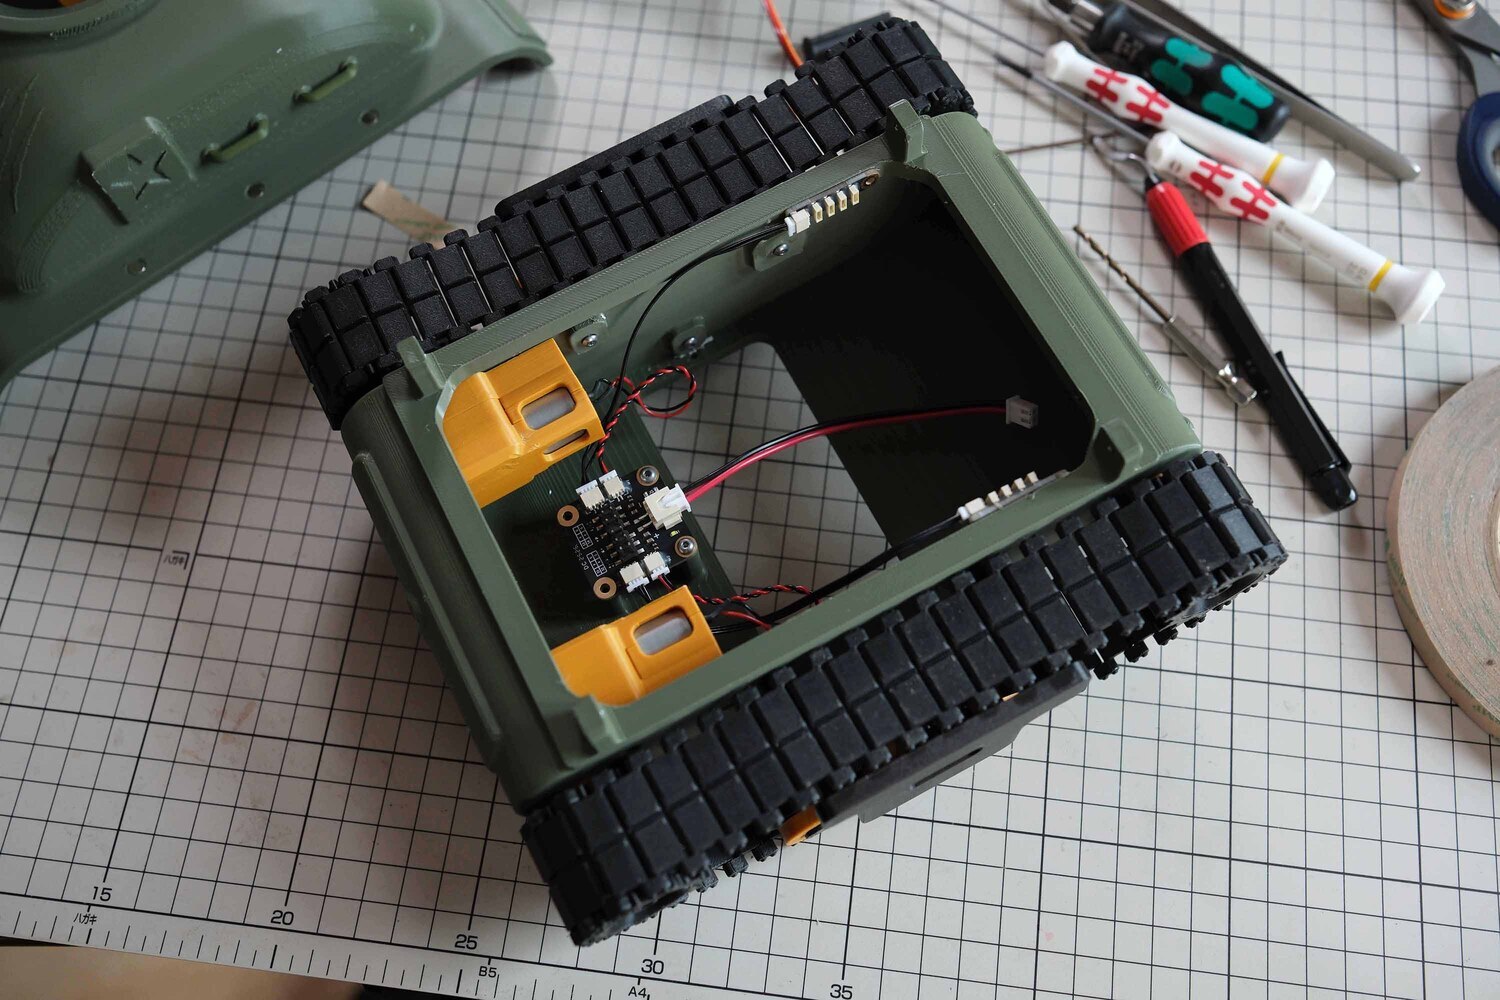 This is the main body of the Tank. Inside, I designed mounting points for the gearbox connected to the external tracks, as well as locations for the RX board, battery, and the front indicator lights, these lights can be configured to stay on, flash, or act as turn signals, depending on how we set them up.
 This is the upper body that driven by a 180-degree servo motor, allowing it to rotate left and right.
 This is the upper gun mount, allowing up-and-down movement and driven by a servo motor. In the future, if I finish designing a mechanism that allows it to fire plastic balls, I definitely will share an update hihi.
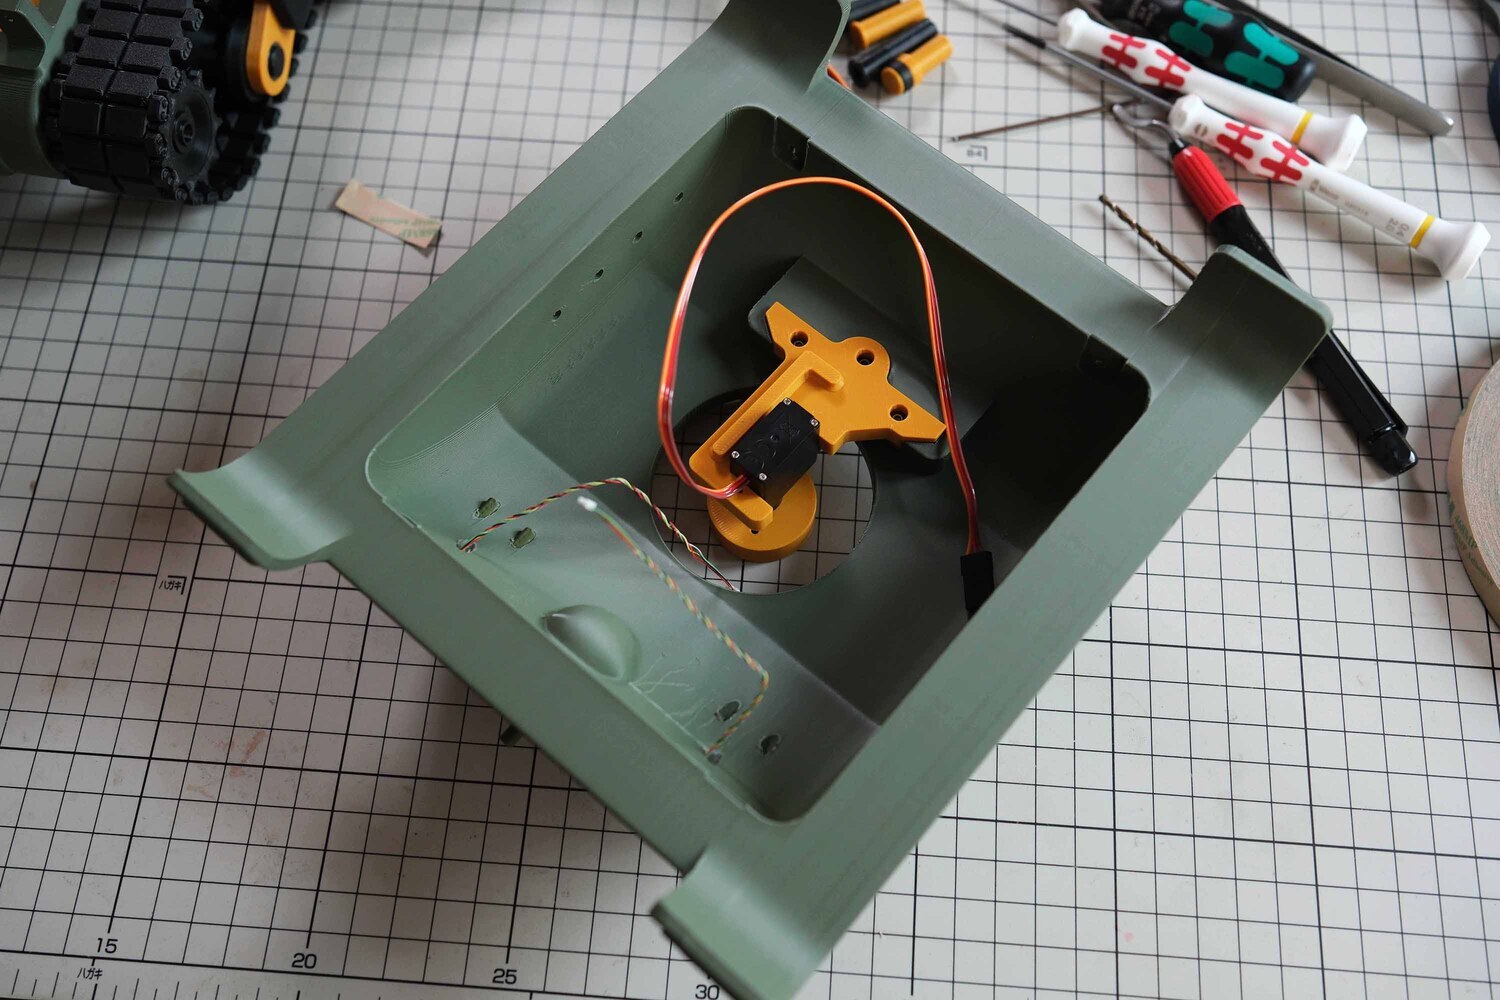 The servos are secured using parts that I designed from the beginning.
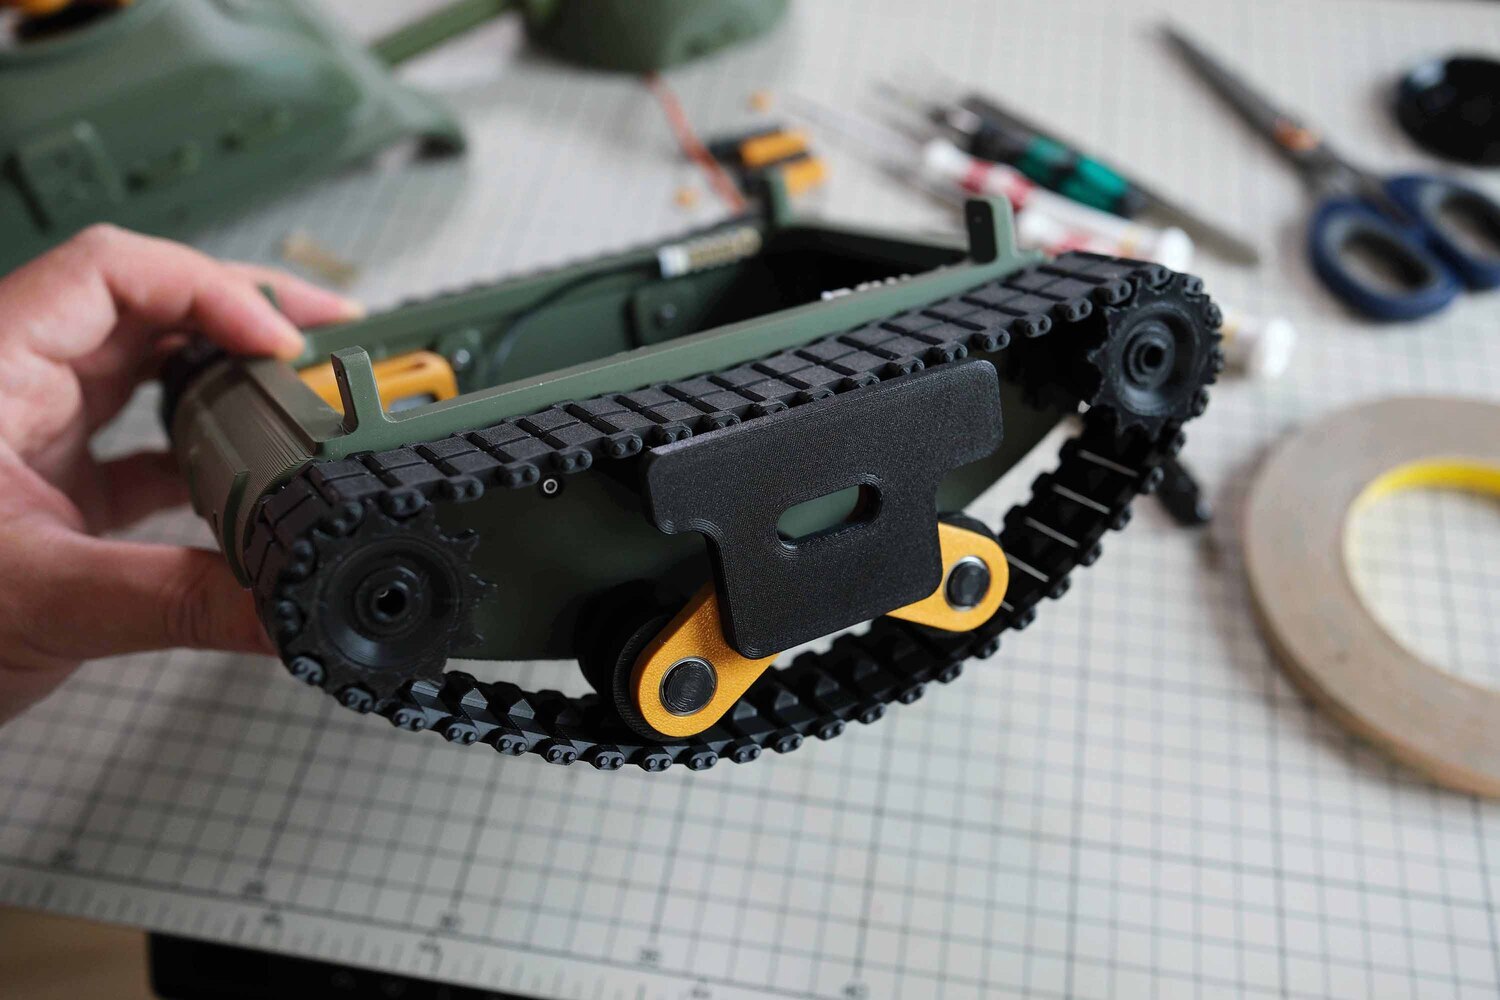 This is the tank’s track assembly, it made up of individual links connected by joints, so the length can be adjusted as needed. Usually, tank tracks perform better when they have a bit of slack rather than being fully tensioned.
Using 3D printing to produce all components
After testing the key mechanisms, we just need to print all the remaining parts and assemble everything together. The assembly and fine-tuning process is actually lots of fun. For me, the most enjoyable part of creating projects like this is the process of building them.
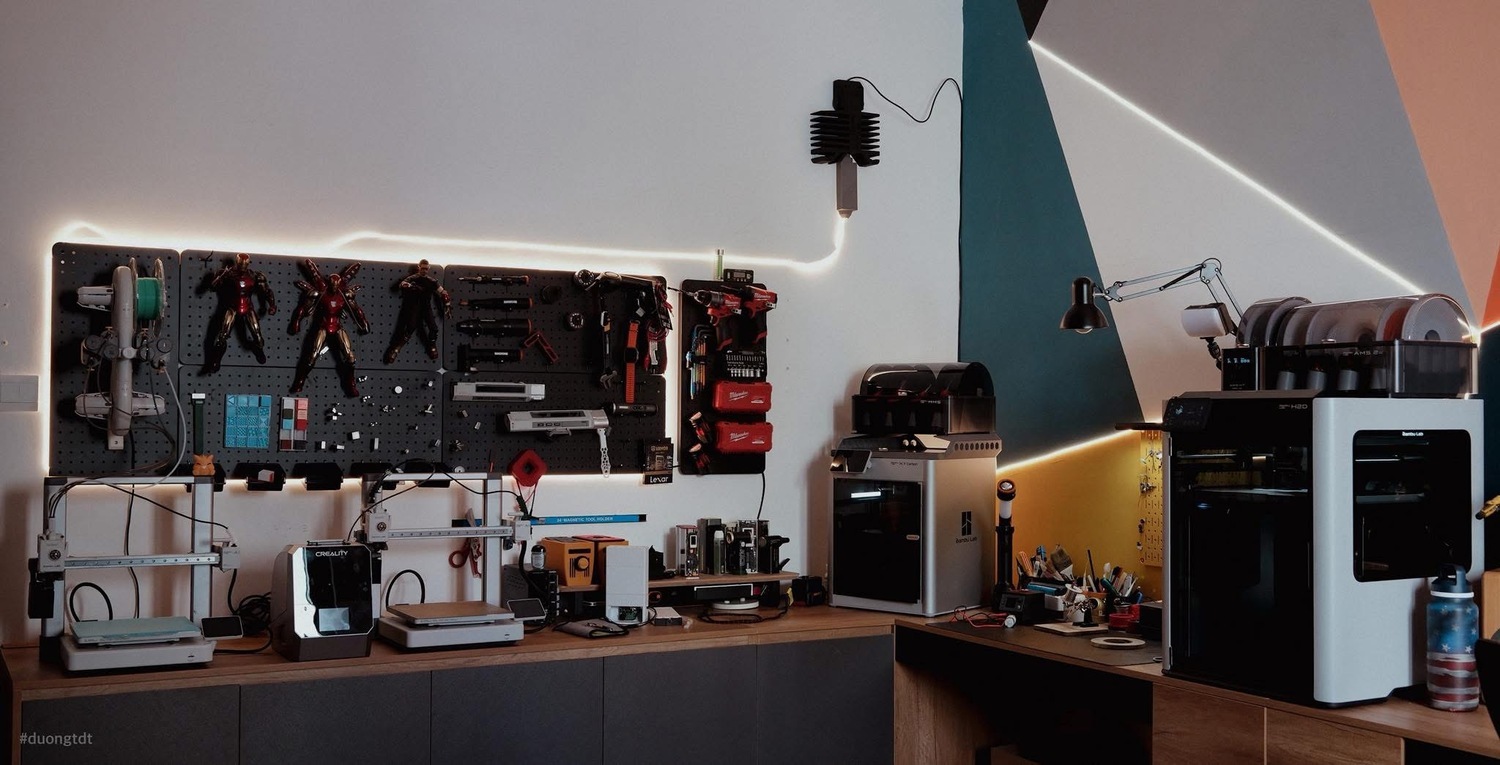
When it comes to 3D printing, I’ve always been using Bambu Lab FDM 3D printers for my DIY projects. And for this, I used the Bambu Lab H2D. With its dual-nozzle capability and multi-material printing, H2D allows me to print with two different filaments at the same time, so I'm able to use different materials to support each other. Resulting in cleaner prints and much easier support removal. (This section is mainly for those into 3D printing and need a reference—if you’re not, feel free to skip it)
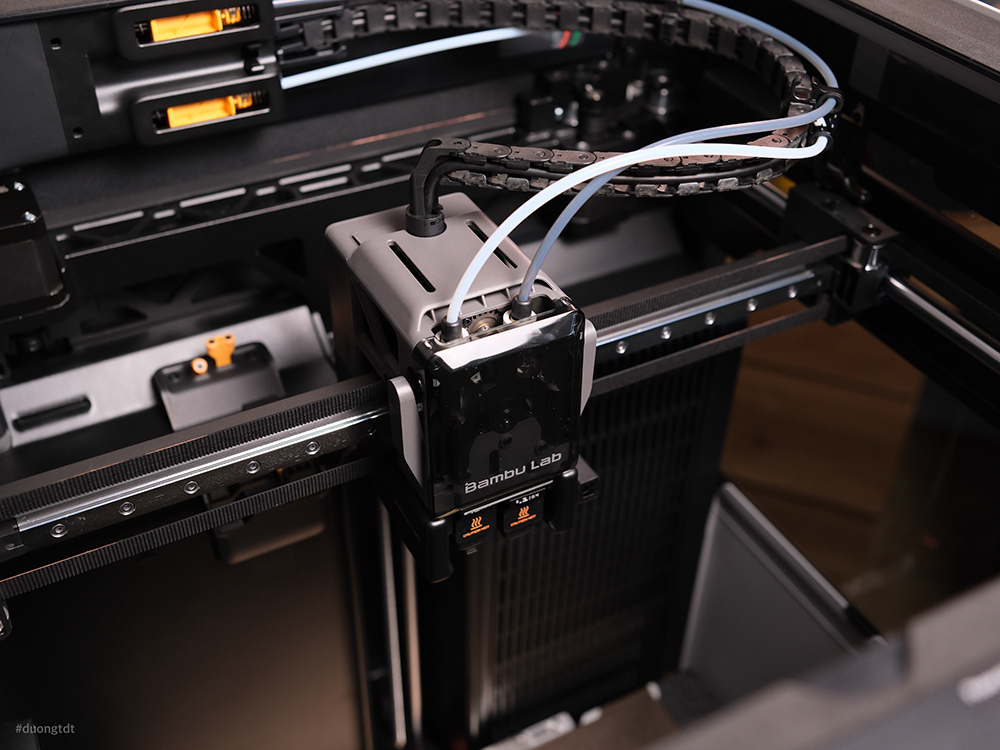 At the moment, H2D is Bambu Lab’s flagship 3D printer. It can handle a wide range of advanced filaments, offering stable performance, high printing speed, and flexible multi-material capabilities. However, this design can be printed on almost any FDM 3D printer, you don’t need such a high-end machine. Using a single-nozzle printer is okay, it will just take more time.
 Here are all the printing files for this toy Tank project. For parts that require continuous movement or need to withstand mechanical stress, I recommend using filaments with better mechanical properties, such as PETG, ASA, or PETG-GF.
Let’s finish it up and have fun!
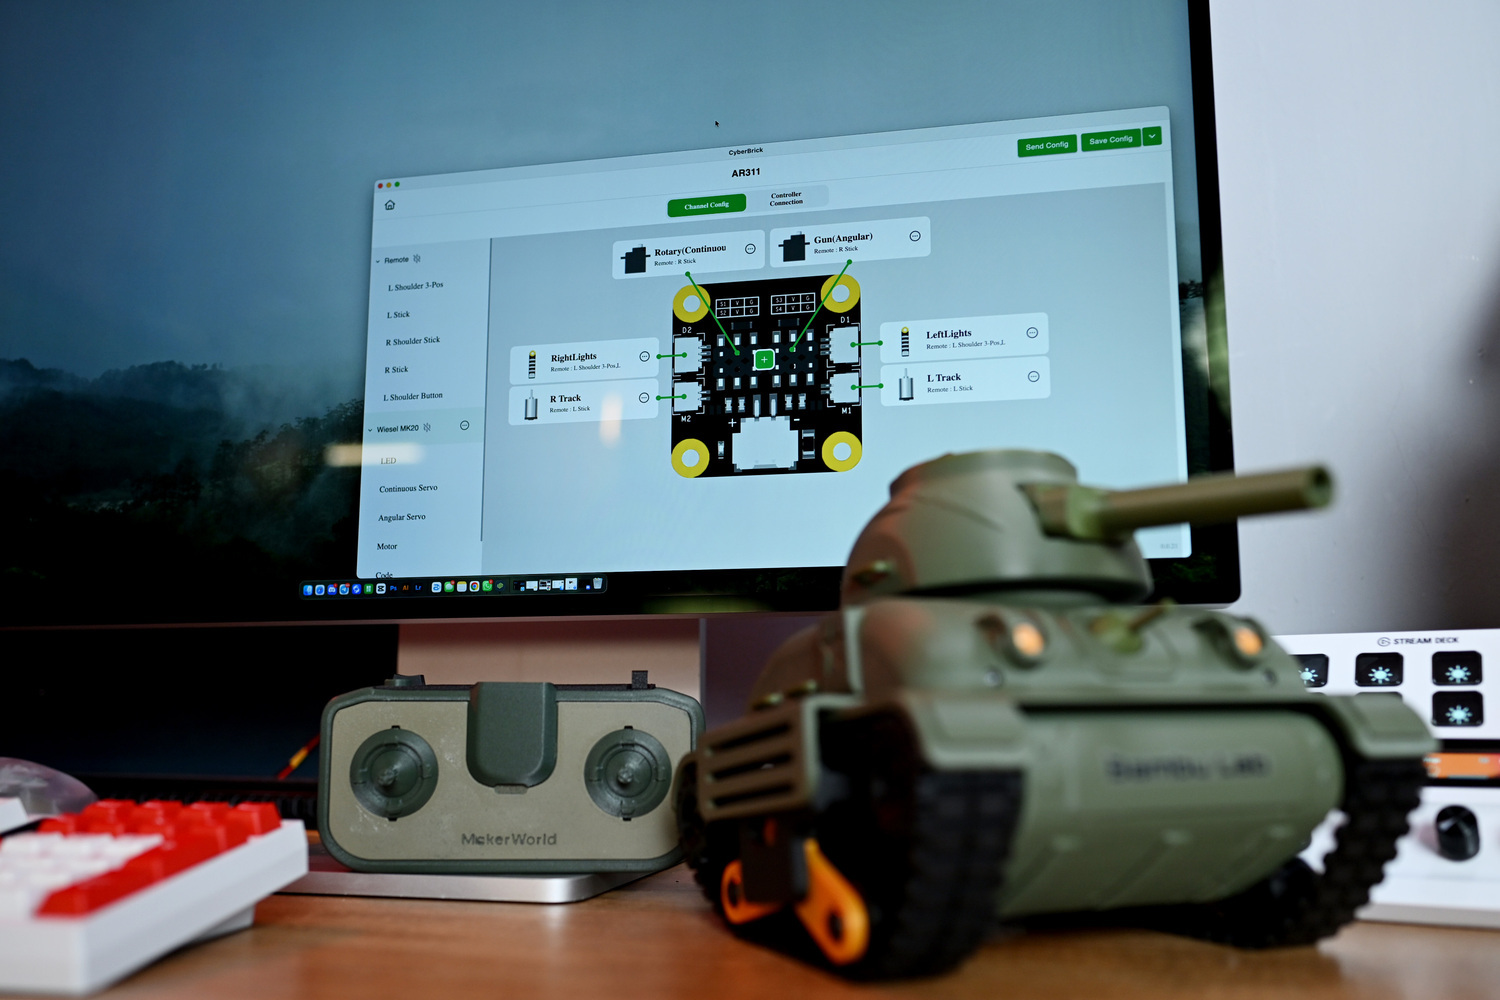 It’s time to program its functions. This might sounds complicated but actually very simple. By using the Cyber Brick kit, everything is based on basic commands: controlling motor directions, setting servo angles, defining LED behaviors and assigning them to control buttons. Since everything is set up wirelessly, it’s easy to configure, even if you don’t have much programming experience.
 Seeing a product from its beginning - from the initial idea, to sketching it out, and finally turning it into something real has always been a joyful and exciting experience to me. Reminds me of a quote I read recently from Ms.Sen “The journey is more beautiful than the destination”.
 I’m truly happy that I can share this project with you all. Being able to recreate a childhood toy for myself - tuning every screw and refining every detail so it works exactly the way I want. I hope that this article brings you more and more creative inspiration, more joy, and maybe even sparks an interest in similar projects, encouraging you to build a fun toy of your own.
Or, if you’d like, you can also support this project through the links below hihi.
Resources
- You can purchase the Cyber Brick kit directly from Bambu Lab’s official store or online: https://us.store.bambulab.com/products/cyberbrick-hardware-kit
- I’m sharing the design files, assembly instructions, and related documentation through a DIY project support platform. Once the project reaches enough supporters, the files will be released. If you like the project, feel free to support or simply follow along here: https://makerworld.com/en/crowdfunding/98-ar311-cyberbrick-tank

I’ve designed an additional aircraft model in the same style as a bonus for those who support this project. There are also support tiers that include full access to the files and a commercial license for those who wish to use the design commercially.
Thank you all for taking the time to read this article until the end.