Hello guys! Today I'm going to share about DIY accessory - a charging station for multiple Kingma camera charging docks. I'm currently using several different types of camera batteries, and each one requires different charging dock. So I came up with the idea why not bring them all together into one charging station for convenience?

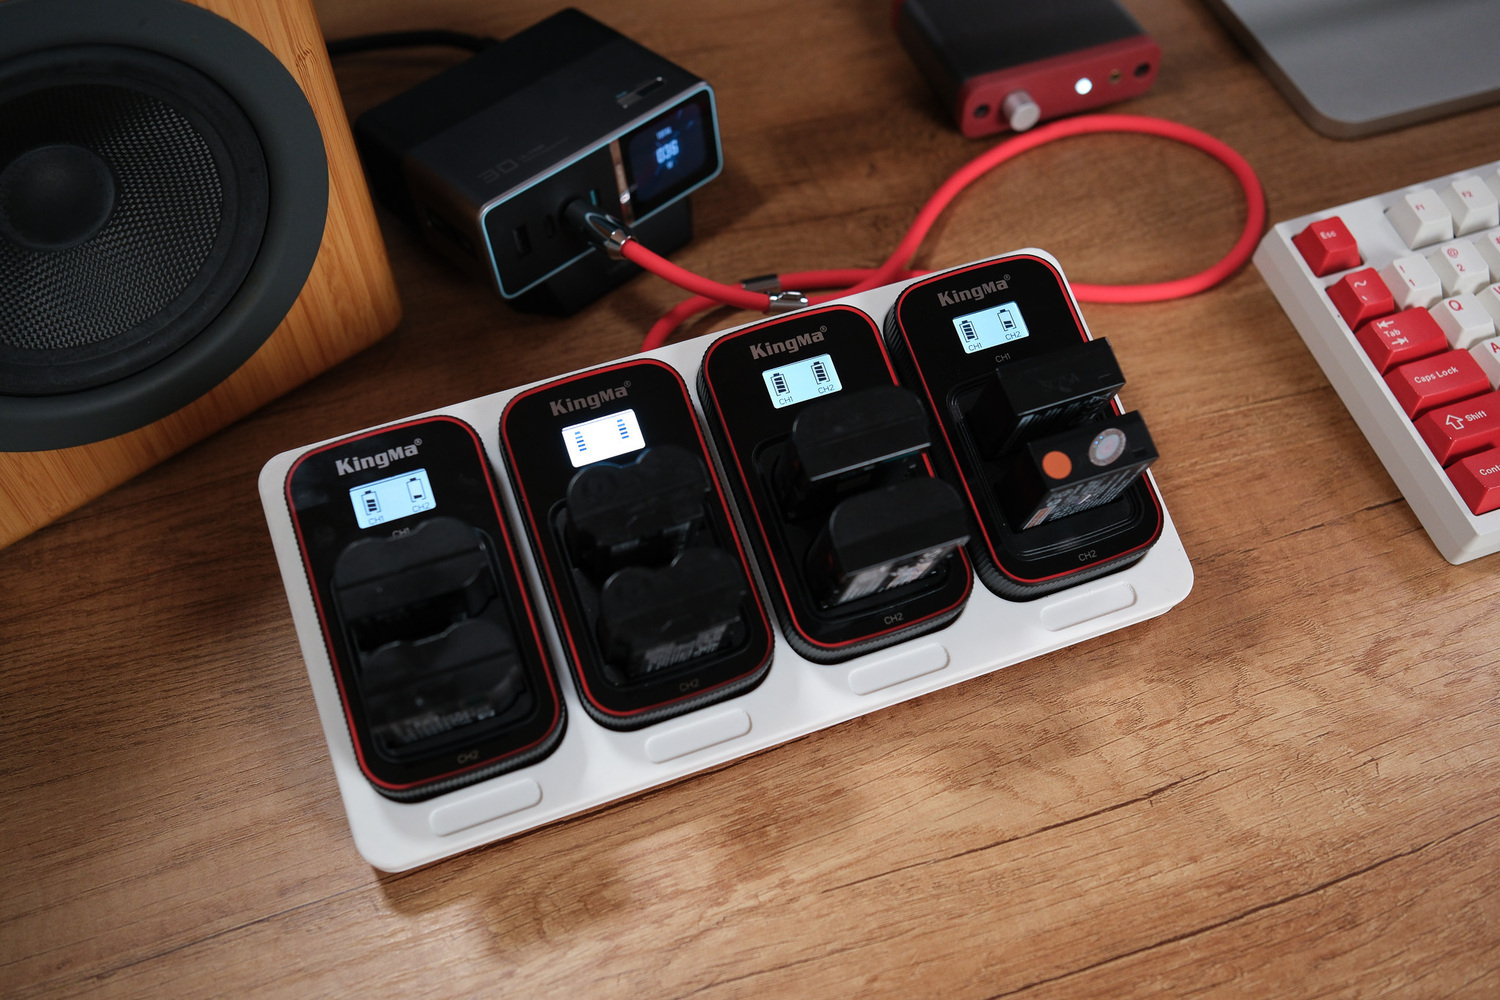
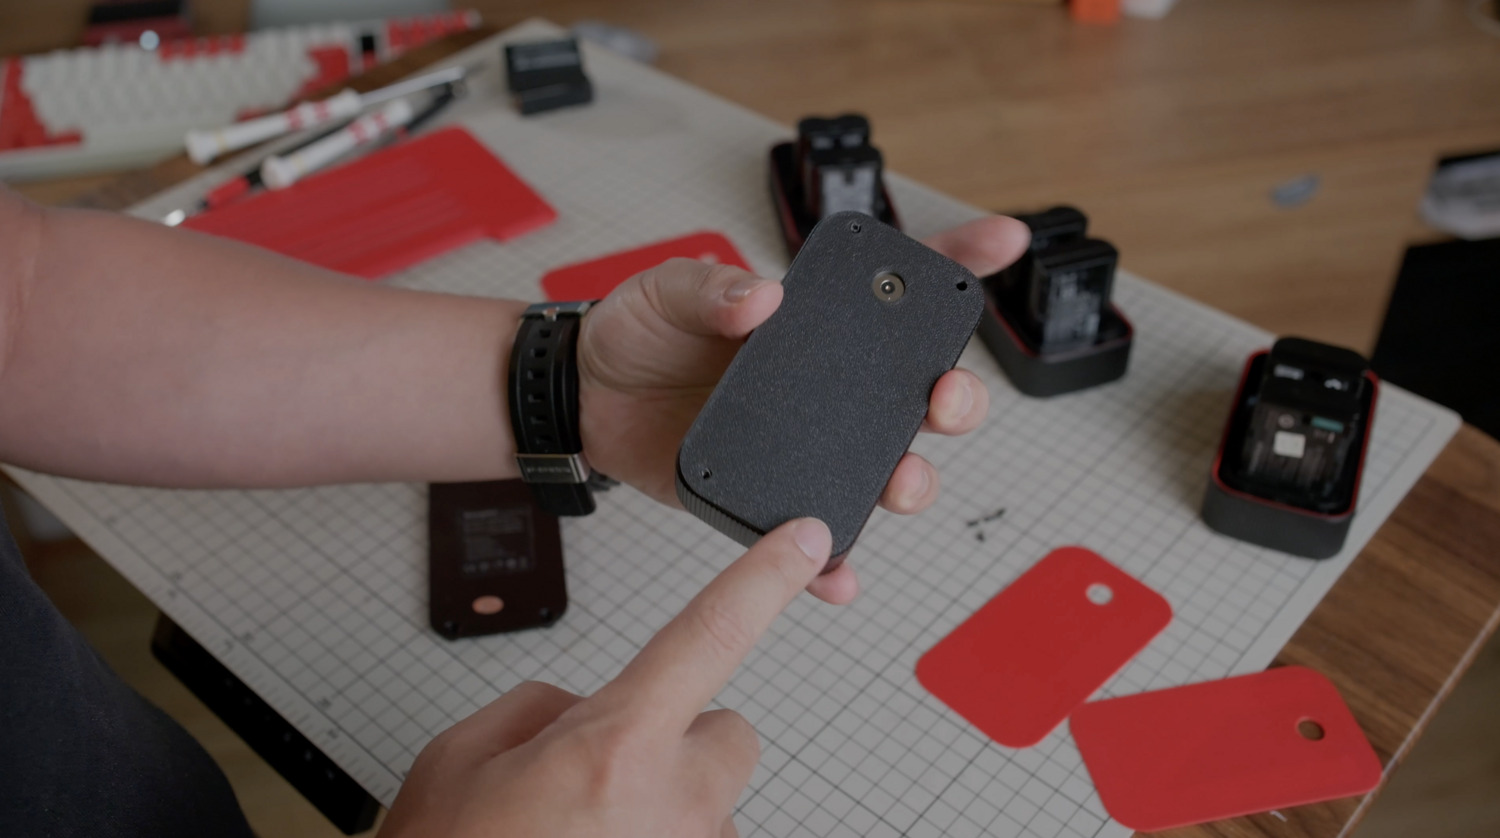
This is how it looks like. After use, you just snap it back into place and it begins charging automatically. Whenever you need it on the go, simply remove it and charge it with a regular USB-C cable.
It’s actually quite simple. I’ve already included the design files and a list of required components below, so after reading, you can download everything and prepare the components accordingly. I also made a detailed step-by-step video showing the entire process, so you can follow along if you prefer watching.
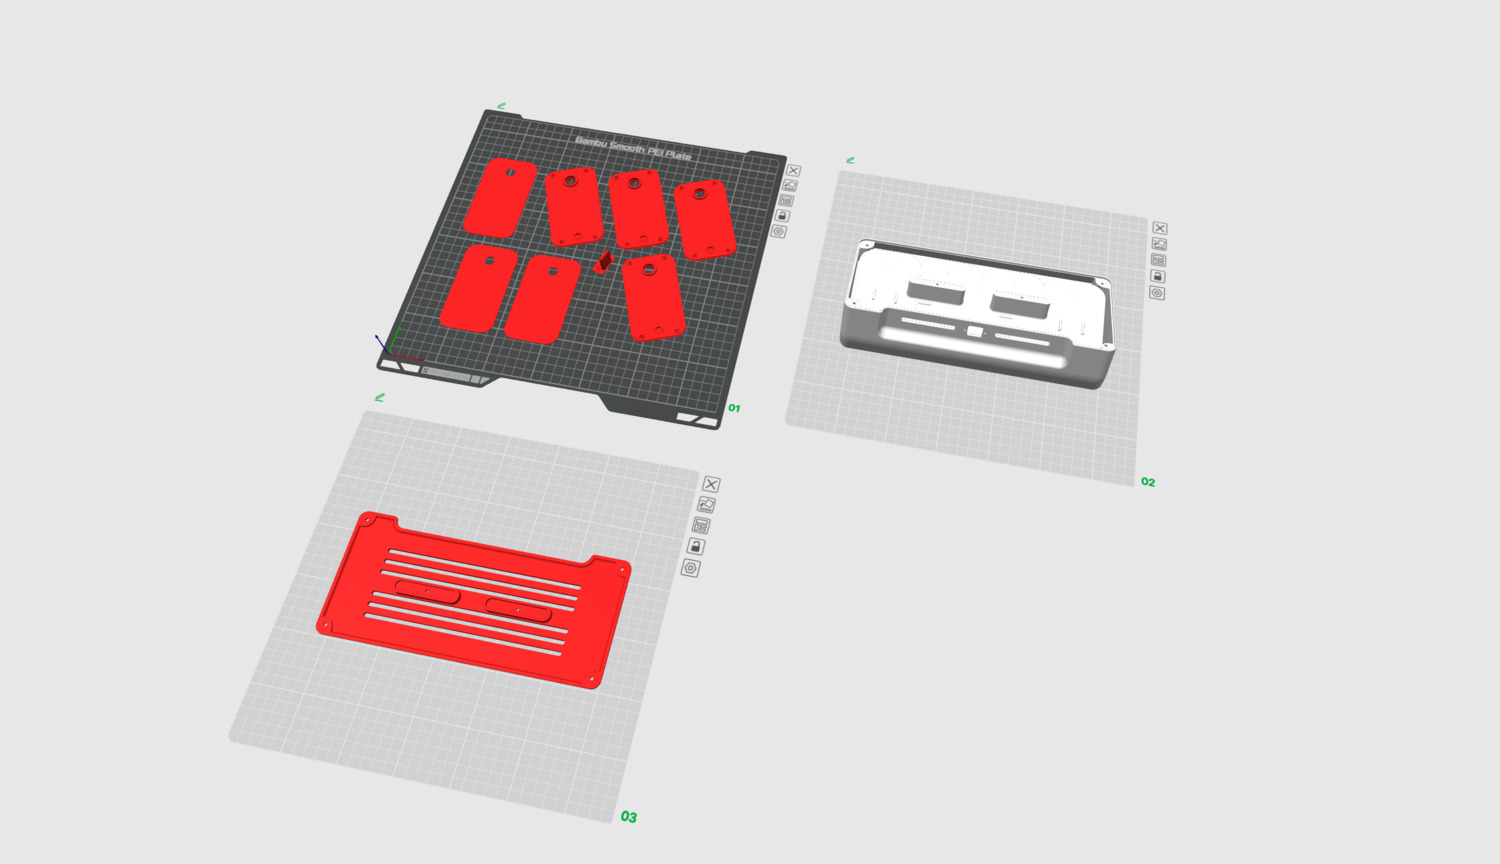
The 3D printing files include the main body, back cover, and accessories such as padding inserts and replacement bases for old Kingma charging docks.

Step 1: Remove the back cover of the Kingma charging dock and replace it with a new 3D-printed back panel from the print files.
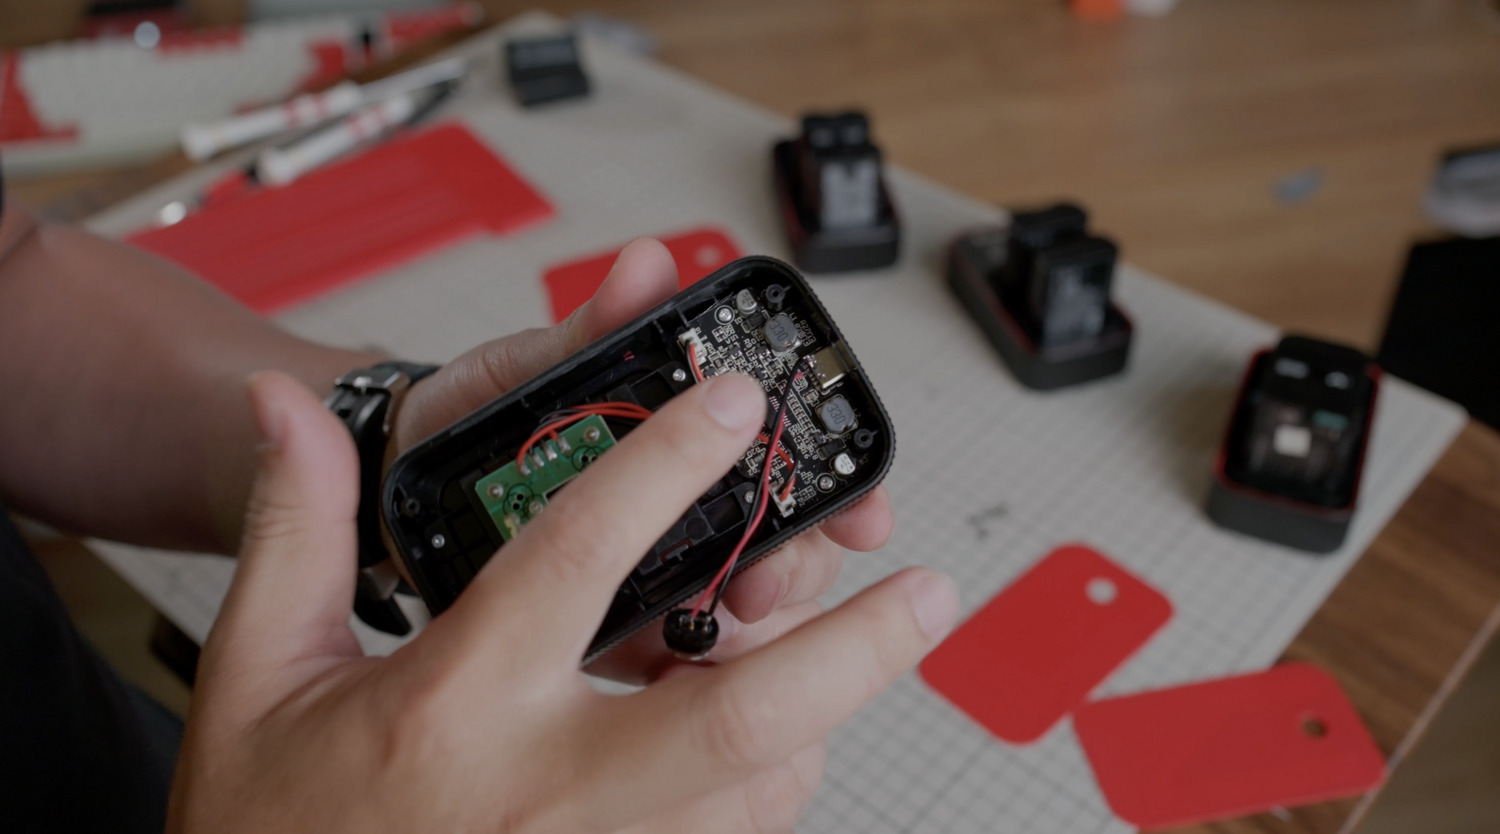
The original Kingma charging dock uses a Type-C input rated at 5V, up to 2A. We took two power wires directly from this port: the (–) wire soldered to the Type-C connector’s metal shell, and the (+) wire is the second from the left. Basically, this allows us to power the charging dock directly.
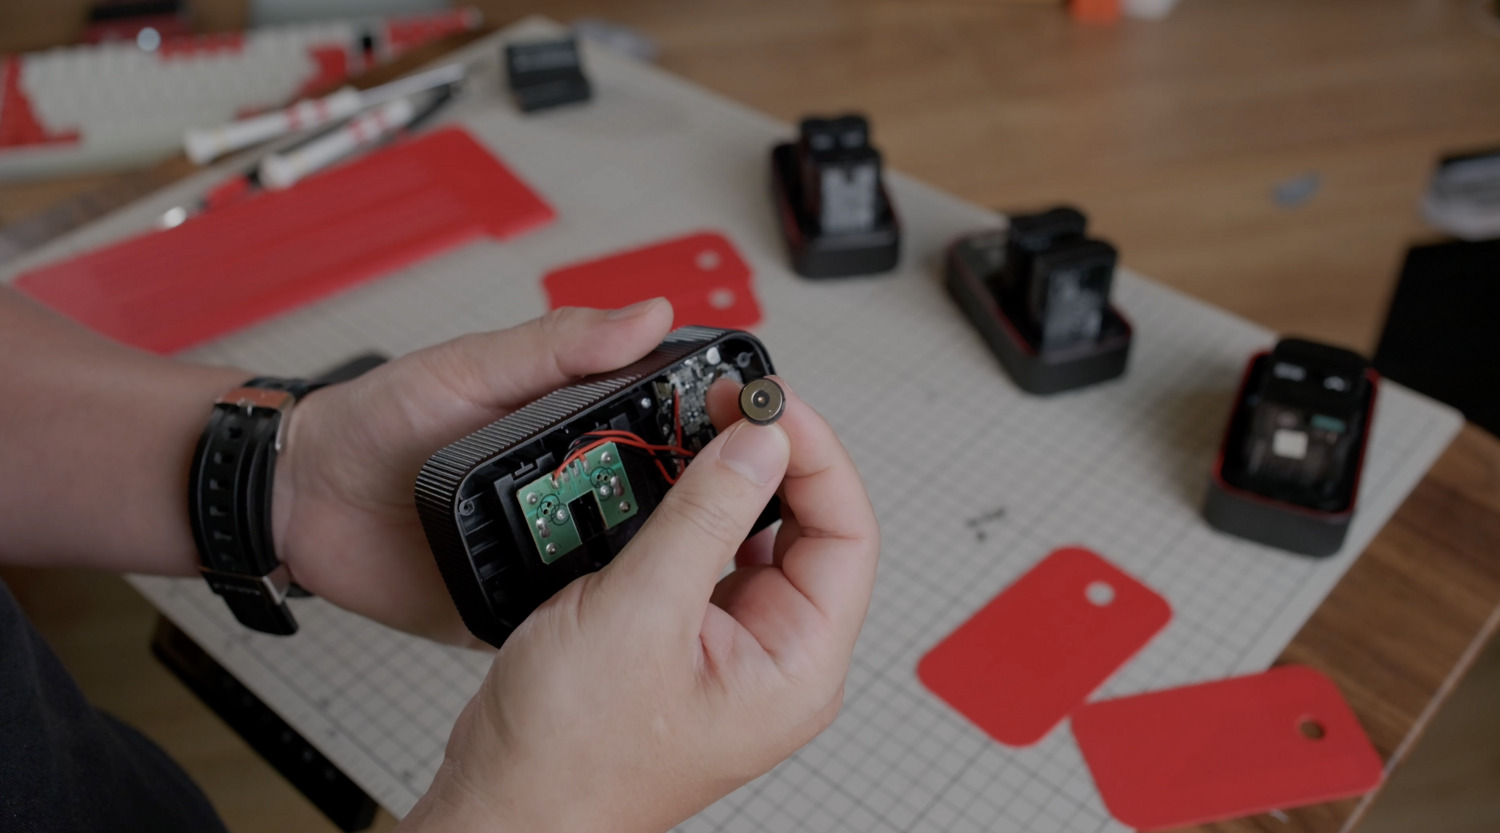
Next, we soldered the wires to the magnetic power connector (see the parts list below), then installed the new 3D-printed back cover.
That's done for the charging dock. Let's move on to step 2 - the charging station:
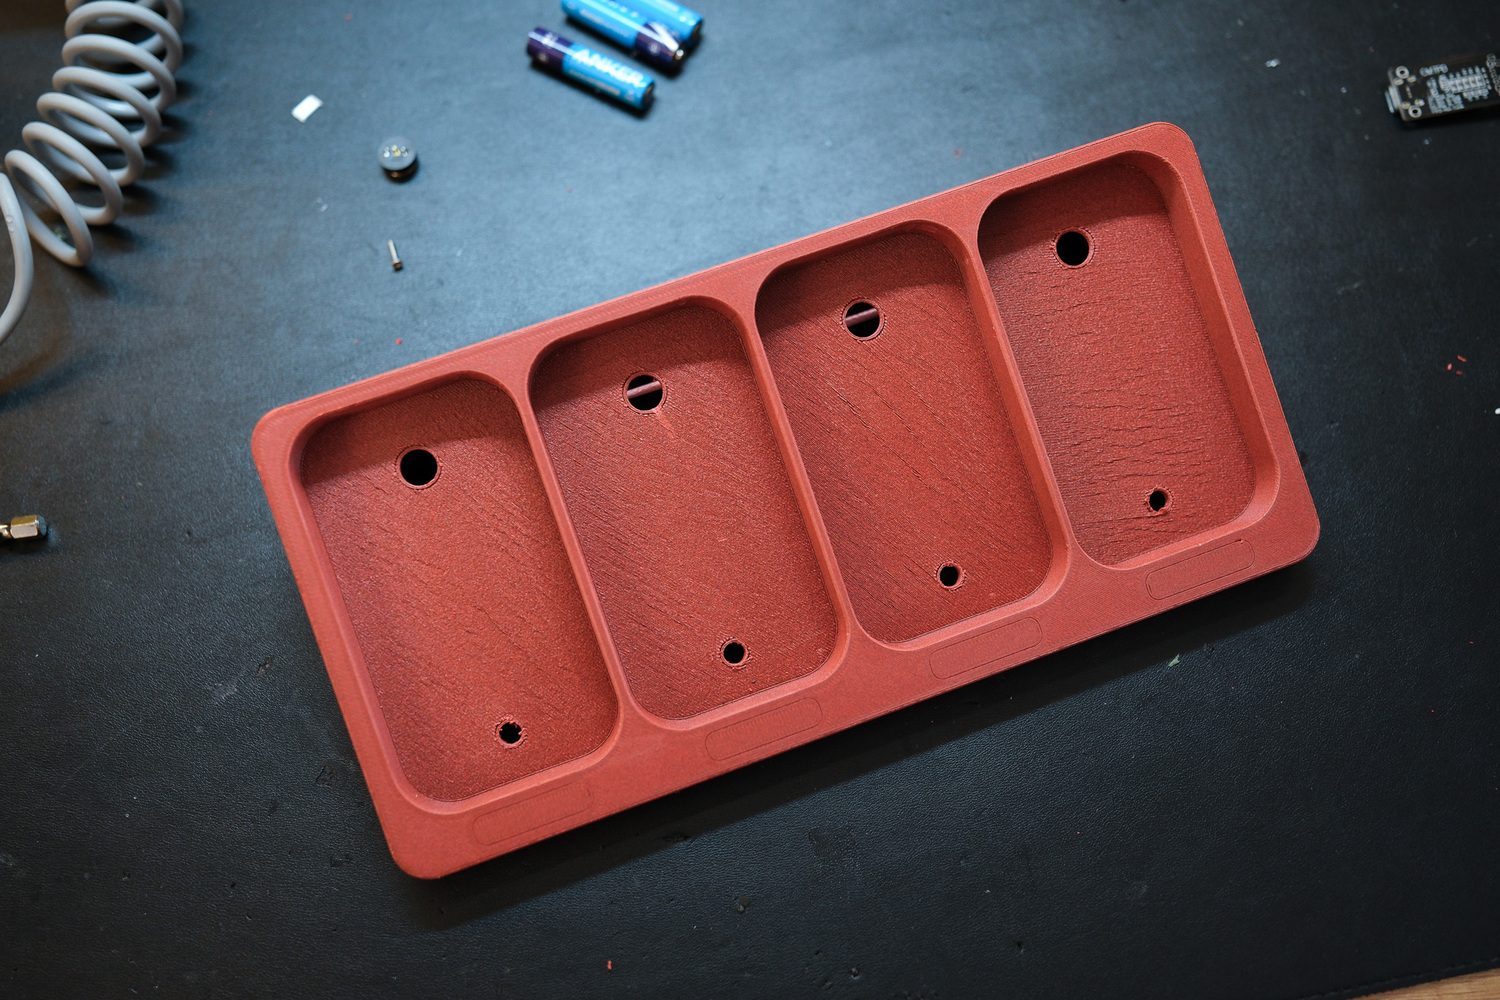
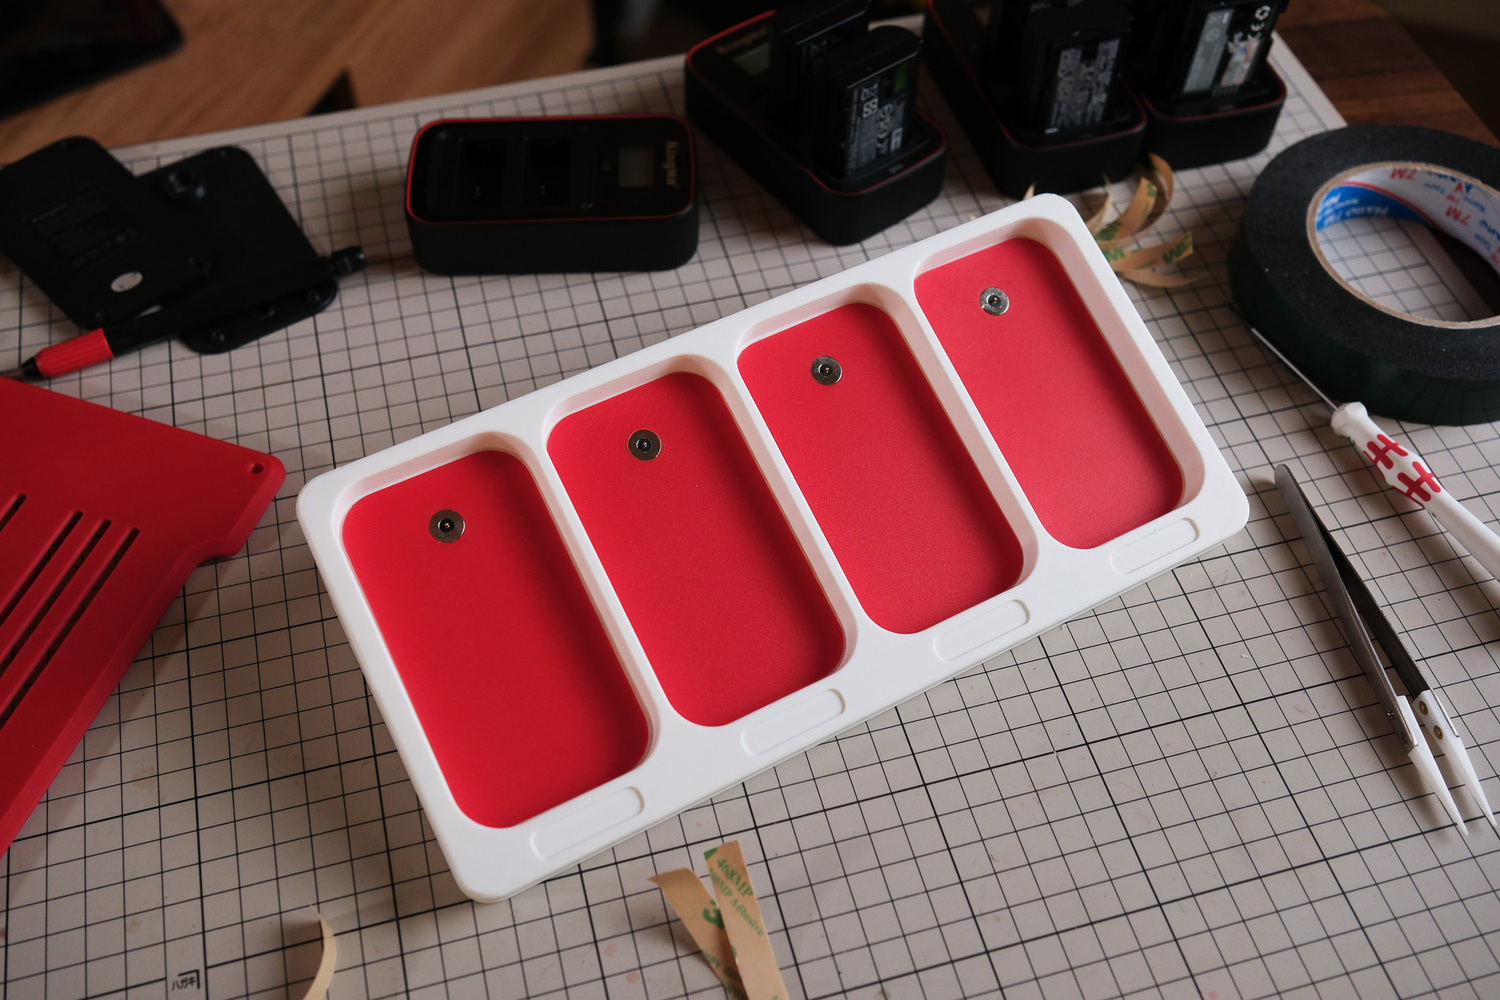
You can start by printing all the design files. In the image above is the main body, I made a version with four charging slots to hold four charging docks. You'll see the body has four mounting points on top for the magnetic power connectors, and four smaller holes underneath for optional small magnets to increase the holding force of the charging docks. These extra small magnets are just optional cause the larger magnets on top already strong enough. 
Once the magnetic power connectors and positioning magnets are installed, it will look like the image above. 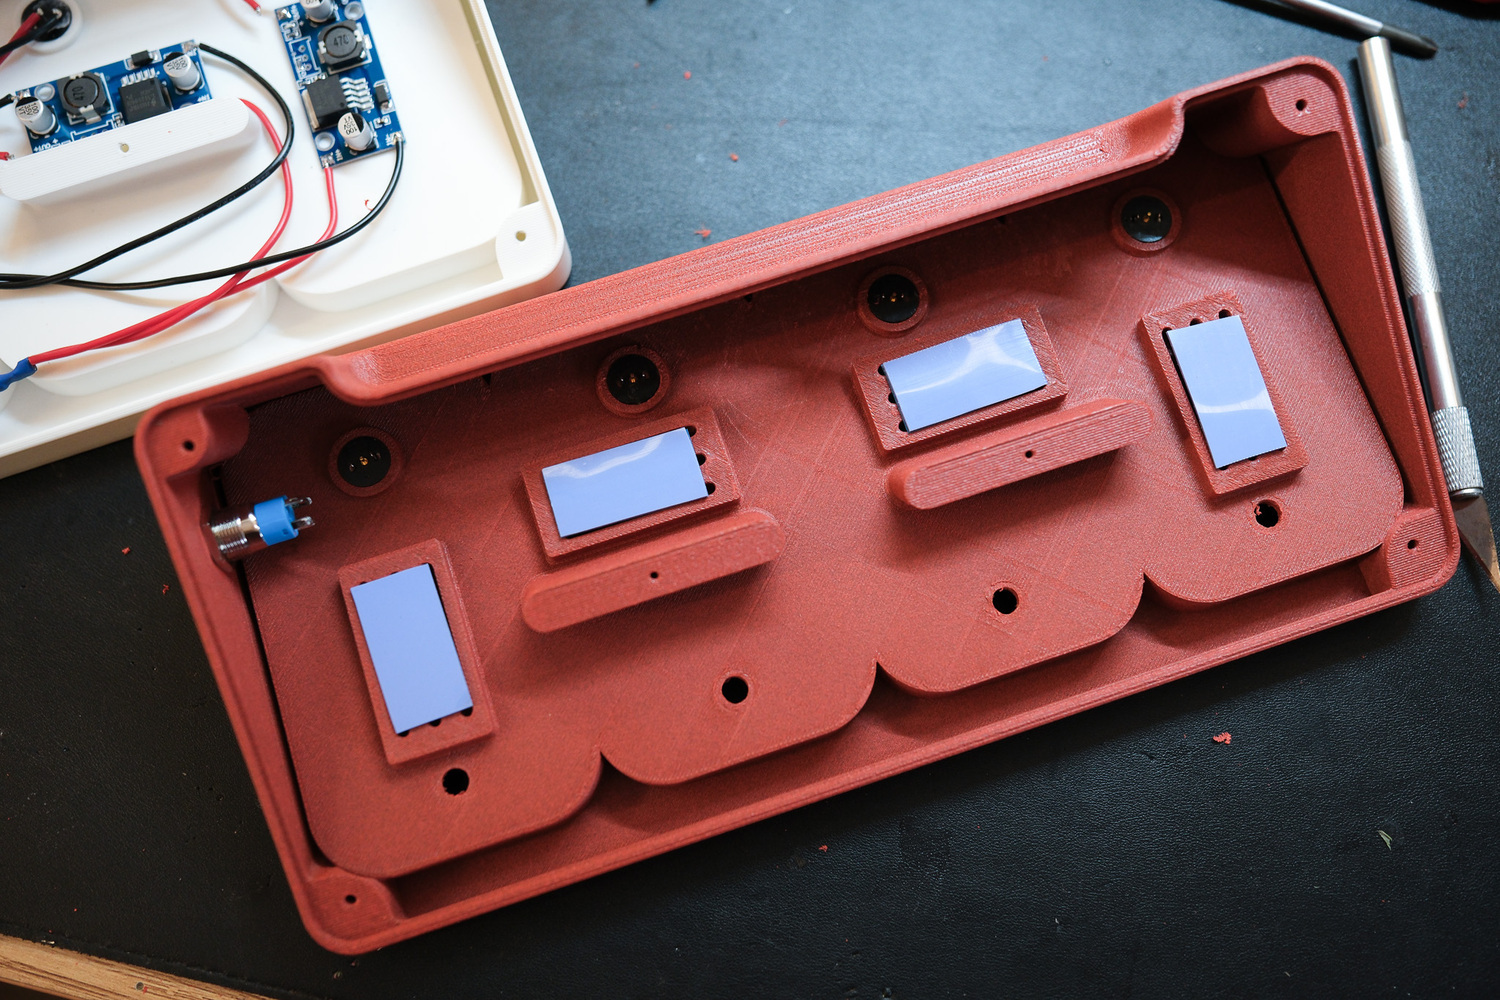 This is the bottom side of the charging station. You can see 4 mounting positions for 4 step-down power module, I also attached small heatsinks to keep things more stable. Since I’m using a 100W Type-C PD input, the output is 20V at 5A, which is then stepped down individually at each charging port to a fixed 5V at 3A.

After installing the modules, it will look like this. It's quite simple guys - each step-down power module is rated at 5V, 3A (about 15W), while the charging dock on top only requires a maximum of 10W. That gives us enough power headroom, making the setup safe and reliable to use.
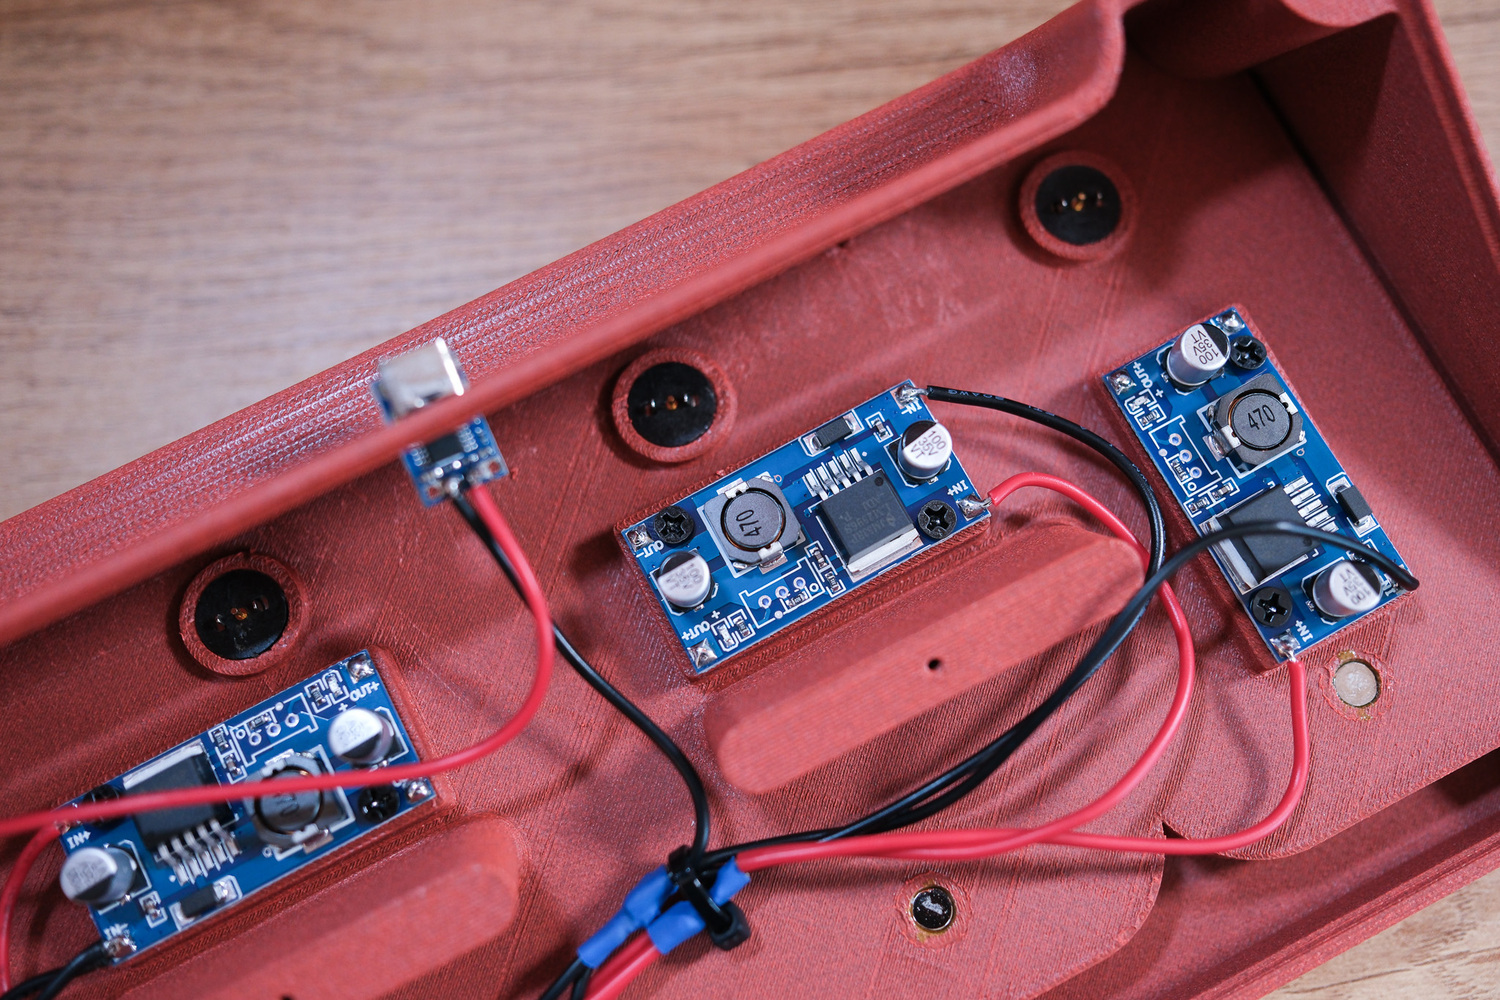
In the video, I also shared a few ways to handle the electrical setup. You can watch it carefully and choose the method that suits you best. This module has two input and two output. The input pins are wired from the Type-C trigger, and the output pins are connected to the two terminals of the magnetic connector above.
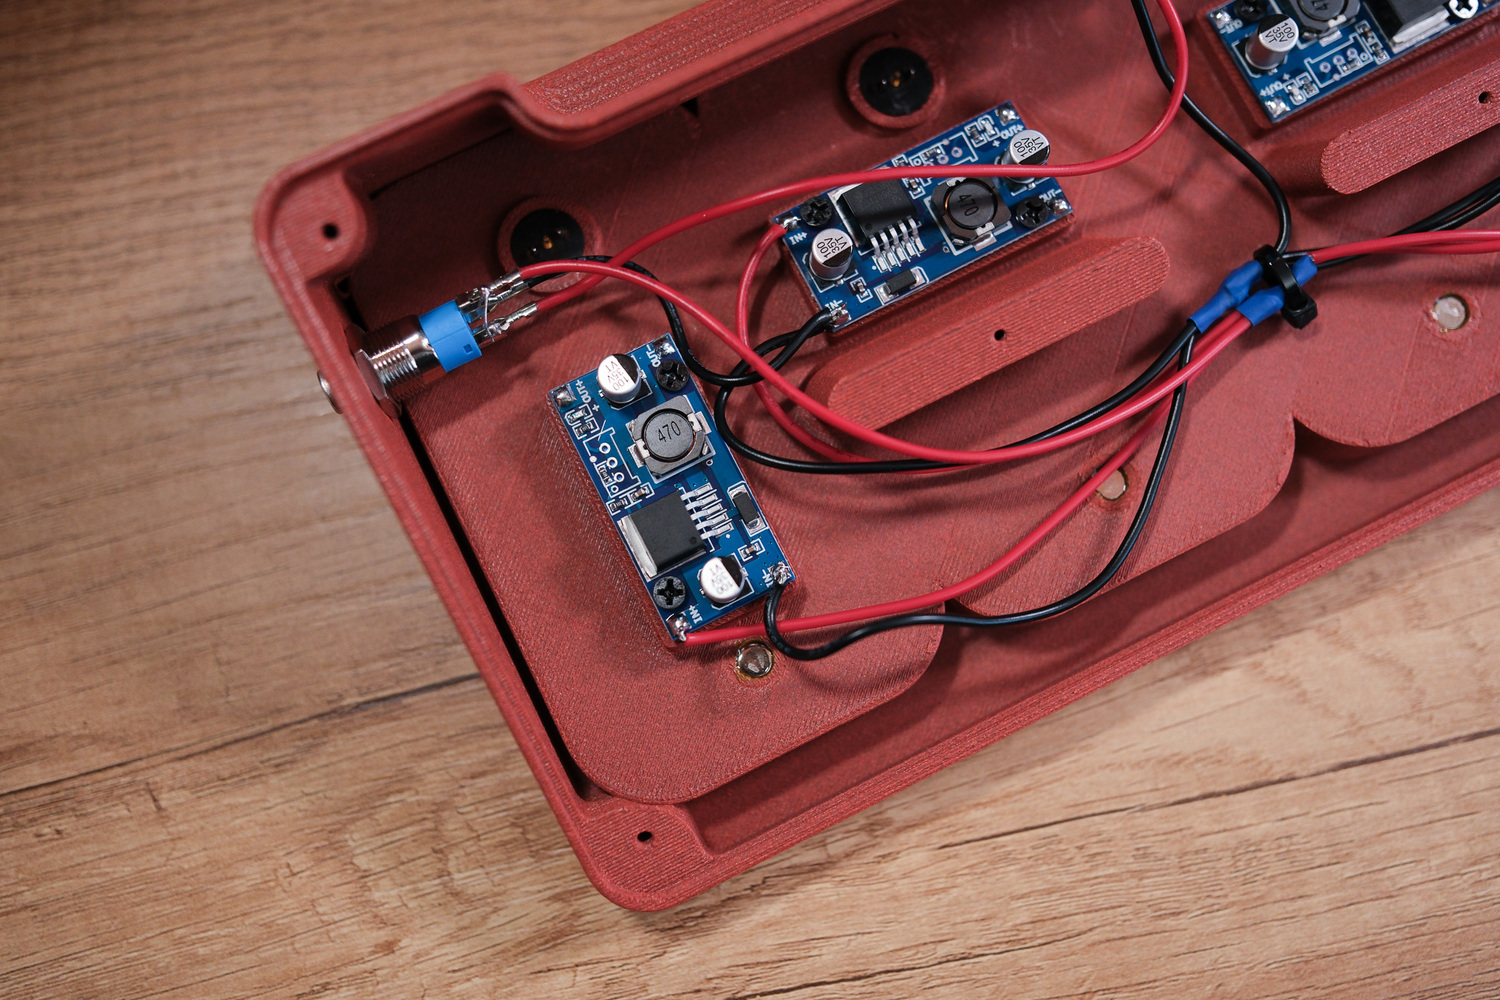
On the left side is an illuminated power button (see the parts list below), to switch the unit on and off. The built-in light also lets you know at a glance whether the system is running. I recommend getting a version with connector pins, which makes both assembly and teardown much easier.
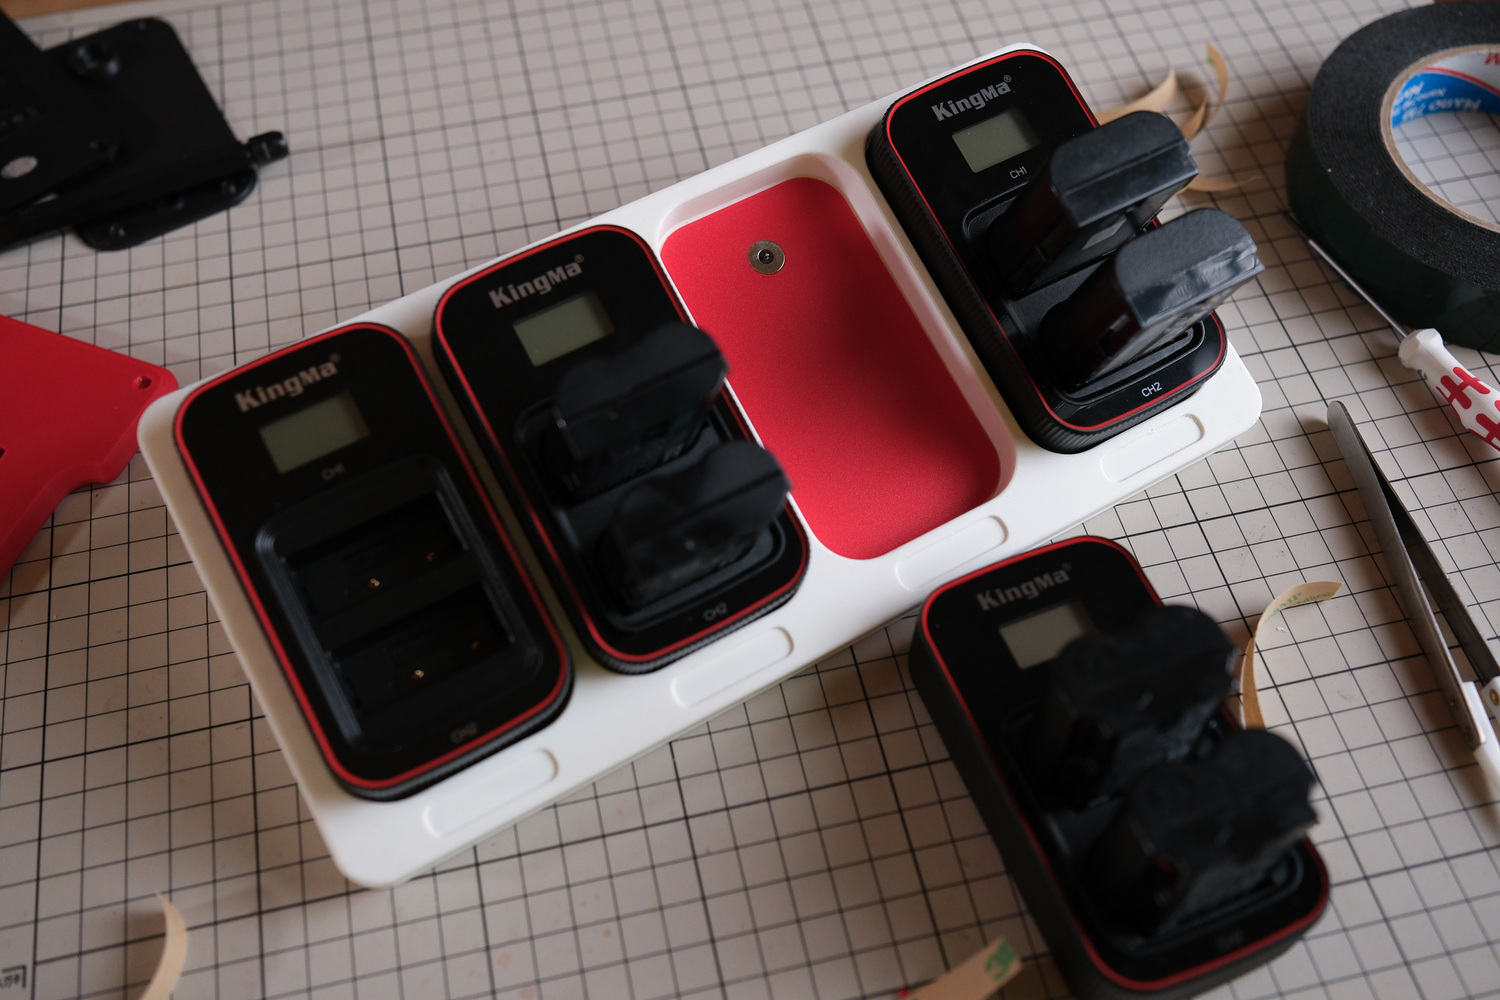
This is the top side. In the print files, I included slots for four decorative inserts, so you can print them in different colors or customize them if you want — totally optional, hihi.
Close it up and there you go. You’ve now completed a charging station for Kingma charging docks. I designed this specifically for this type of dock, so if you want to follow along, I recommend using the same model. The dock design stays the same even if the battery capacity differs, which makes it much more convenient to design around.Đậy lại là xong. Vậy là ae đã hoàn thiện cho mình một trạm sạc cho các Dock sạc Kingma rồi đó. Mình làm để sử dụng cho đúng loại Dock sạc này, nên ae nào muốn sử dụng theo thì nên dùng loại này. Vì đây là mẫu Dock mà có khác pin thì thiết kế vẫn không đổi, nó thuận tiện cho việc thiết kế hơn.
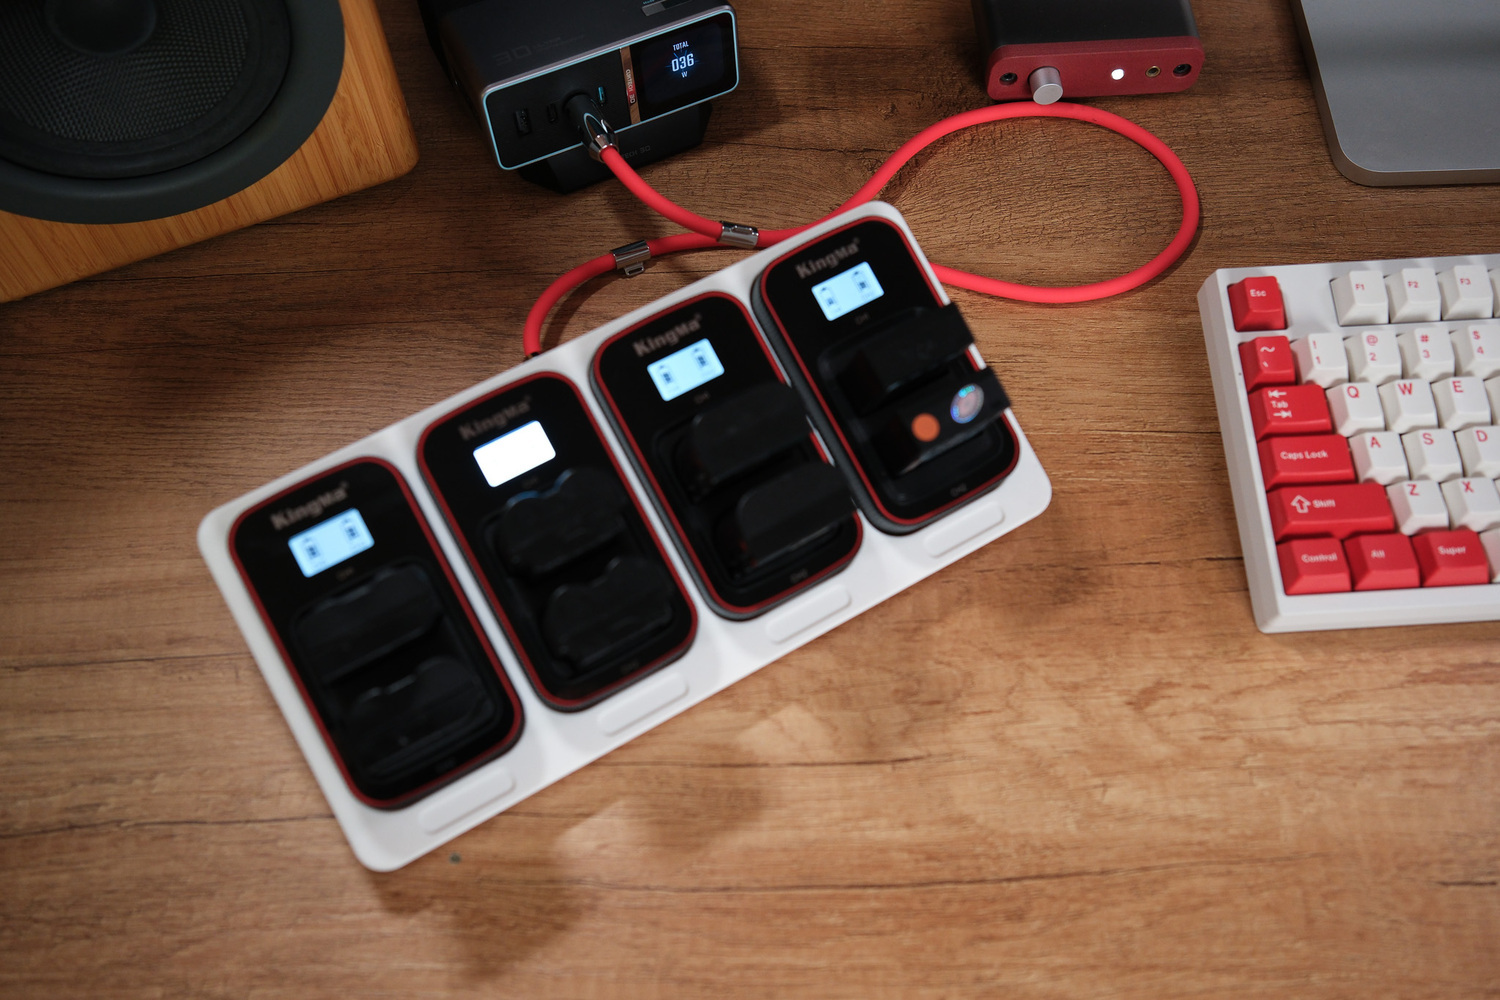
The total power draw when charging all 4 slots at maximum, especially when all batteries are fully depleted, is around 40–45W, exactly as planned in the initial setup. If you’re following this approach, be sure to use a power bank or charger that supports 100W PD or higher, so the Trigger can pull the 20V 5A PD profile. Remember that lower-power chargers or power banks won’t work in this case.
Have fun with your DIY projects!
--------
Parts list: