Hello guys! Today I'm gonna share with you one of my projects - I call it LUMON CYBERDECK. Let's take a look at the teaser video above to get the vibe first, then I’ll walk you through the initial idea behind the project. After that, we’ll explore how I brought this build to life and why it ended up with such a fun and unique name.
 I recently watched a movie produced by Apple, which released on their own platform. In the movie, the characters use a computer called the Lumon Terminal Pro, I was really impressed and drawn to this design. It's like a computing machines from the old days - And I’ve always been attracted to classic industrial design more than modern ones nowadays. Much like my attraction to the work of Dieter Rams, designs that are timeless, beautiful, and perfectly aligned with my taste. Anyone with an interest in industrial design will surely be familiar with Rams and his books.
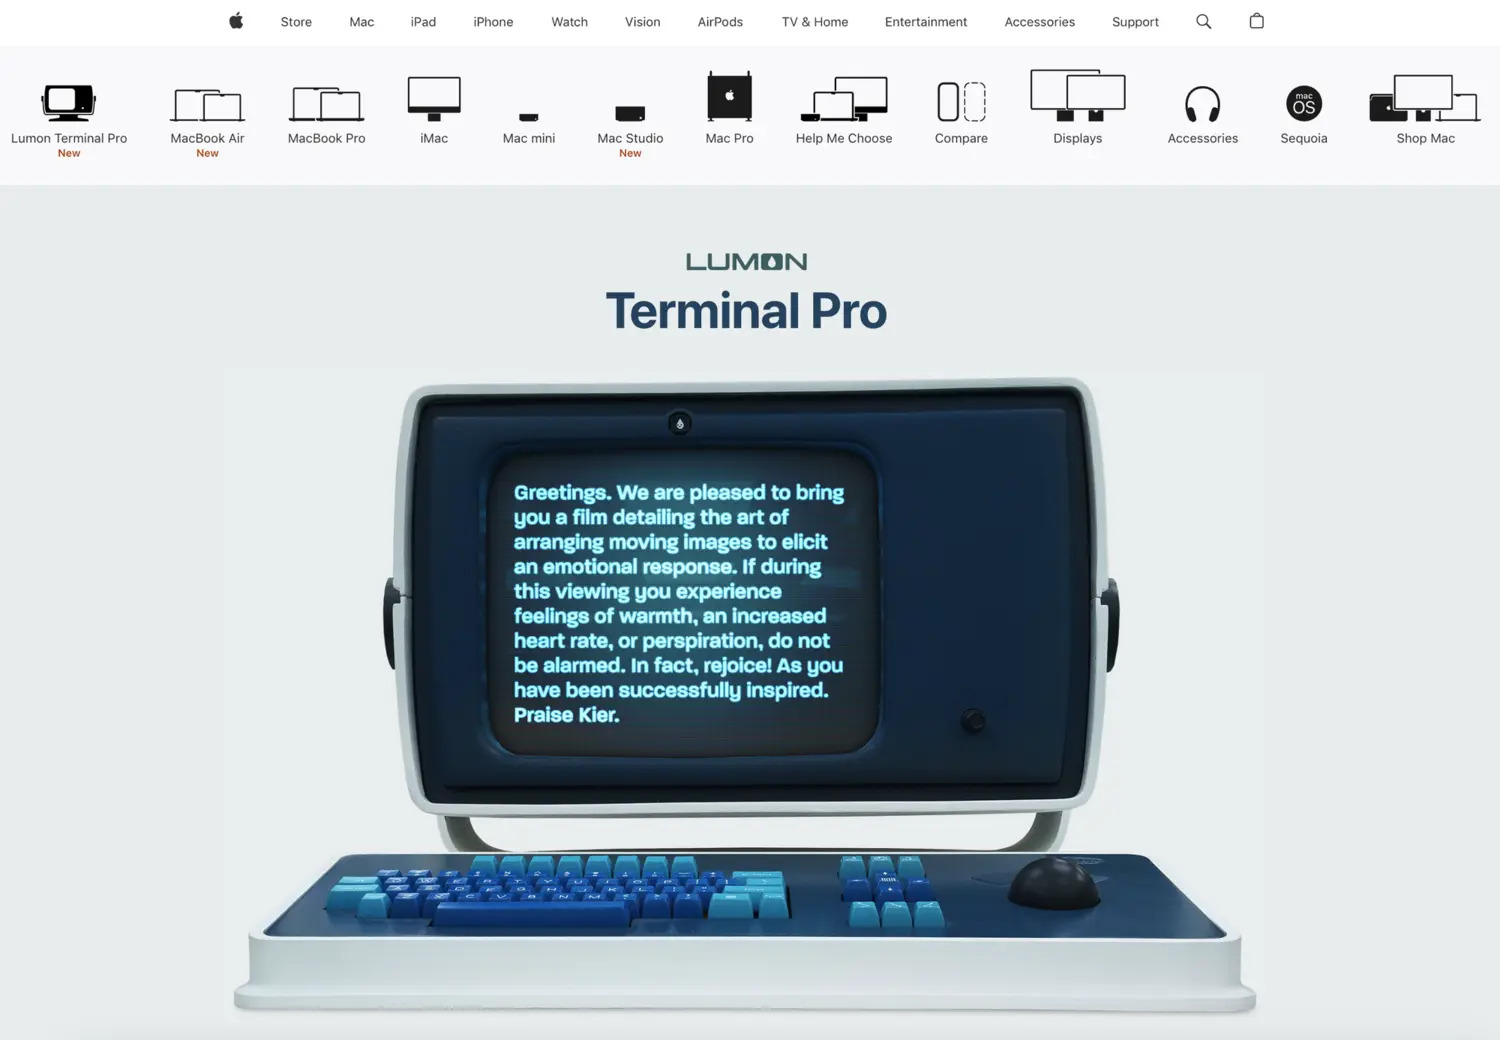
I began looking online for more information about the computer from the movie, and turned out it was actually just a prop created for filming - it doesn’t exist as a real, released product. So I decided to recreate it based on the reference images I could find online, aiming to get it as close to the original as possible. From the very beginning, my idea was to put a Raspberry Pi inside. I have been using these Raspberry for various personal projects in my daily life, so instead of leaving them exposed or building separate cases, I decided to build this. So eye-catching and impressive! This way, it’s not only for display, but also fully functional.
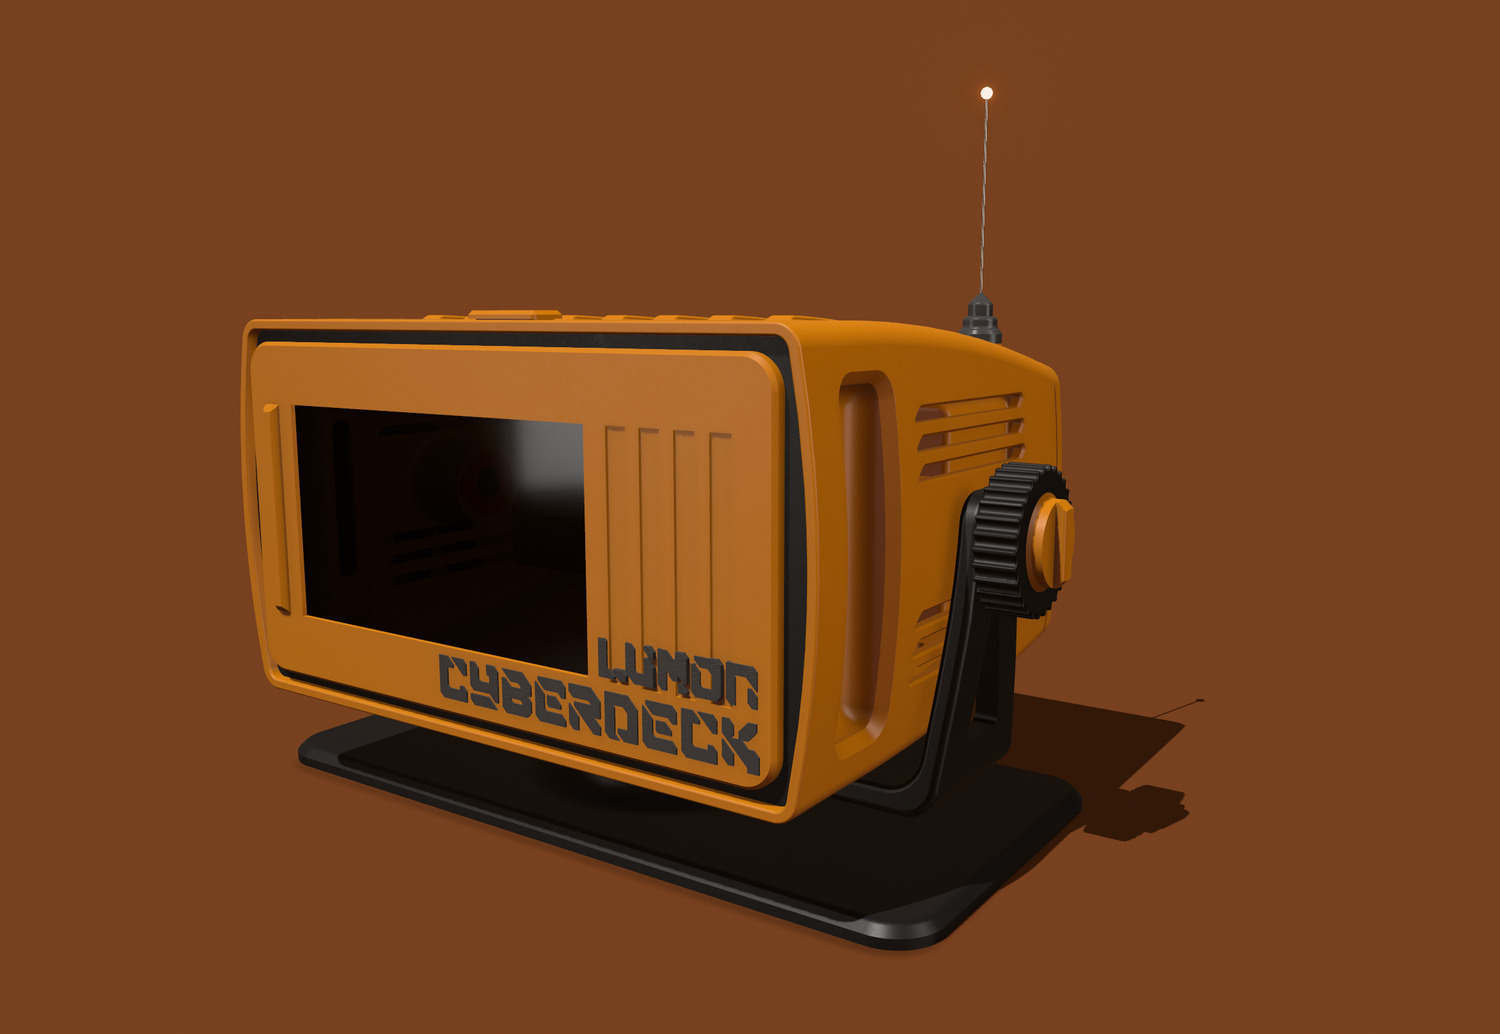
For anyone unfamiliar with cyberpunk, it’s a sci-fi genre that portrays a future shaped by advanced technology coexists with harsh, low-life living conditions. If you watch sci-fi films about robots or future tech, you’ll often see rundown, slum-like environments, with cyberpunk-style robots in there. And that is where my inspiration comes from.


When I redesigned new version for this piece, I felt truly inspired, satisfied and couldn’t wait to bring it to life as soon as possible.
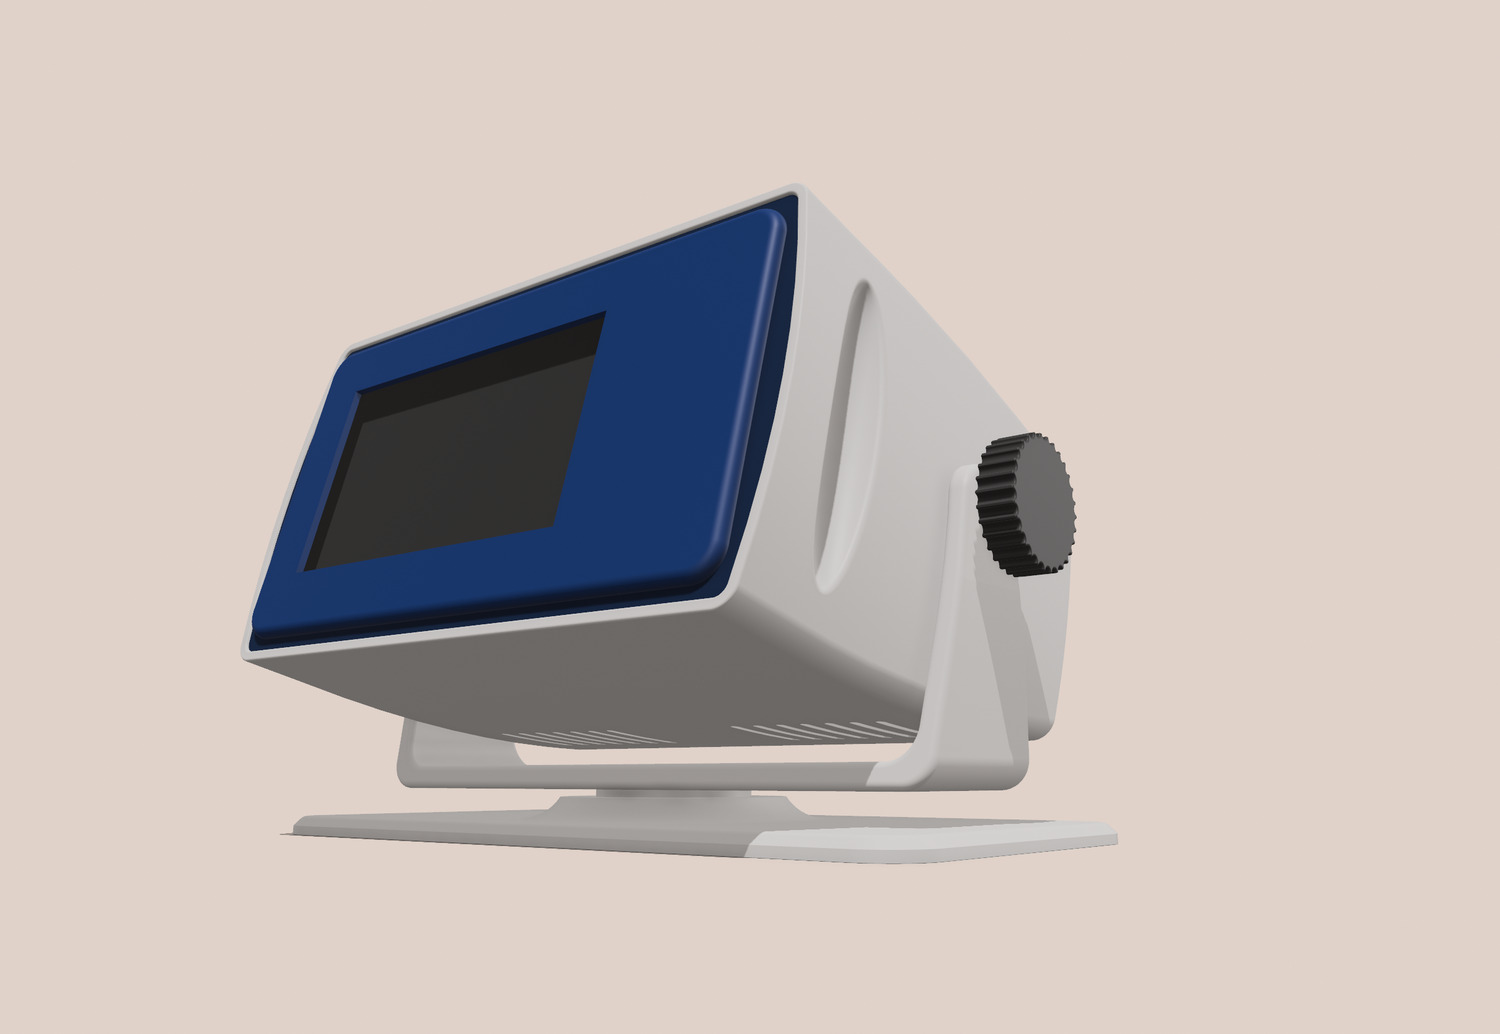
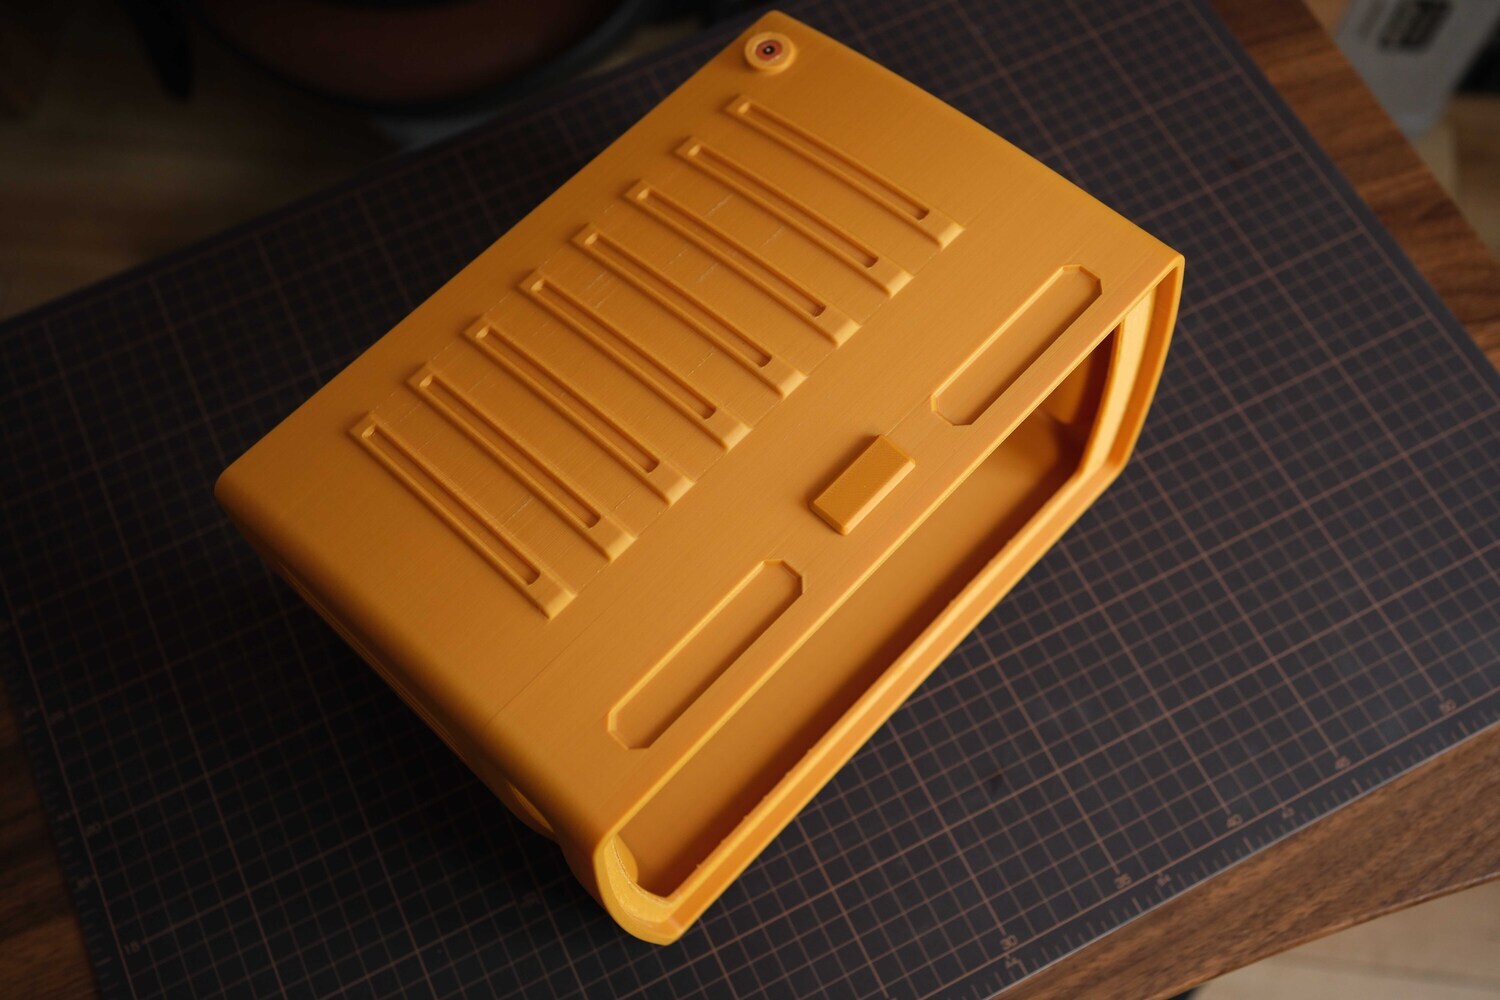
And here it is, the final design. It was slightly adjusted from the actual, but this is the version I finalized for 3D printing.
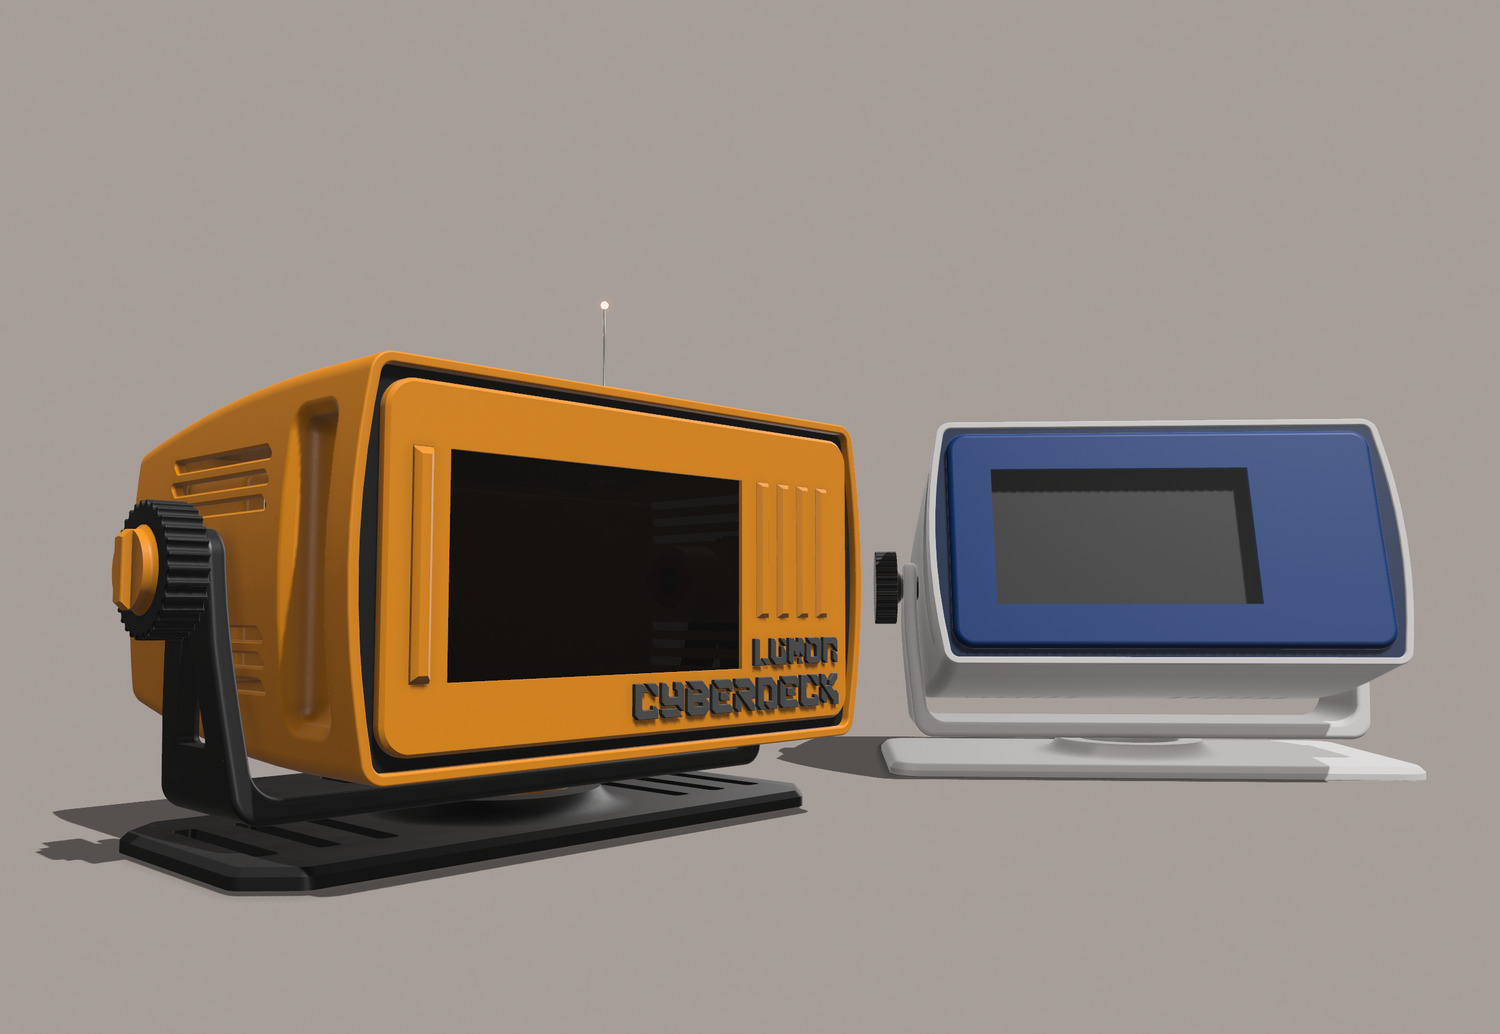
As you can see, when placed beside the older version, the Cyberpunk version feels much more striking and aligns perfectly with my personality and personal build style.
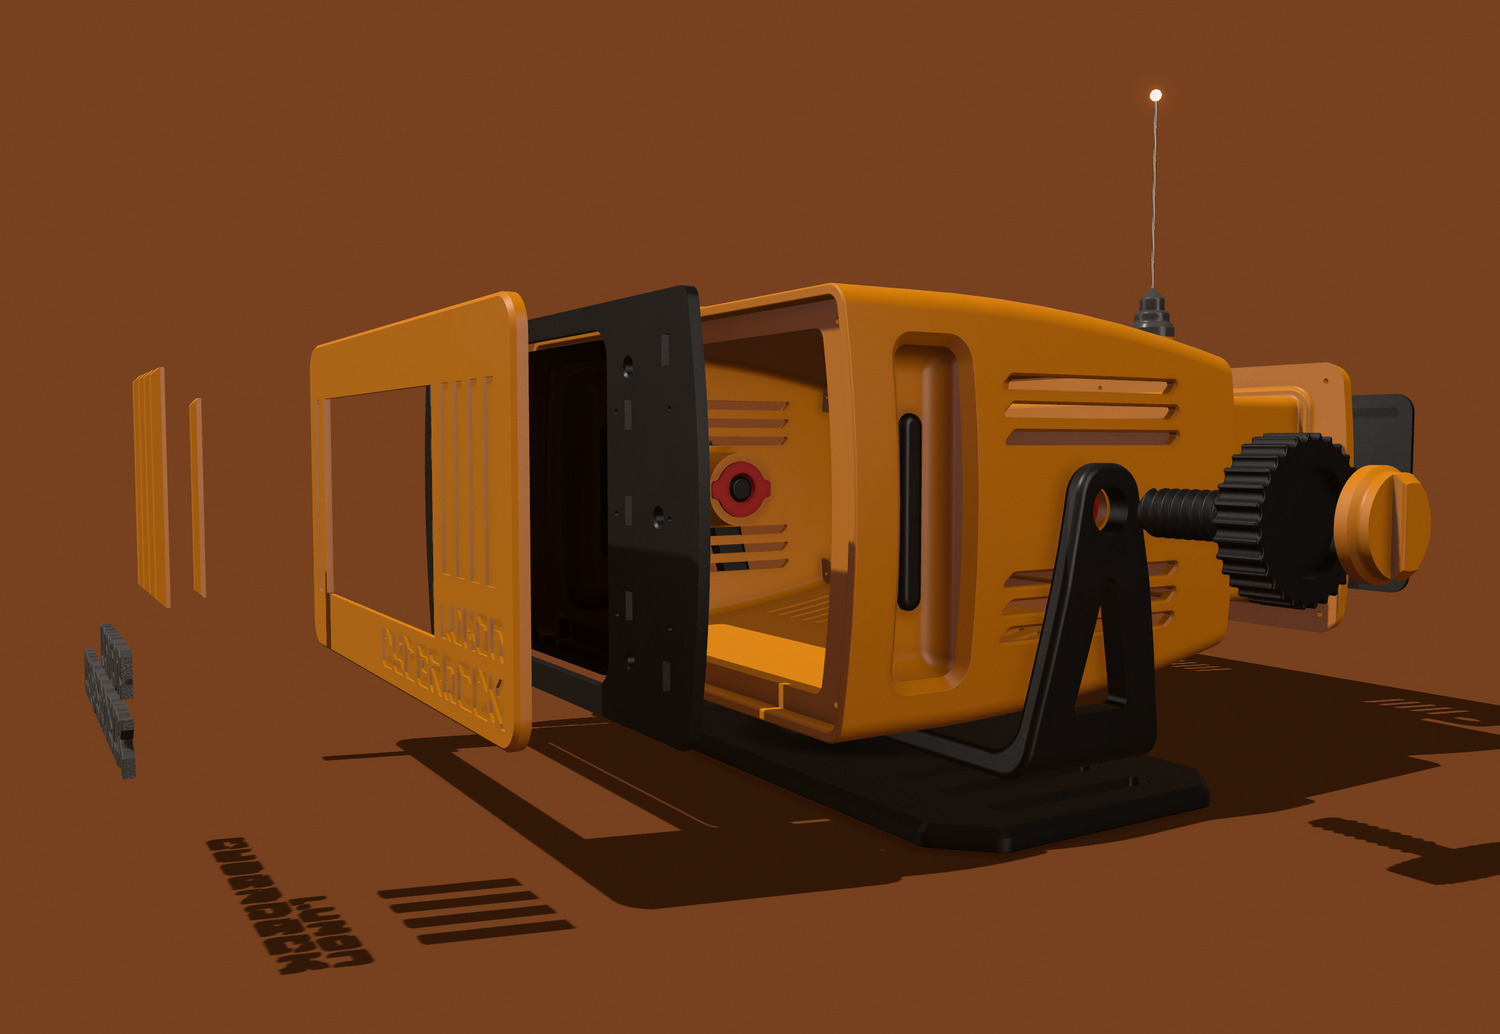
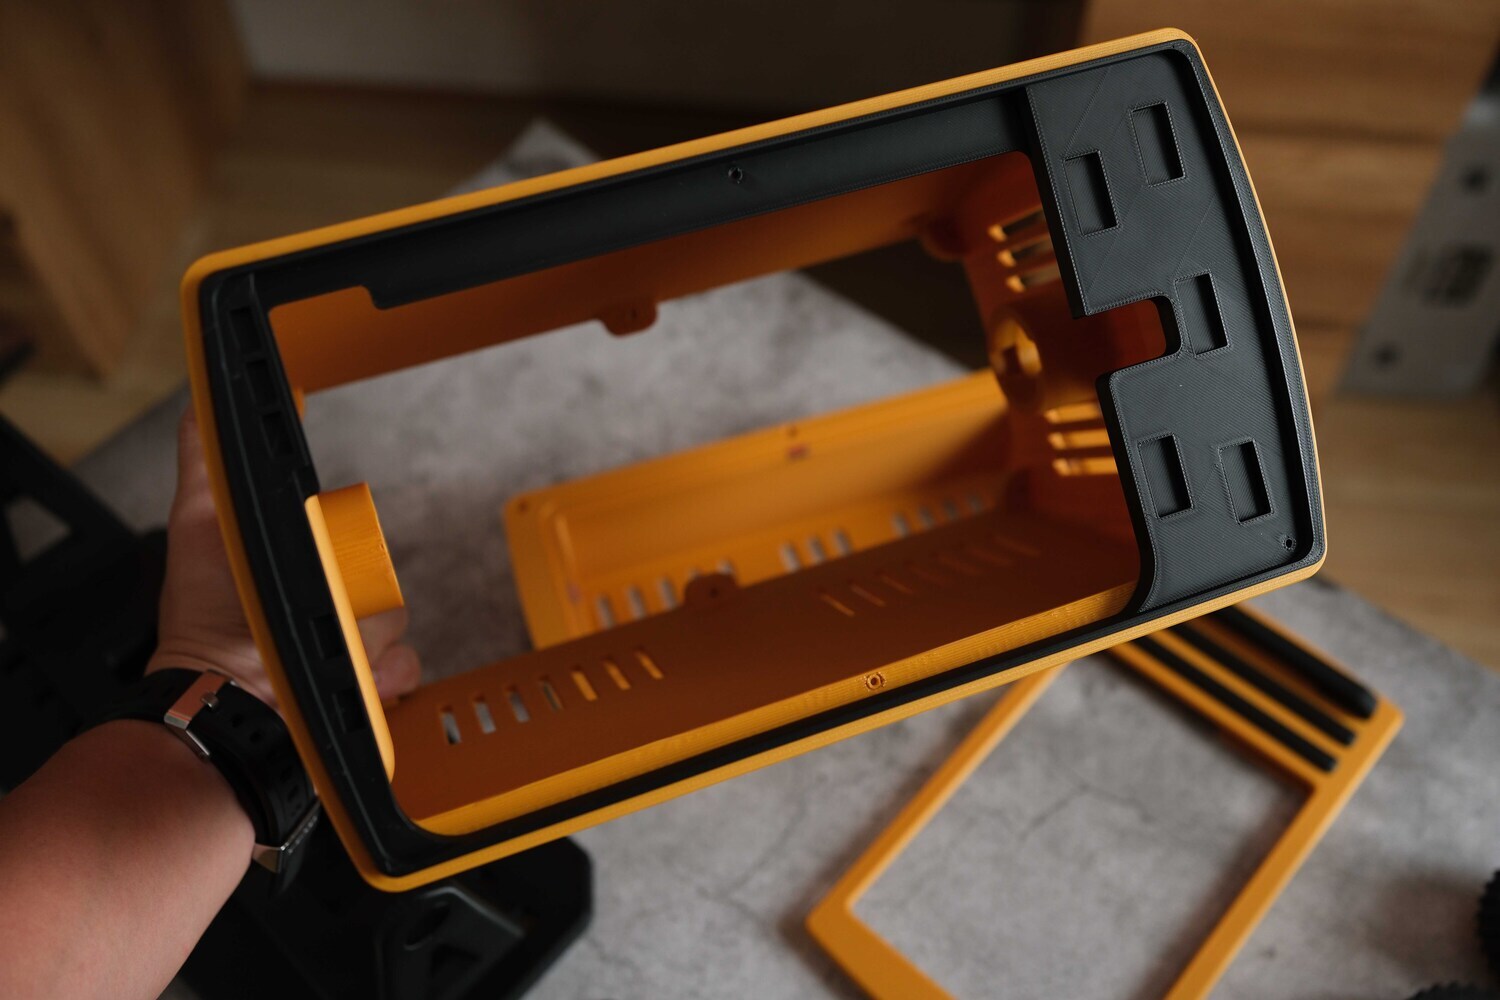
Inside, the internal components are quite straightforward — nothing too complex, easy to assemble, and very simple overall.
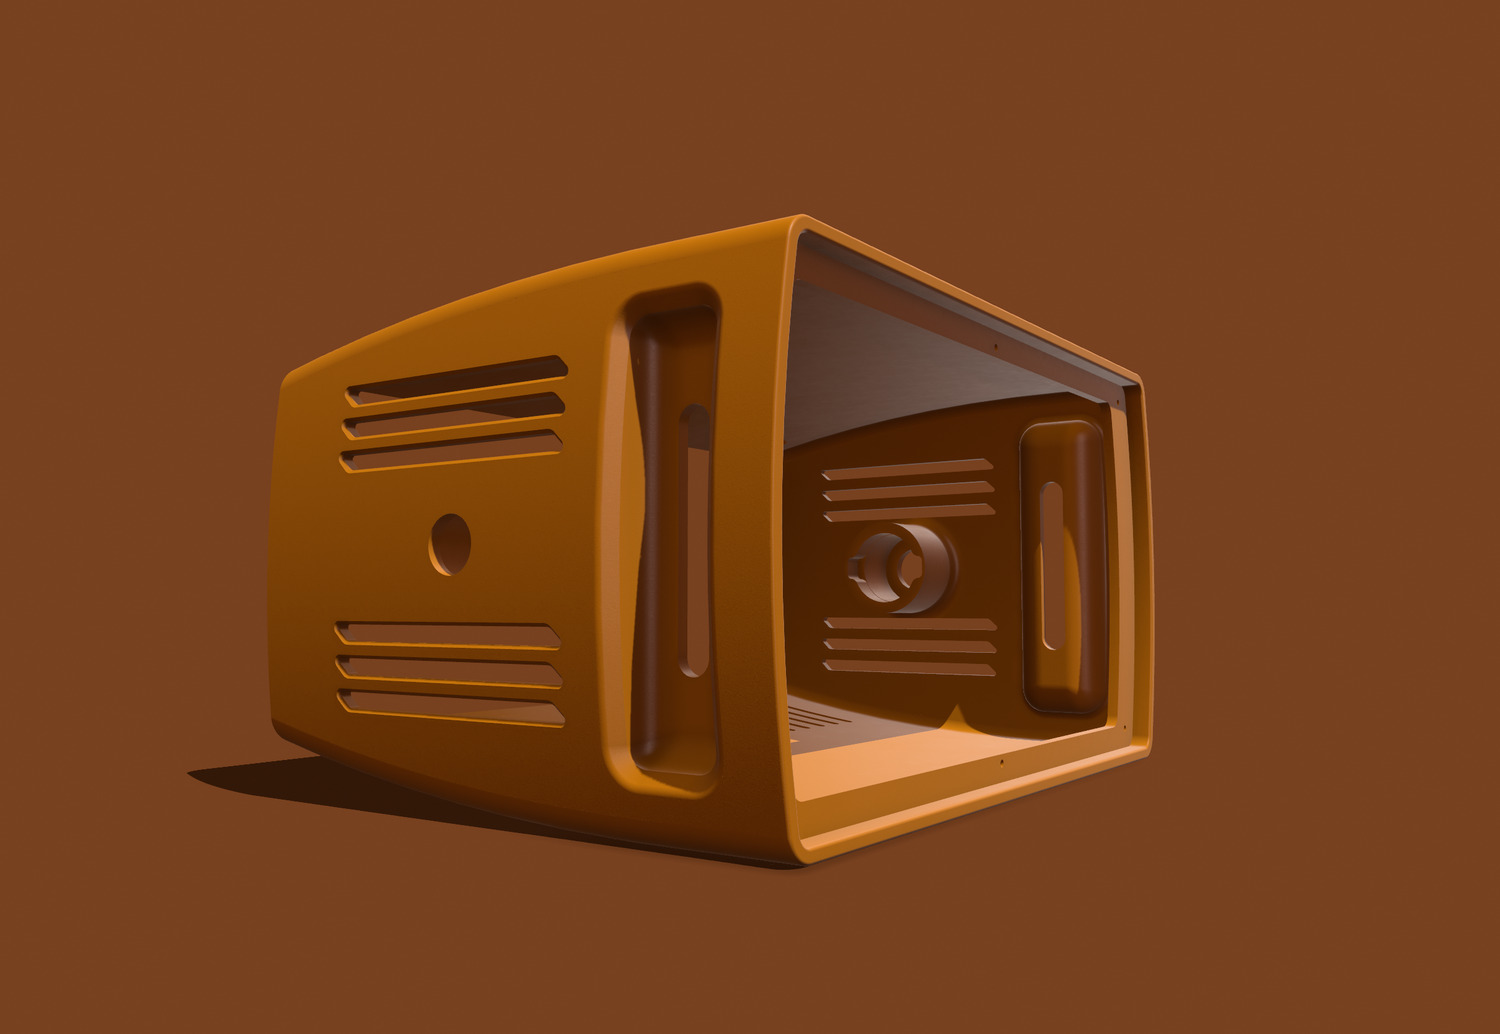
First is the outer shell, it measures around 320 mm, so you're gonna need a large-format printer to print it. I’m planning to release an assembly-friendly version for smaller printers later on.
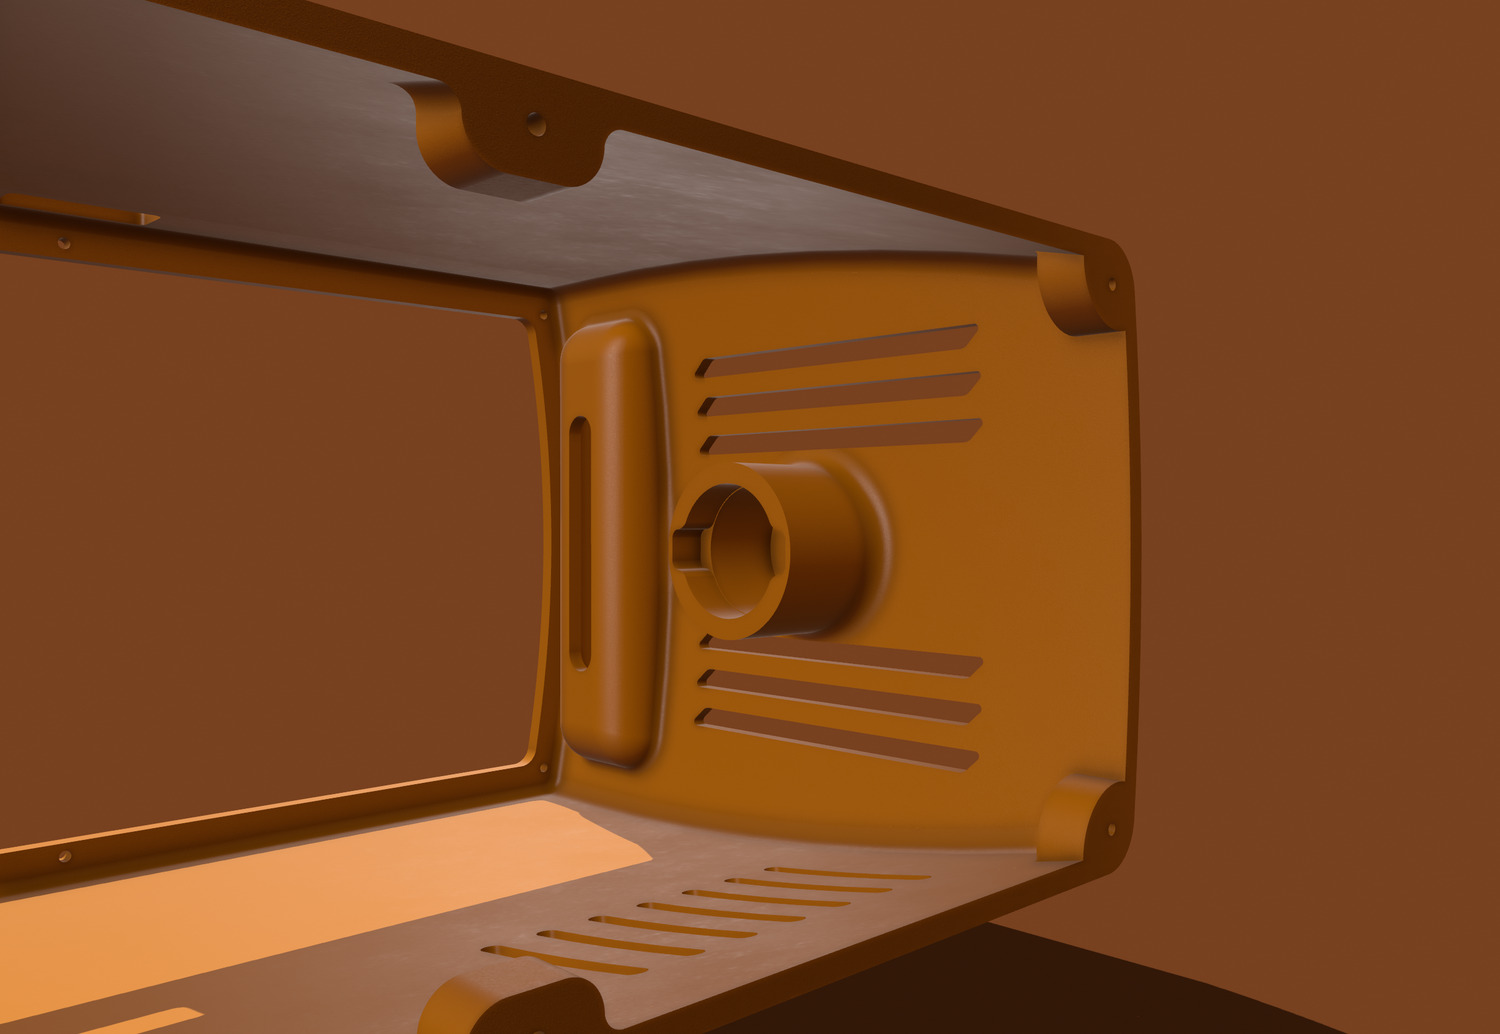
Inside, there’s a spot to install the threaded insert.
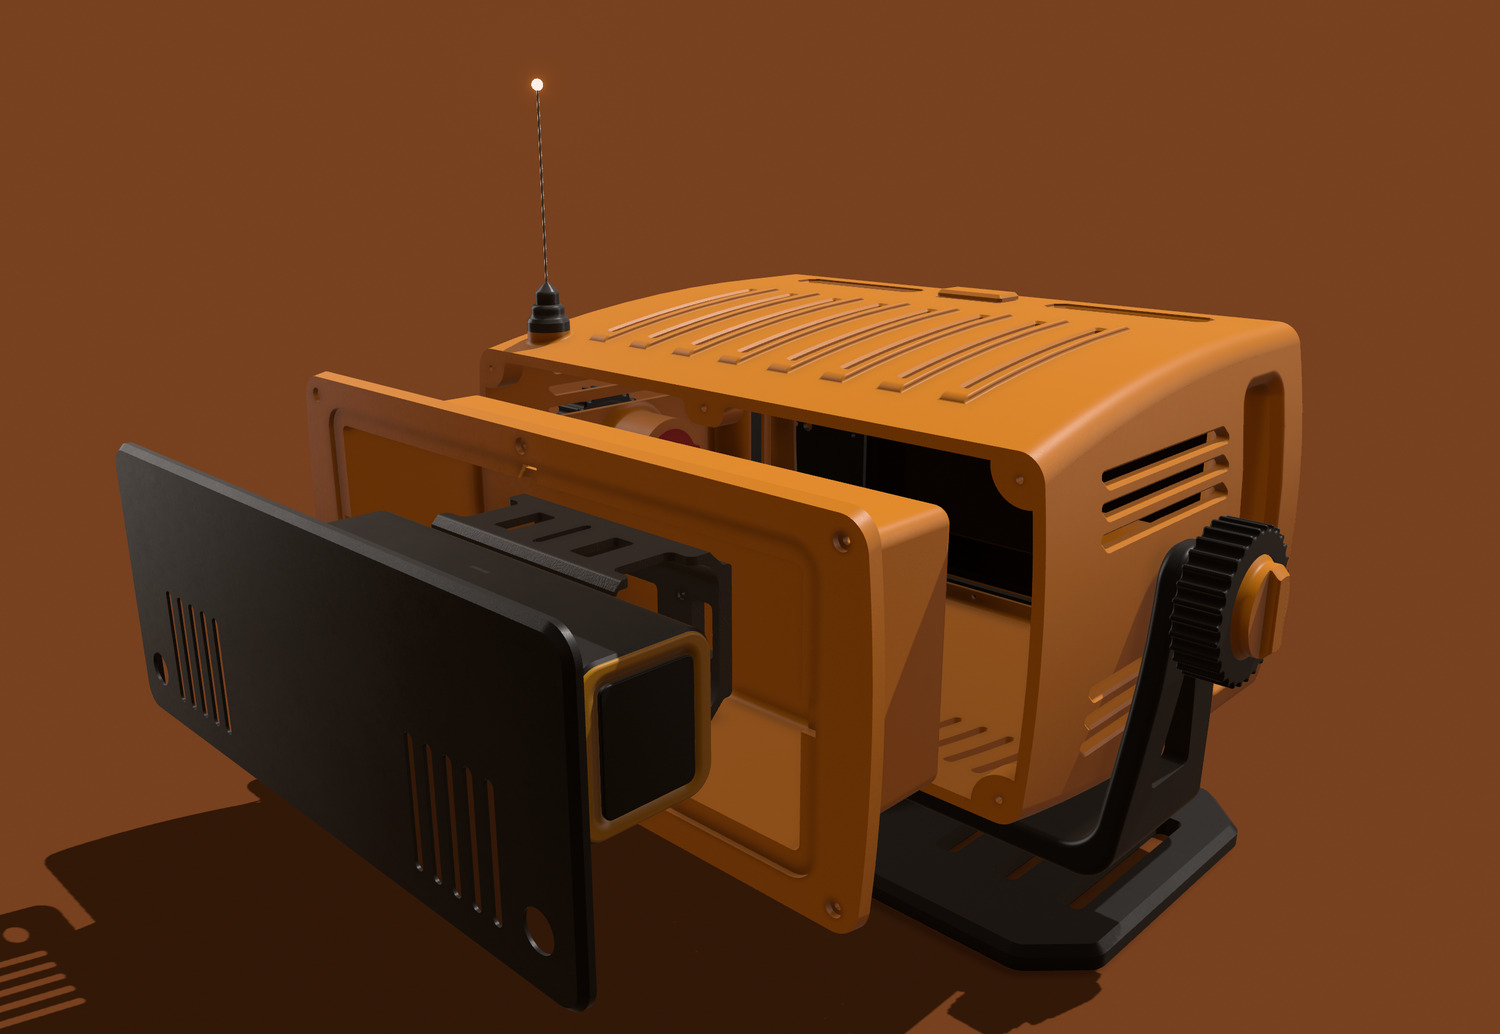
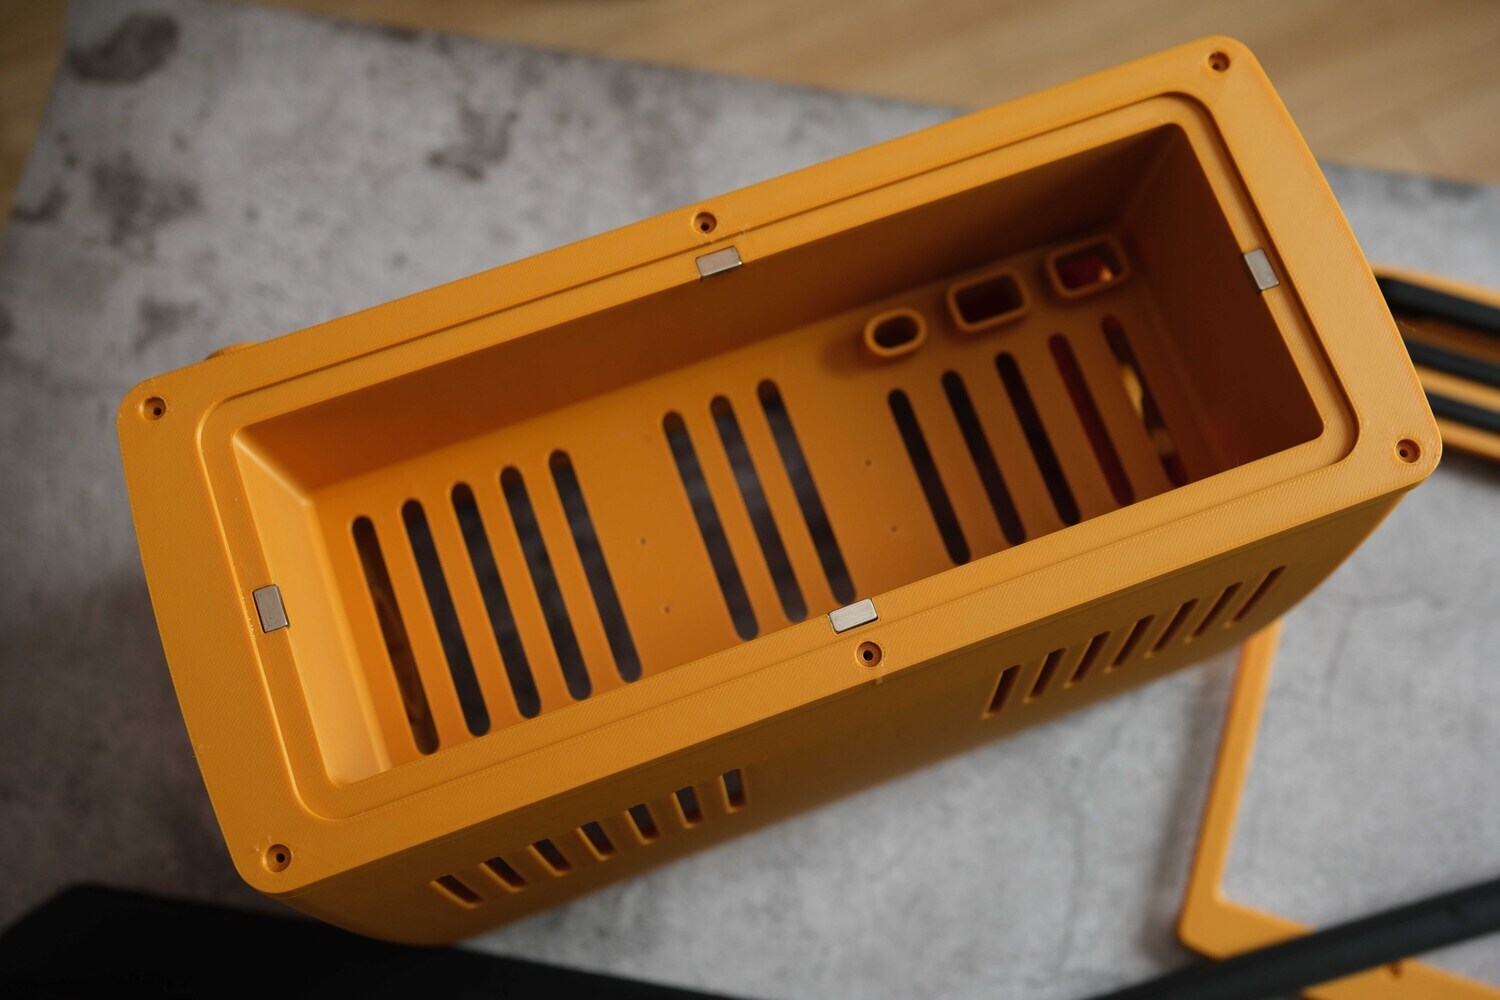
These are components at the back. They include a rear compartment for storing cables, a power bank, or an SSD — depending on your needs. I’m currently using it to house an AOHI 26,500 mAh power bank, which supplies power to the iPad or the Raspberry at the front via a Type-C cable. If you’re using the same power bank model, you can use the mounting bracket as is.
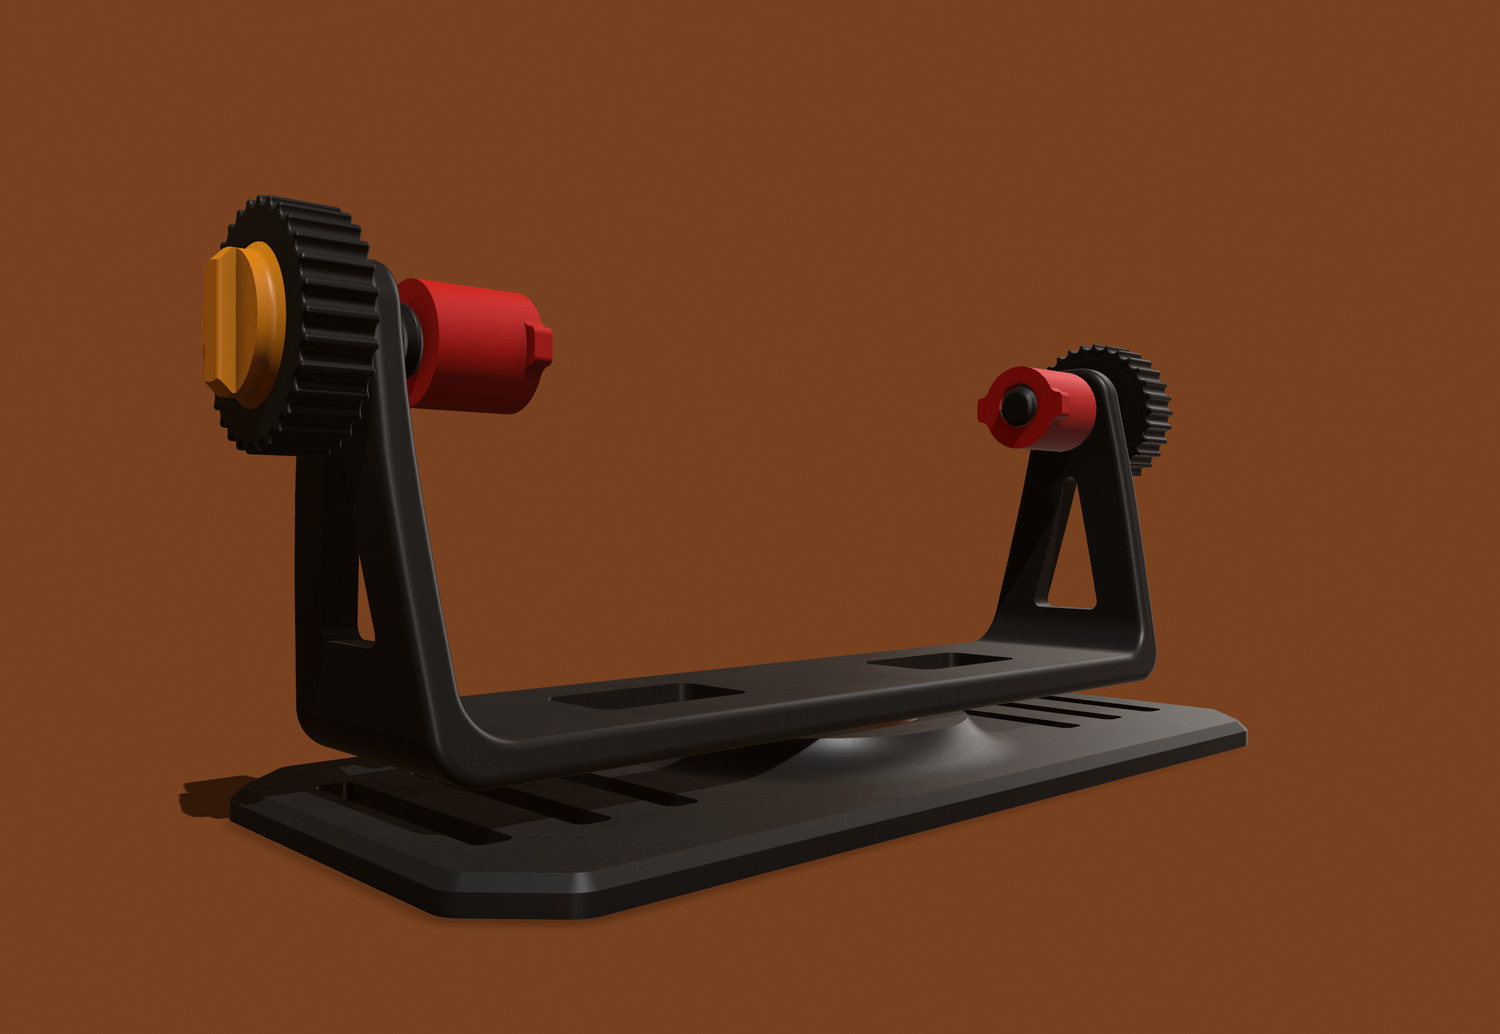
This is the Lumon base assembly. It includes the base, a rotating joint, and two side locks for adjusting the screen up and down.
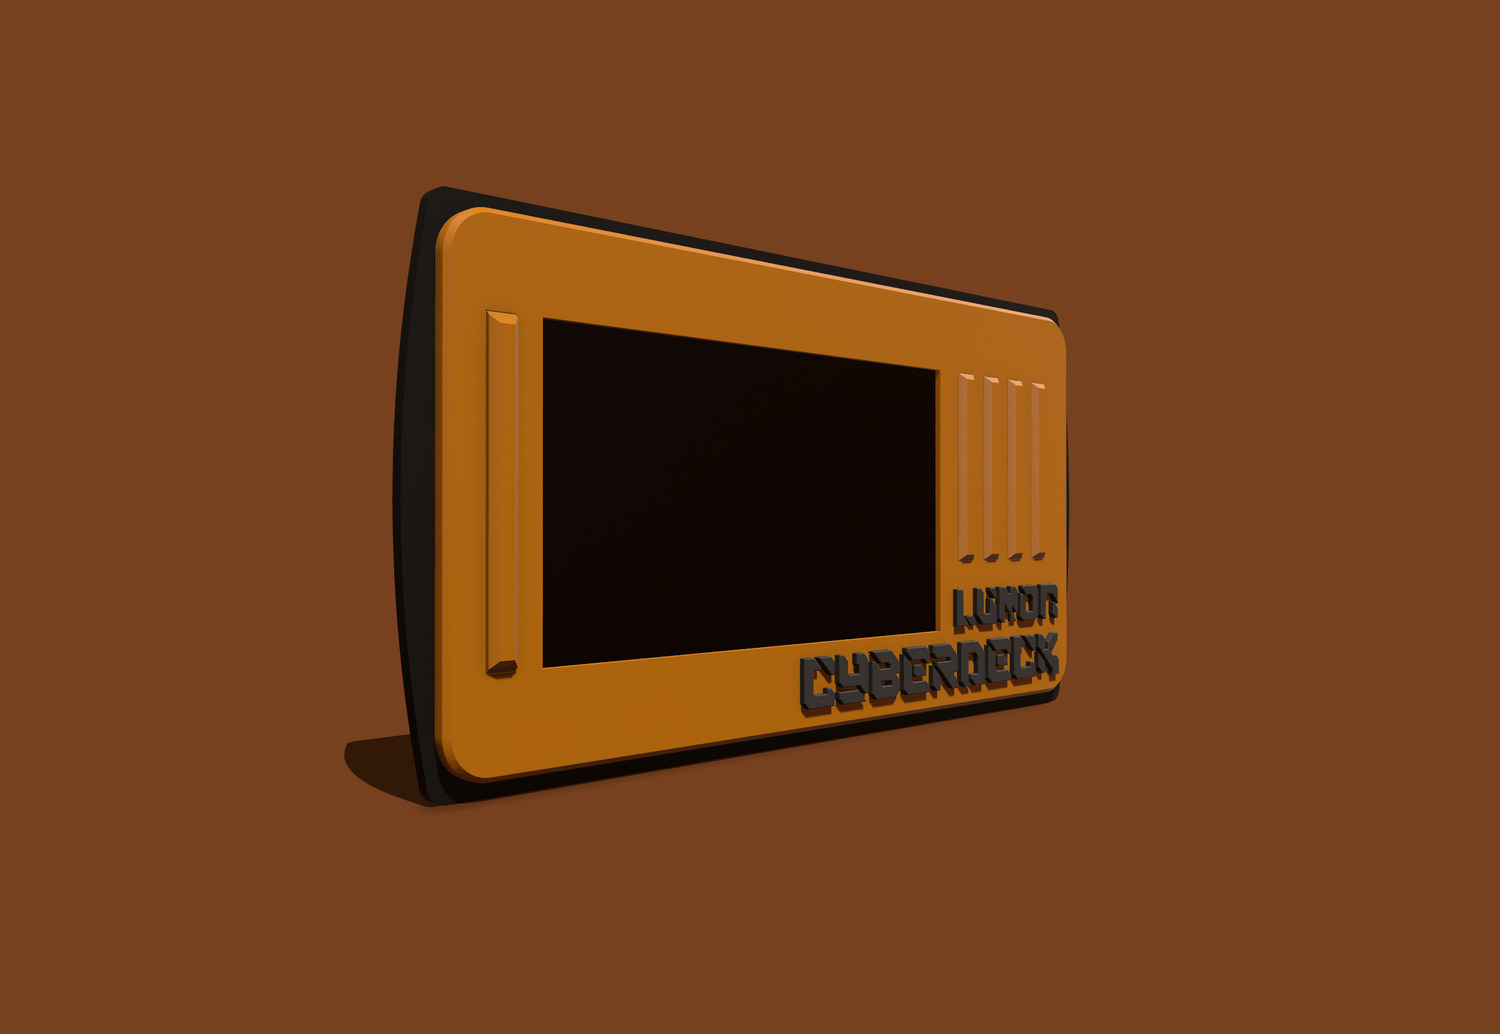
This is the front bezel made to fit a 7-inch Raspberry touchscreen. If you’re using the Raspberry with its 7-inch touchscreen, you can use the design exactly as provided.
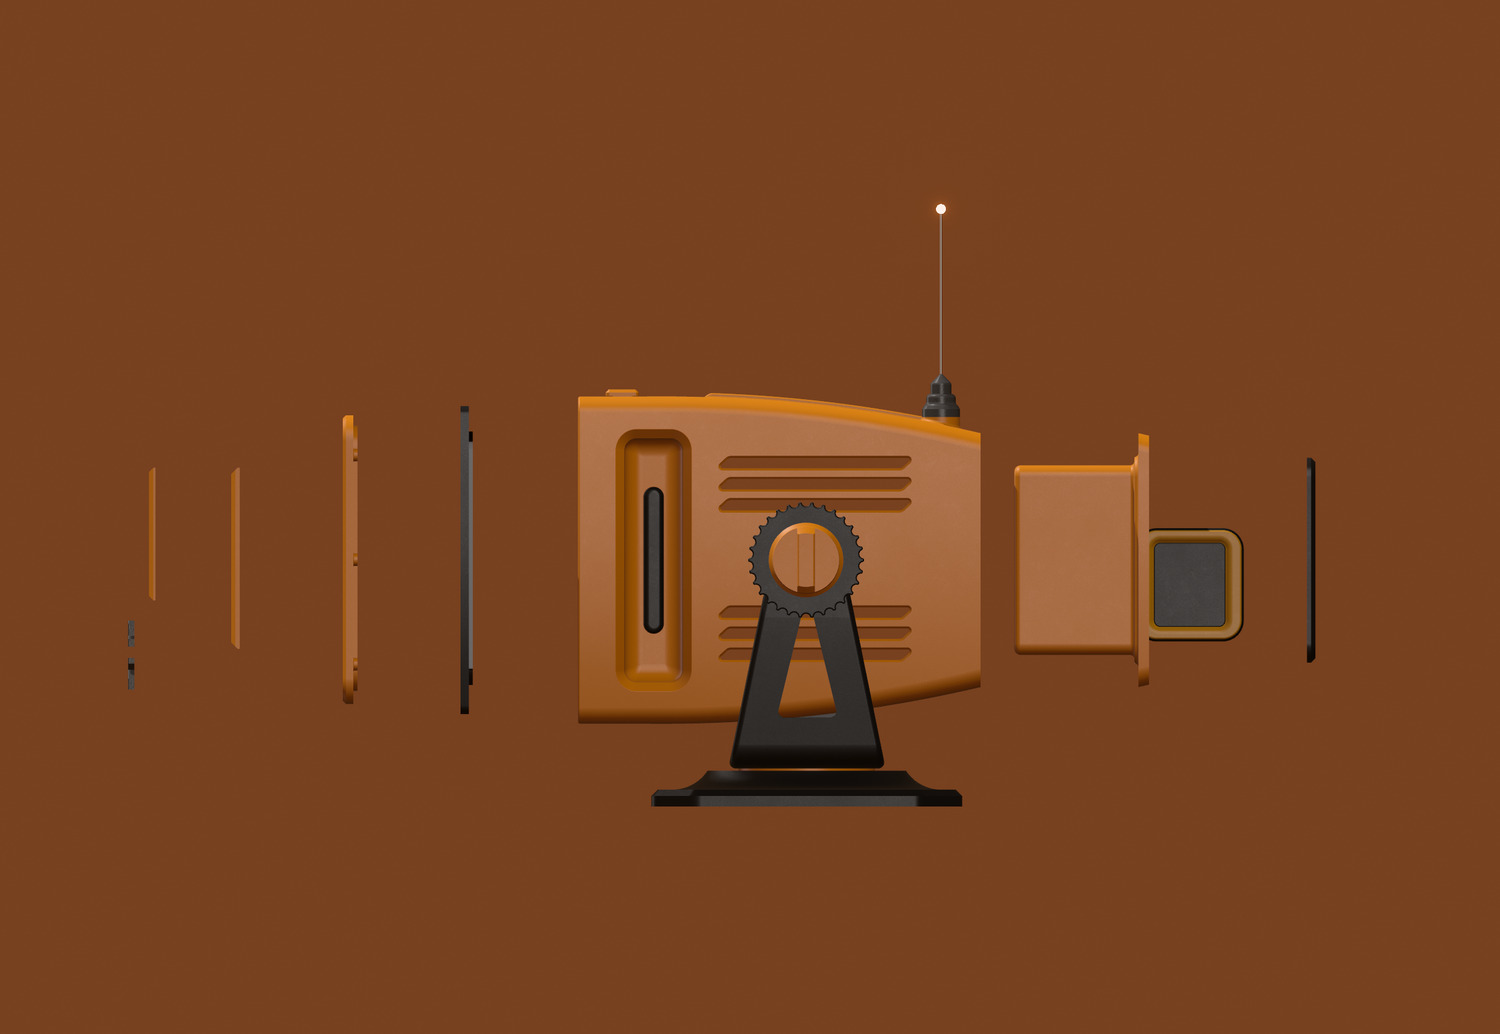
Here’s a cross-section to give you a better idea of how everything is laid out inside. Next, I’ll walk you through the printing and assembly process. If you like the project, you can print the parts and put it together by following the guide below.
PRINTING PROCESS
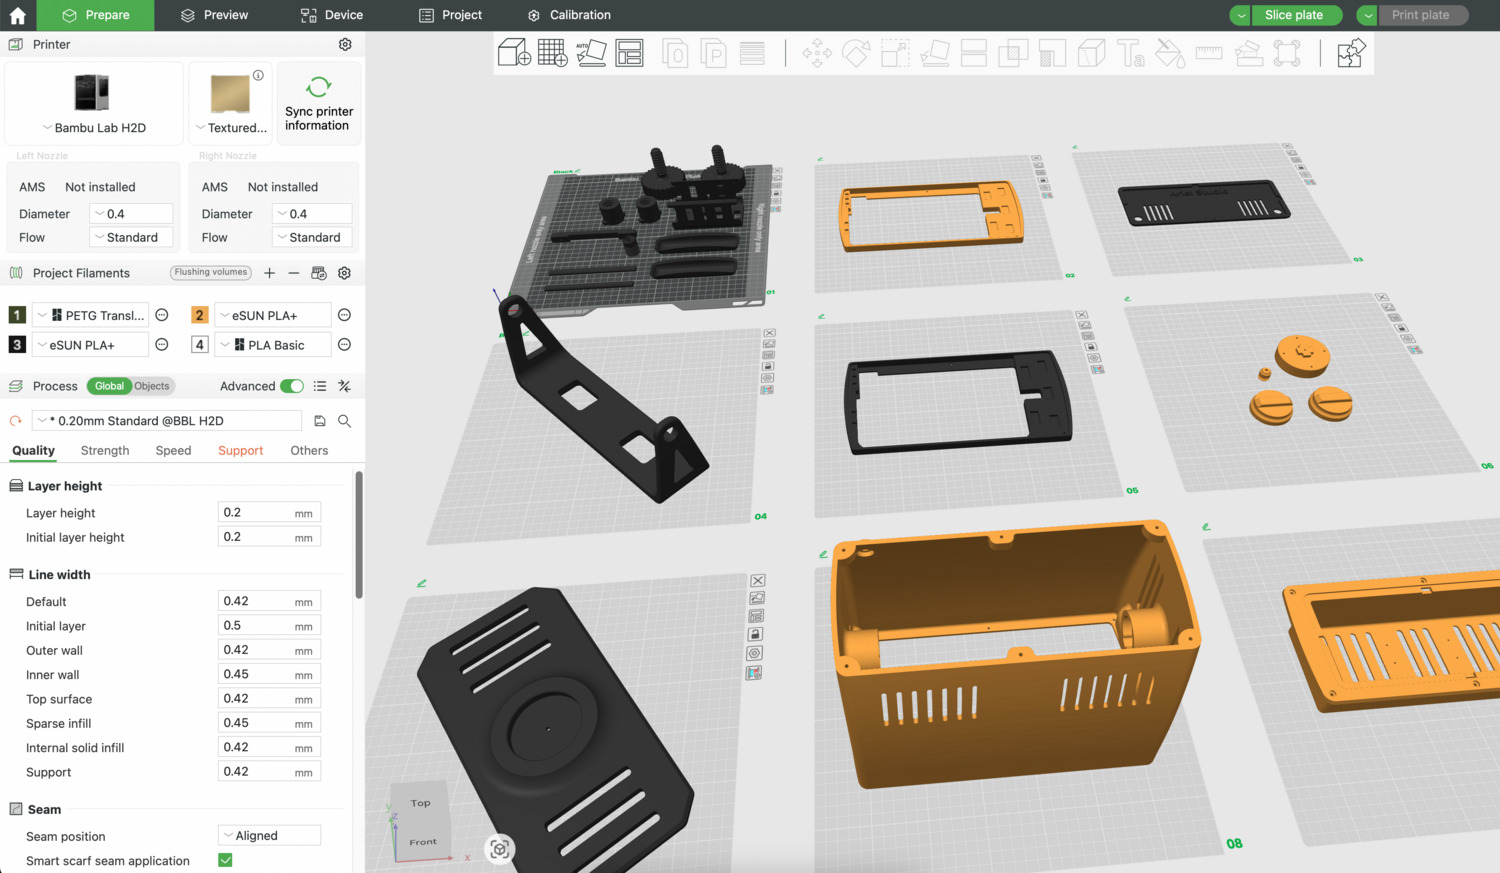
1. MATERIALS
I used two main filament types: PLA+ and PLA CF. eSUN PLA+ in Gold for the gold-colored parts, printed them with default settings using a 0.4 mm nozzle. Most of my designs are calculated to print clearly without much adjustment to the settings. As long as you avoid difficult overhangs and the common weak points of FDM printing is okay. For parts that involve screwing, rotating, or movement, I chose PLA CF. This is a PLA-based filament reinforced with carbon fiber, offering better mechanical strength, improved wear resistance, and greater durability overall.
2. PARTS PREPARATION: Here’s what you’ll need to complete the Lumon build.
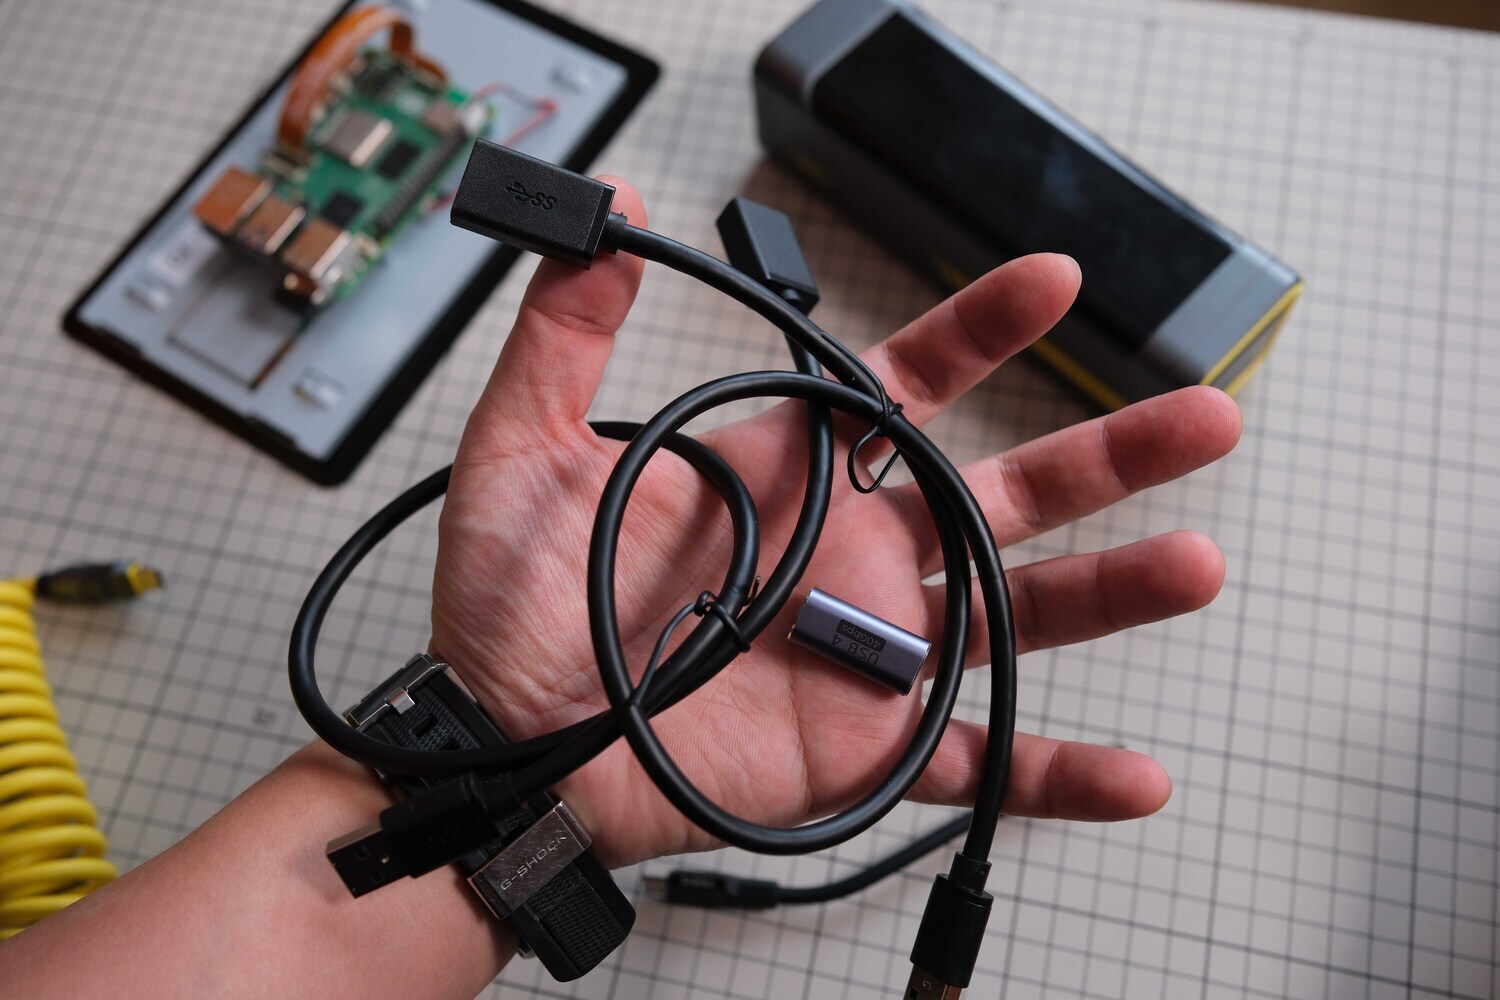
An L-shaped Type-C coiled extension cable for a cleaner look, with a Type-C connector for back port.
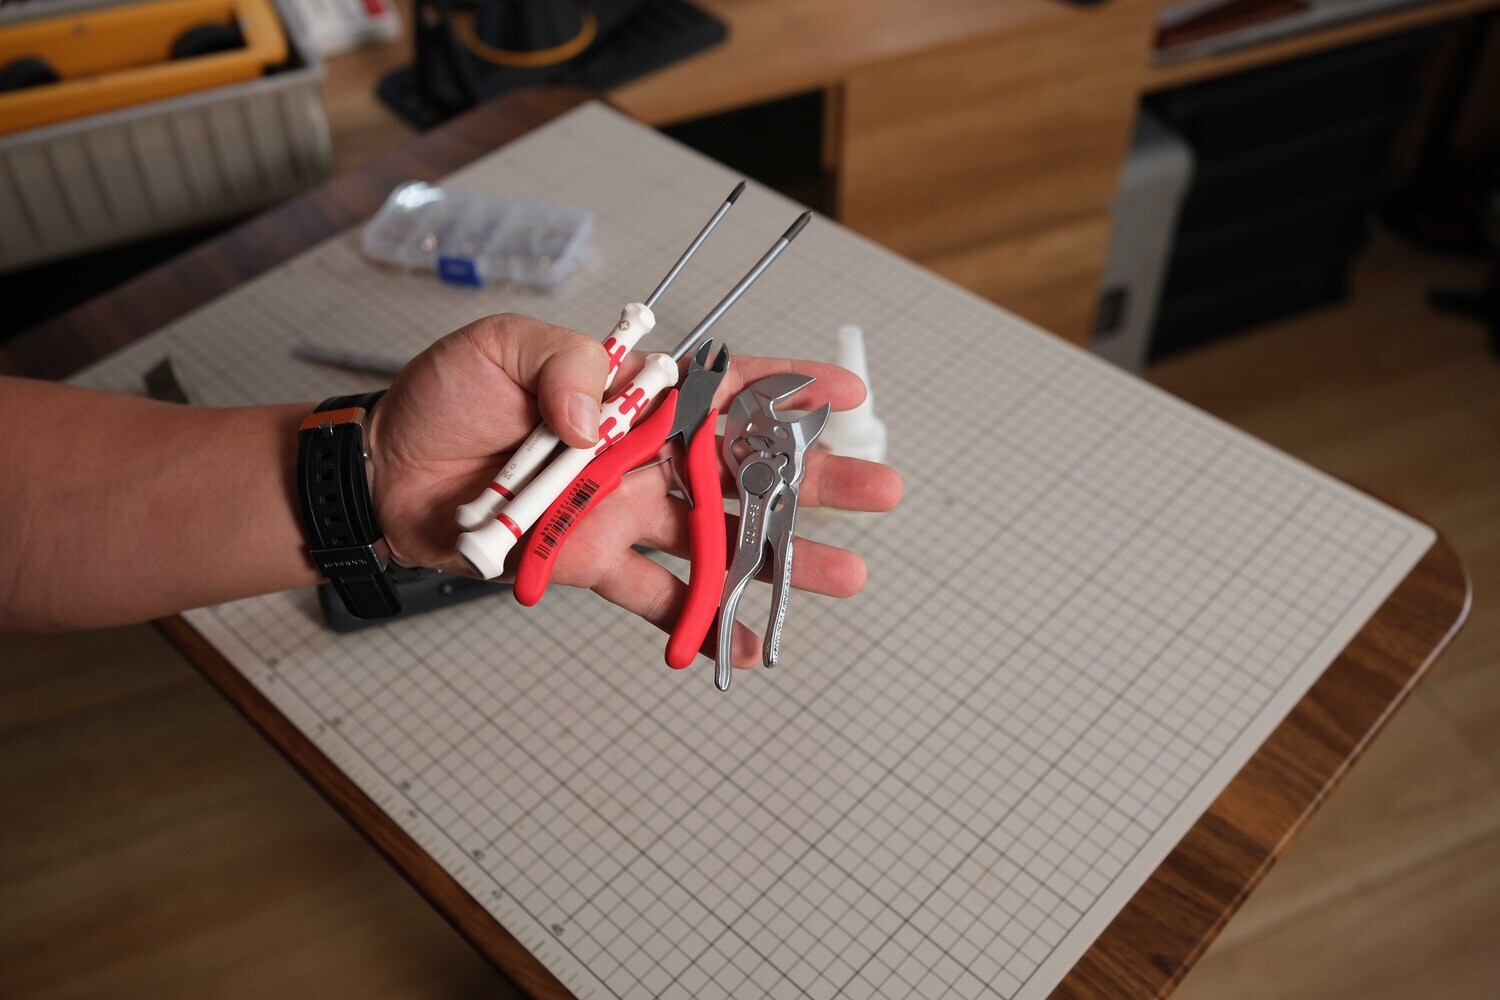
Some basic tools such as screwdriver, pliers, and wire cutters.
 Use M2 and M3 self-tapping screws for plastic, in 10 mm and 5 mm lengths. The easiest option is to buy a mixed screw kit like this, which includes all the sizes you’ll need — it’s convenient and inexpensive.
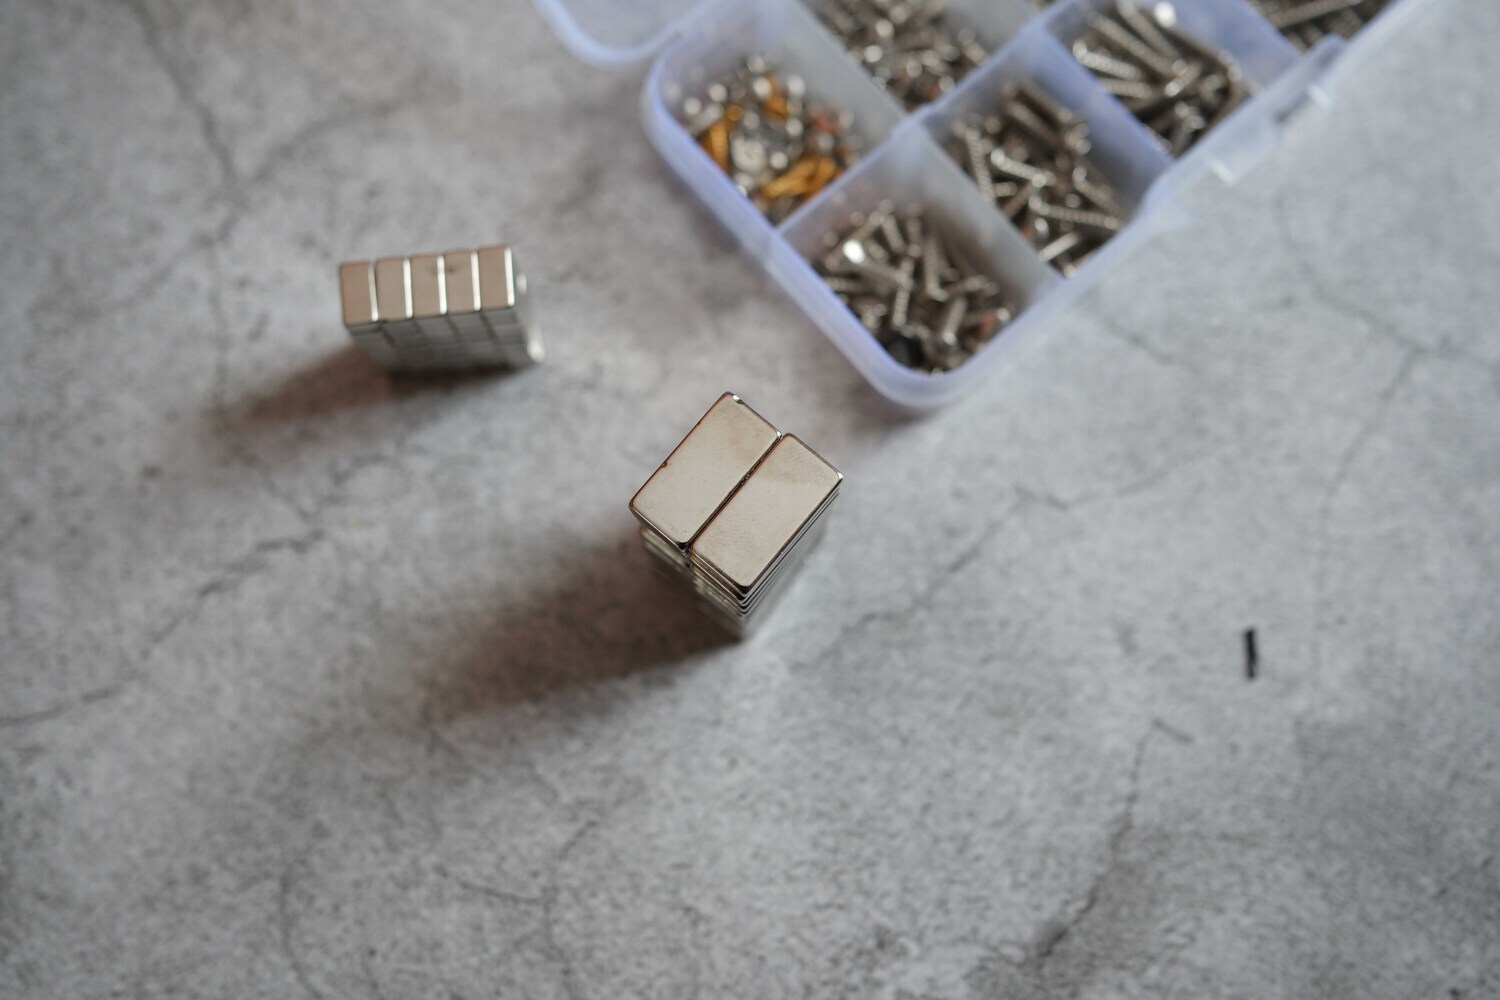
There are two magnet sizes used in this design: 20×10×3 mm and 10×5×3 mm. When buying the magnets, make sure to ask the seller to double-check the dimensions, as some shops don’t sell magnets with exact sizes. Otherwise, they may fit loosely and require extra glue to secure.2 loại nam châm sử dụng trong thiết kế này là 20x10x3 và 10x5x3.
3. ASSEMBLY AND FINAL TOUCHES

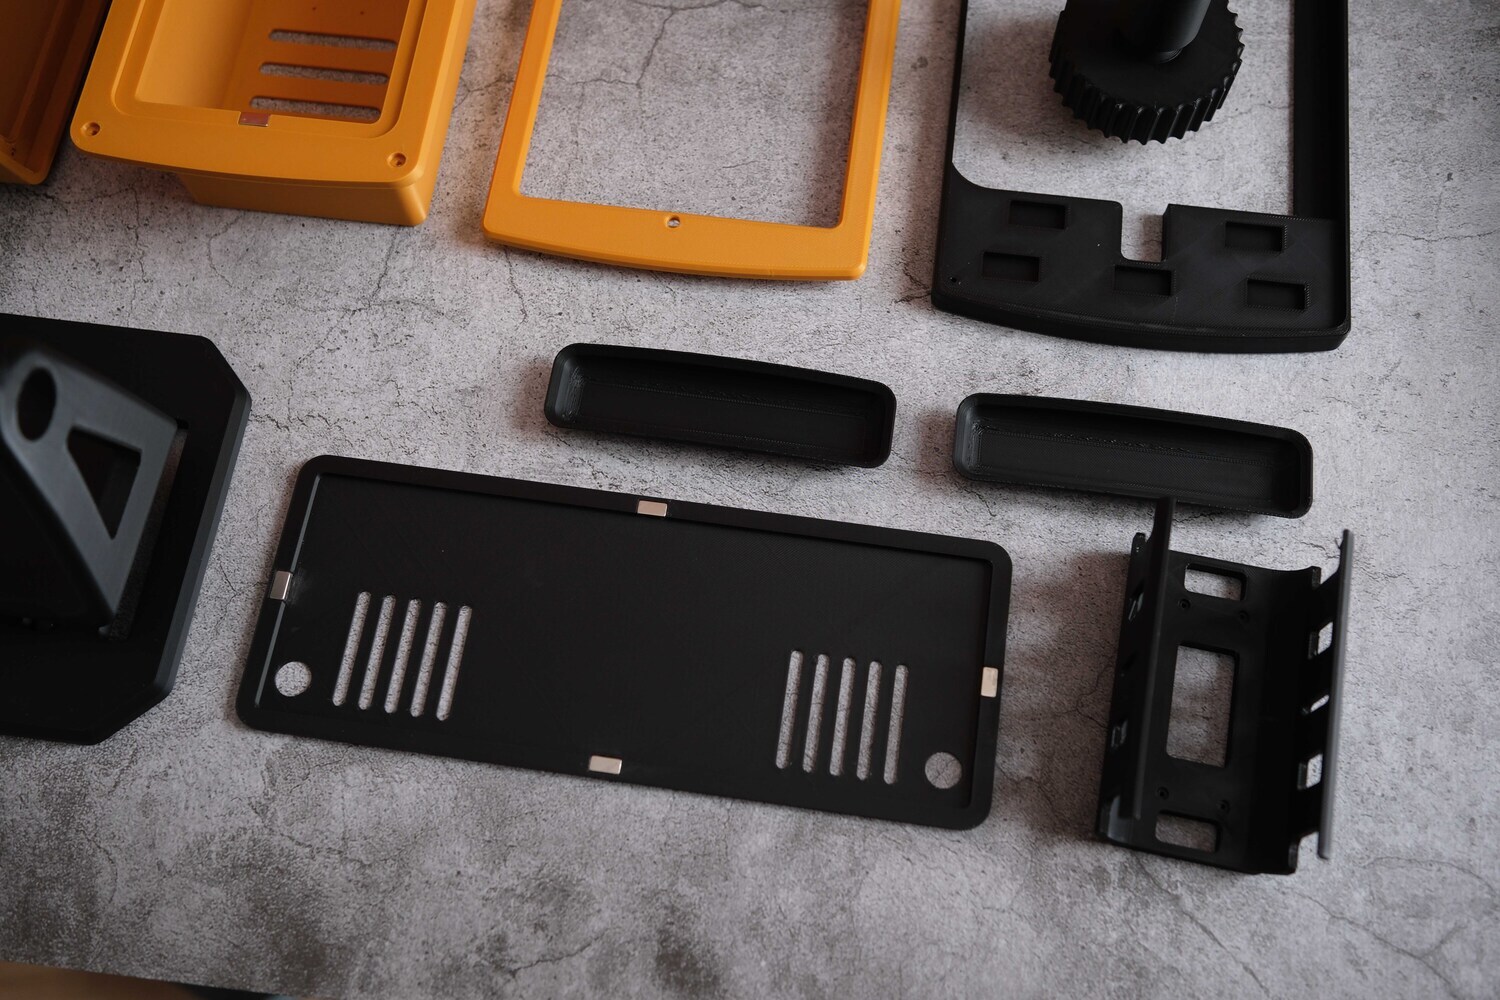
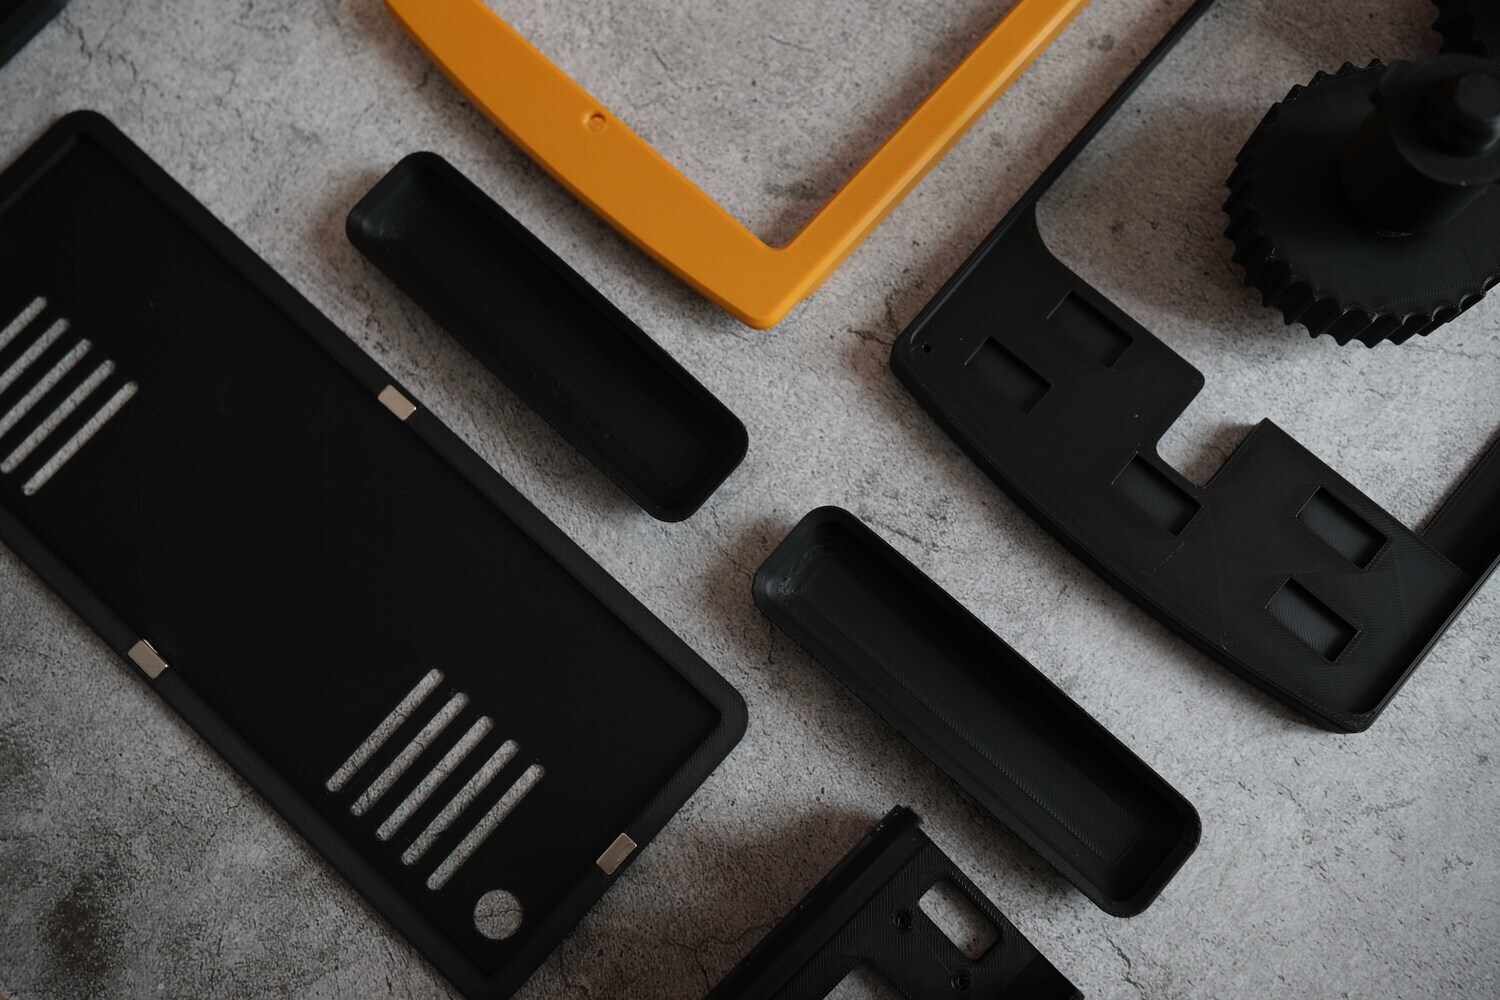
Once all the files are printed, you’ll end up with the parts shown in the image above.
Outer shell: This part was printed using eSUN PLA+ in Gold. It used about 700 g of filament and 18 hours to print. I designed the supports to be simple, so removal is fairly easy and not too difficult.
Filament's colors: Only gold and black. For the black parts, you can use other filaments as well. I used Bambu PLA CF.
These are the two side “ears,” used for decoration and to cover the less attractive side surfaces, since those areas require supports during printing.
Attach the back plate of the front bezel using M3 screws through the alignment holes, tightening them from the inside.

This back plate includes mounting positions for magnets: 10×5×3 mm on the left and 20×10×3 mm on the right. The number of magnets used is up to you—just make sure the fit feels secure. I added multiple mounting positions to support different front bezel designs.

Insert the threaded, then screw in the outer rotating part. It will pull itself inward without needing to be pressed. Make sure the two joints on both sides are properly aligned.
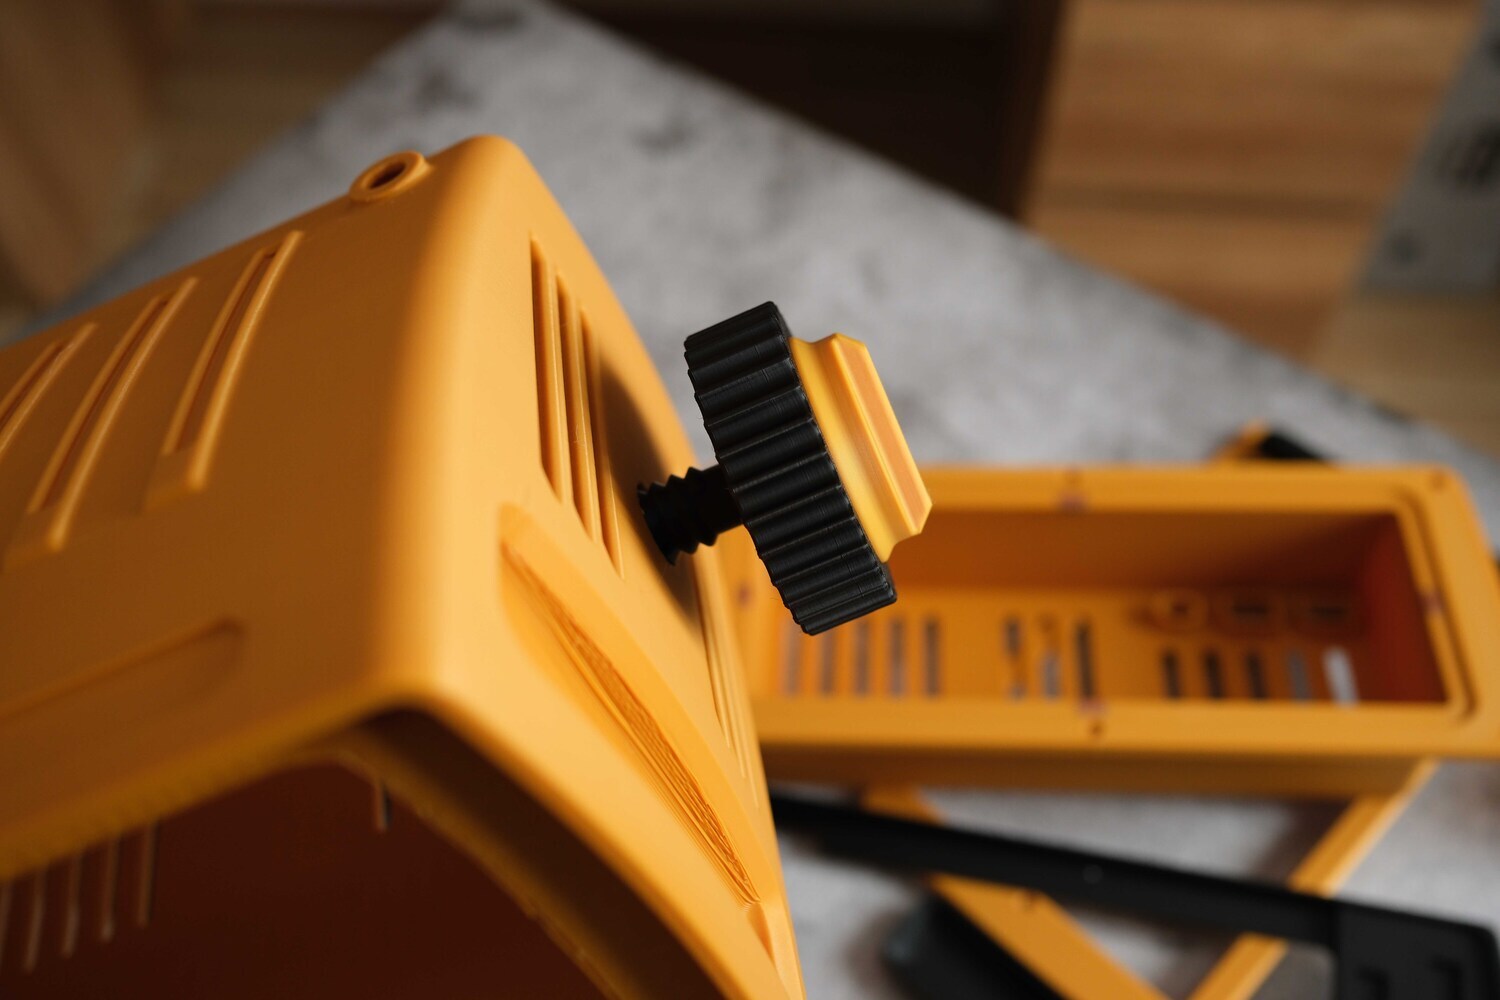
By tightening this ring, the threaded insert will be pulled into place. You can see some stripe marks near this side ear — those are support marks from FDM 3D printing, which is one of its limitations. But it’s okay, I’ll cover this area with a panel later.
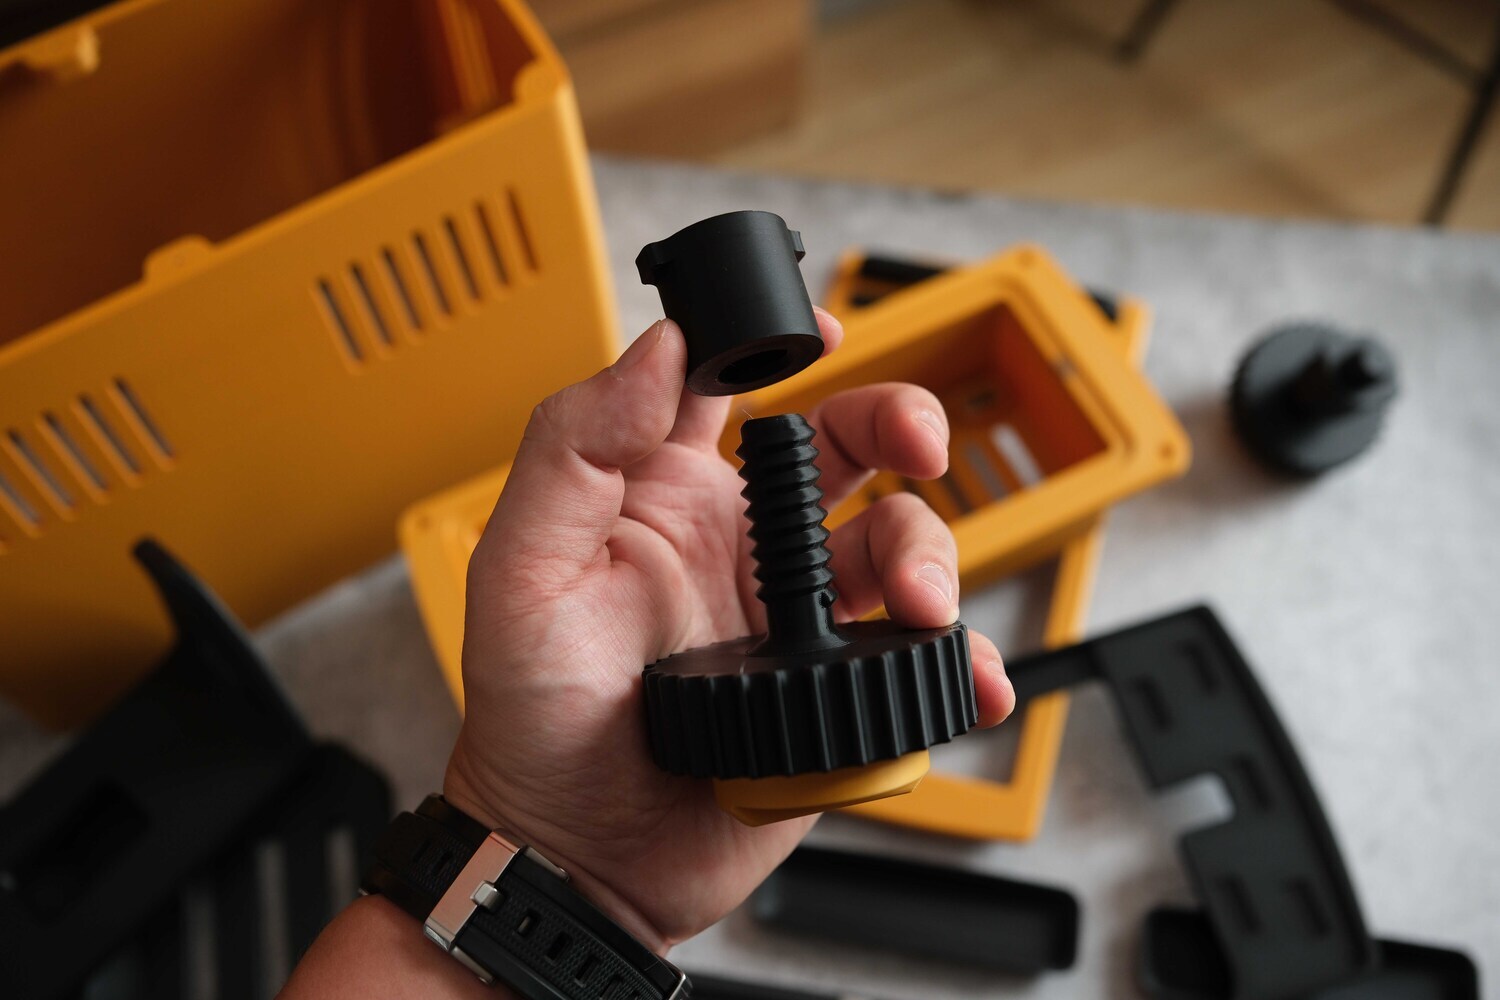
I designed this locking mechanism in two parts: a smaller inner piece, the tightening ring on the outside.
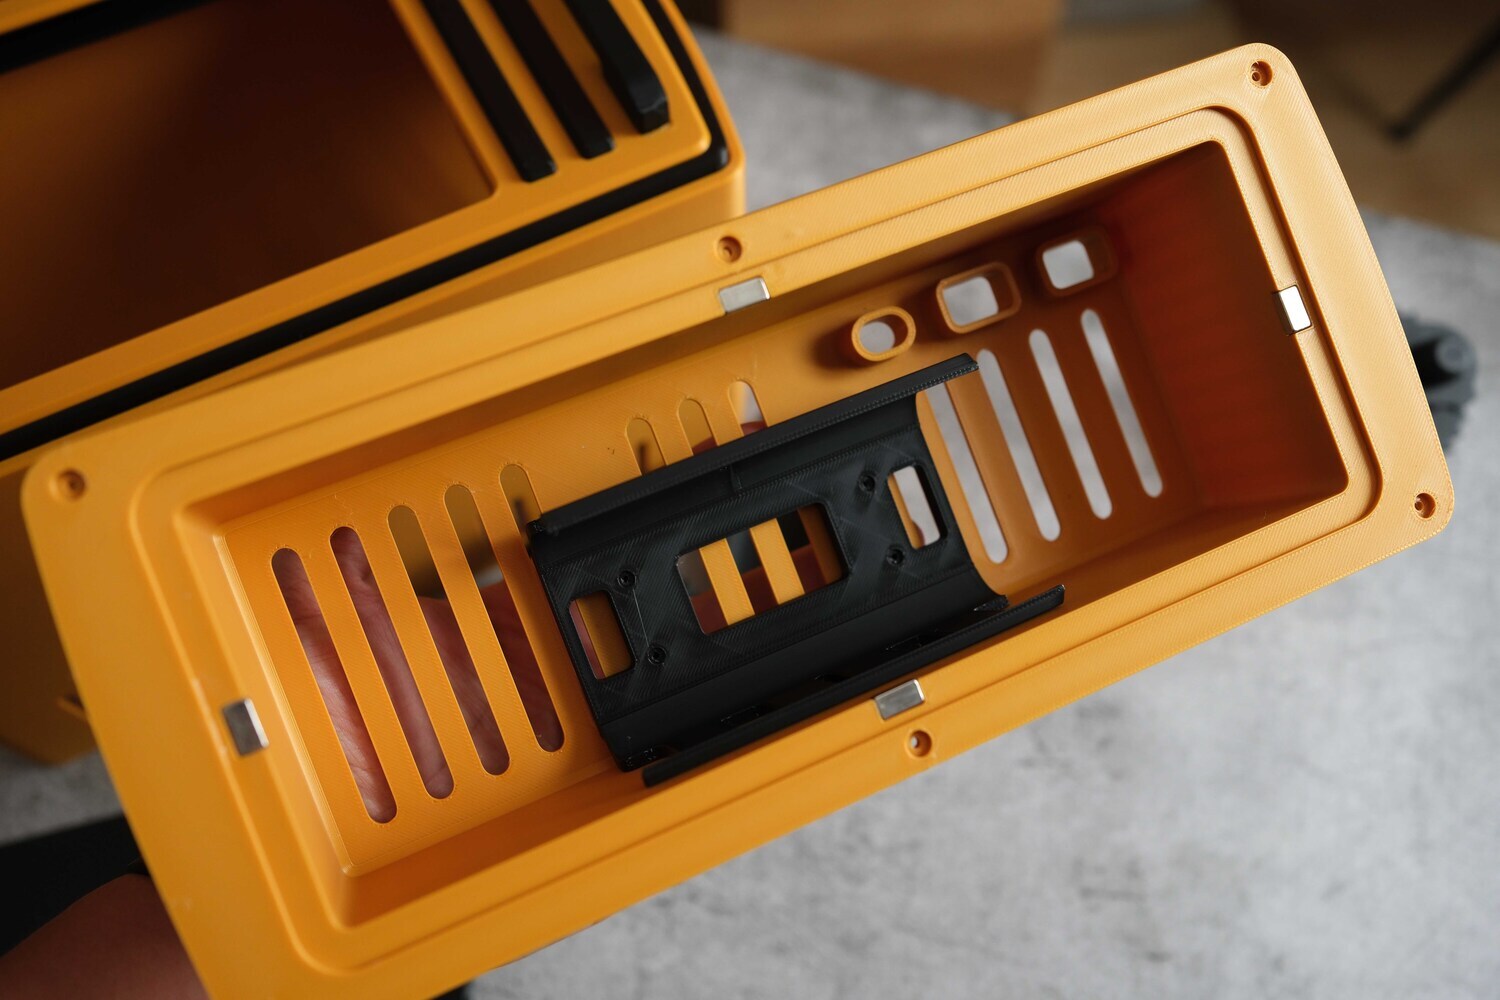
This is the rear storage compartment. If you’re using the same AOHI 240W 26,500mAh power bank as I do, you can use this exact mounting base; otherwise, you can skip it.
After that, attach the rear compartment to the main shell using the six pre-positioned M3 screw holes, I recommend black M3 10 mm screws for a cleaner look. The magnet positions here use 10×5×3 magnets.
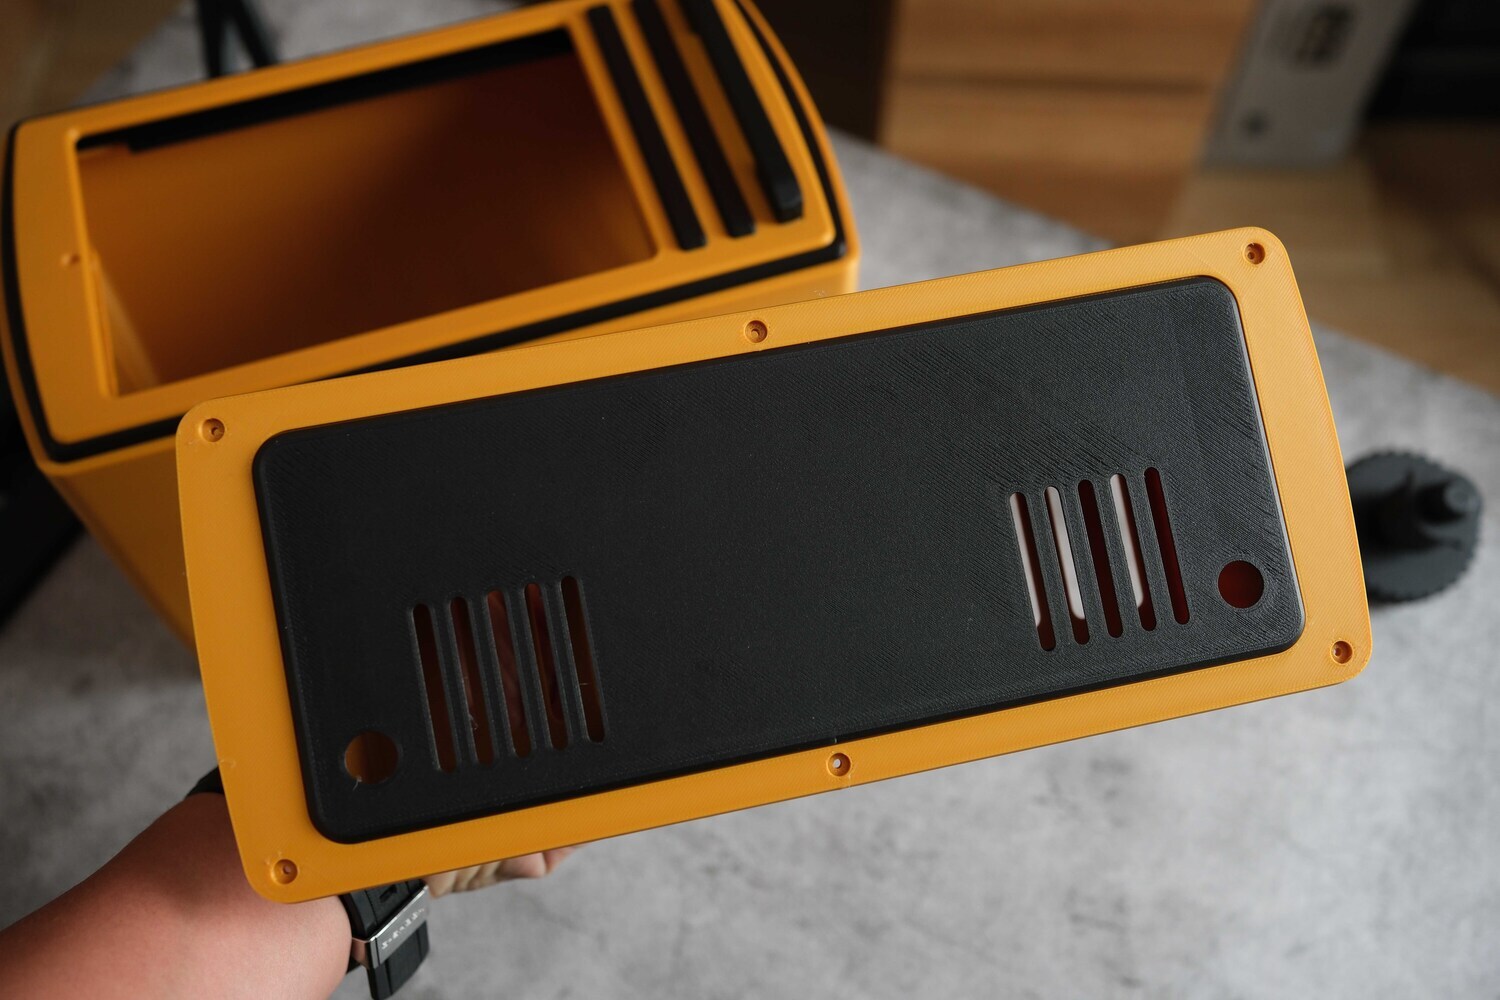
The final back panel is magnetically attached. Once the magnets are installed, the panels will snap together easily. Remember to check the polarity when installing the magnets, if you install the wrong way, they’ll push against each other. This part also uses 10×5×3 magnets.

For the stand, attach the two parts as shown. The circular ring in the middle serves as the rotating joint, secured with an M3 × 20 mm screw tightened from the bottom.
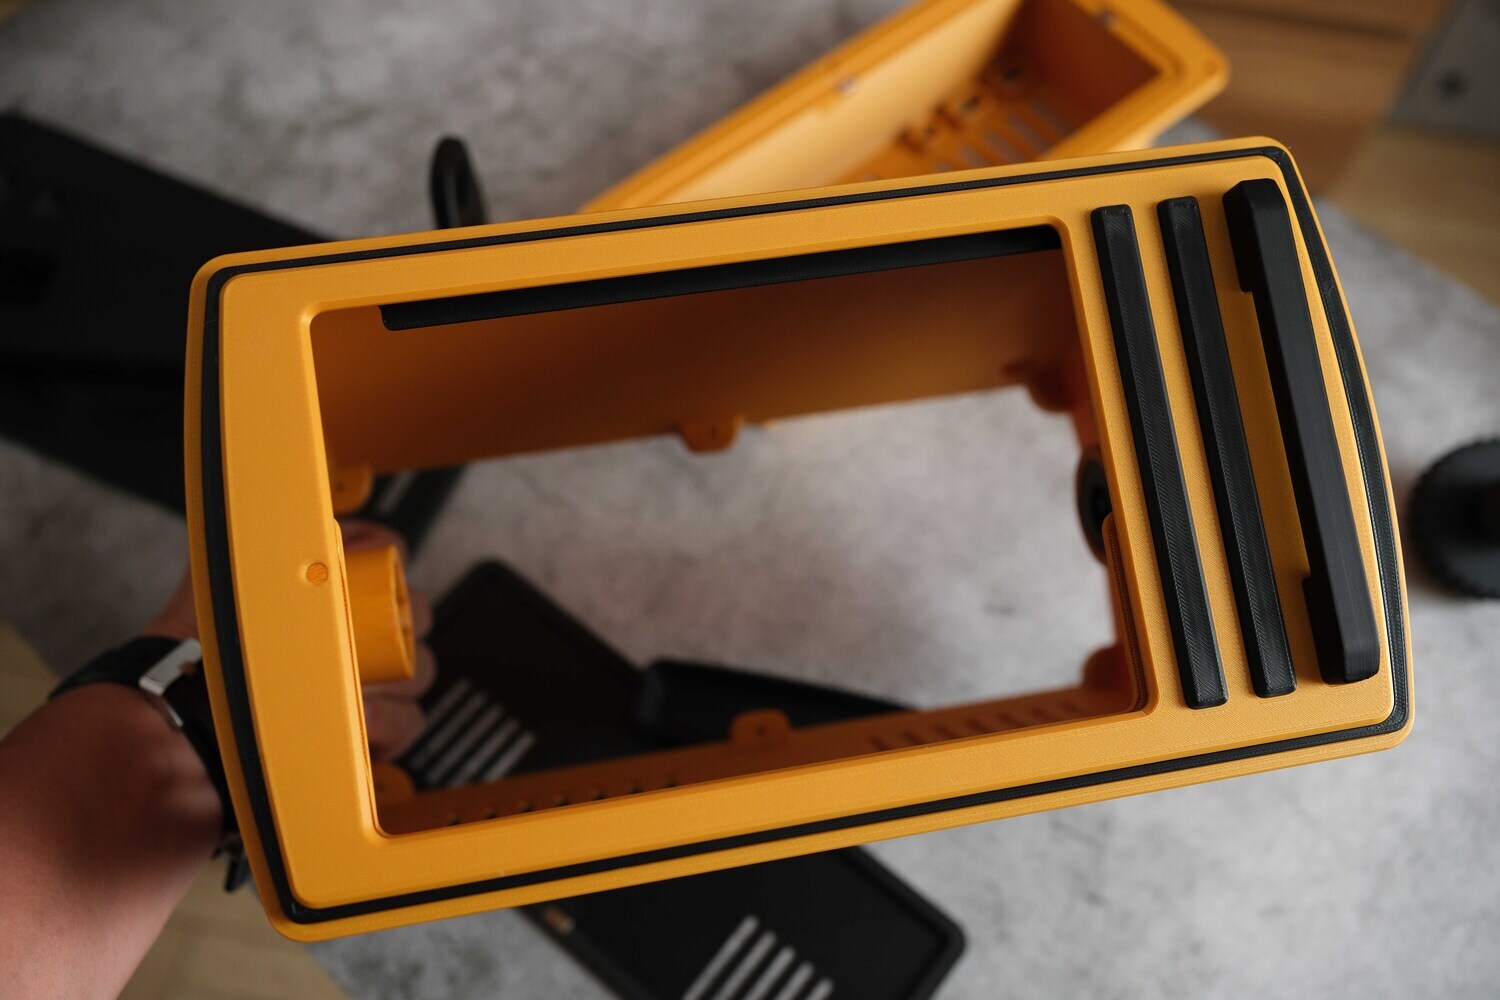
Next up is front mask, the version shown in the image is made for iPad Mini. The iPad mounts from the back, the black decorative bars on the front are glued in place, and only the pull handle is fastened with screws.
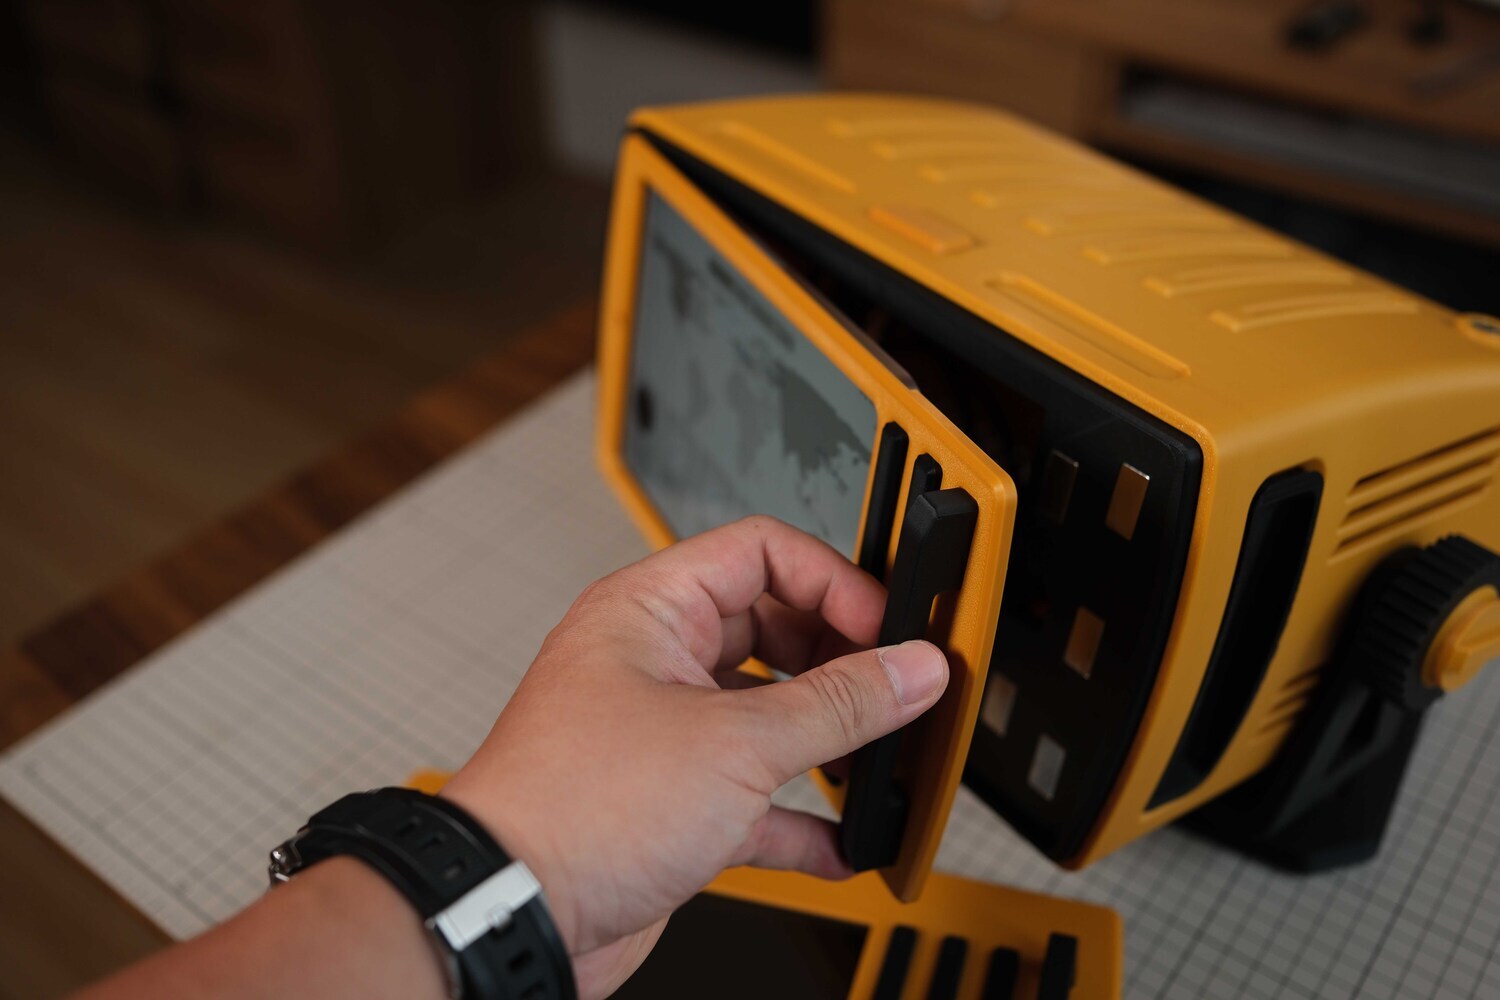
For the handle, make sure to secure it with screws for extra stability. There are pre-aligned holes on the back—just use M2 screws and fasten it in place.
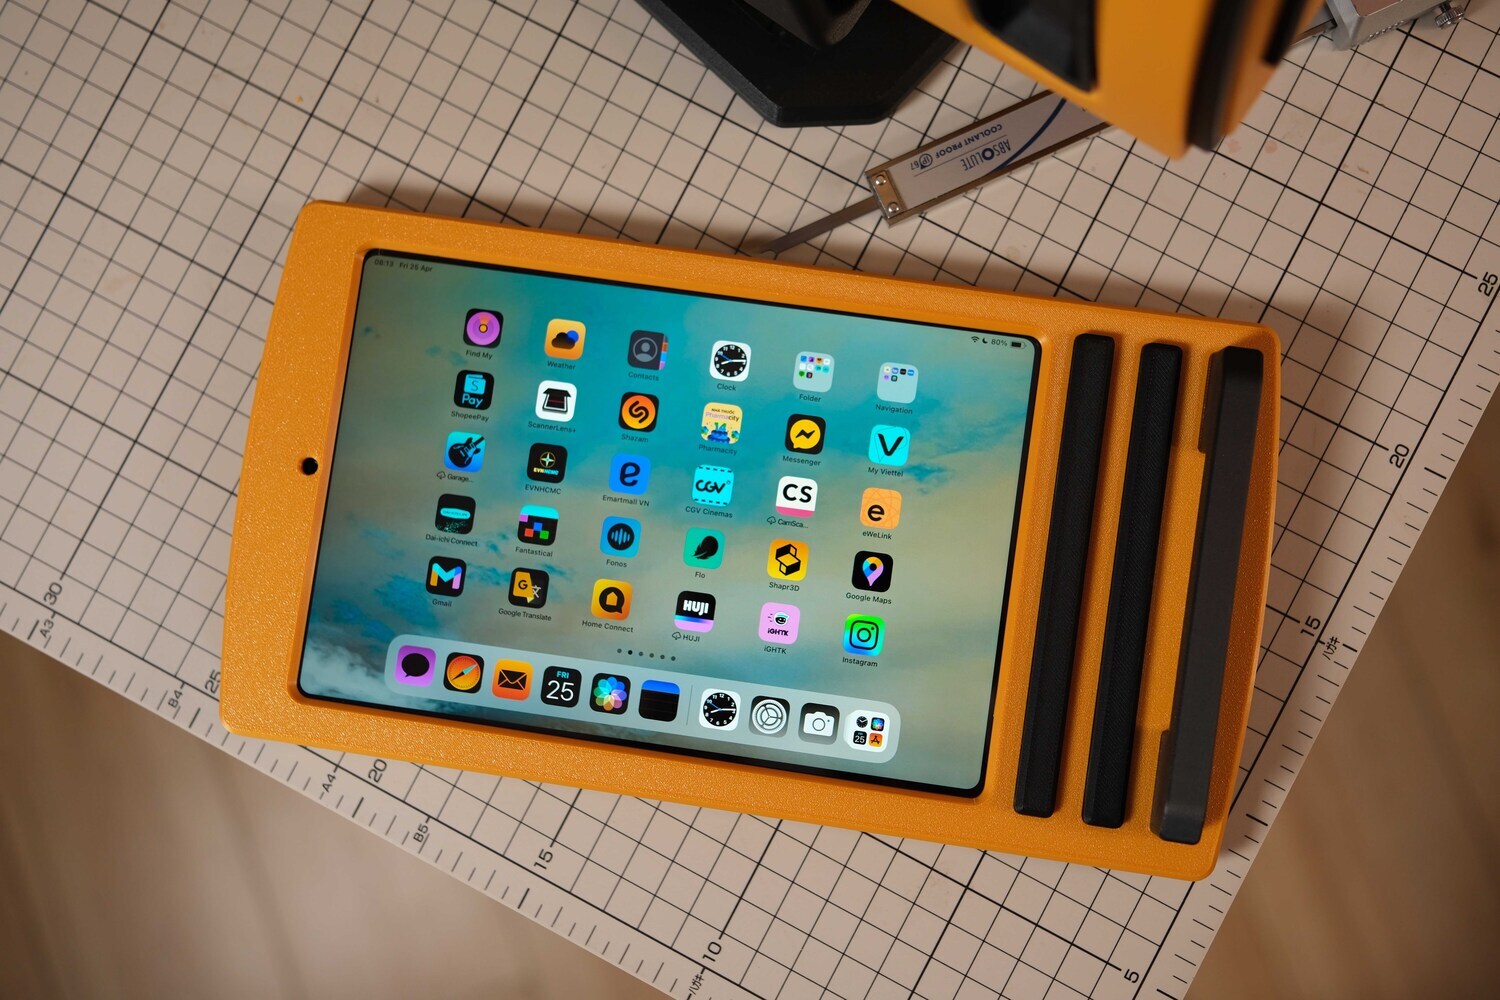
This is how the front panel turned out.
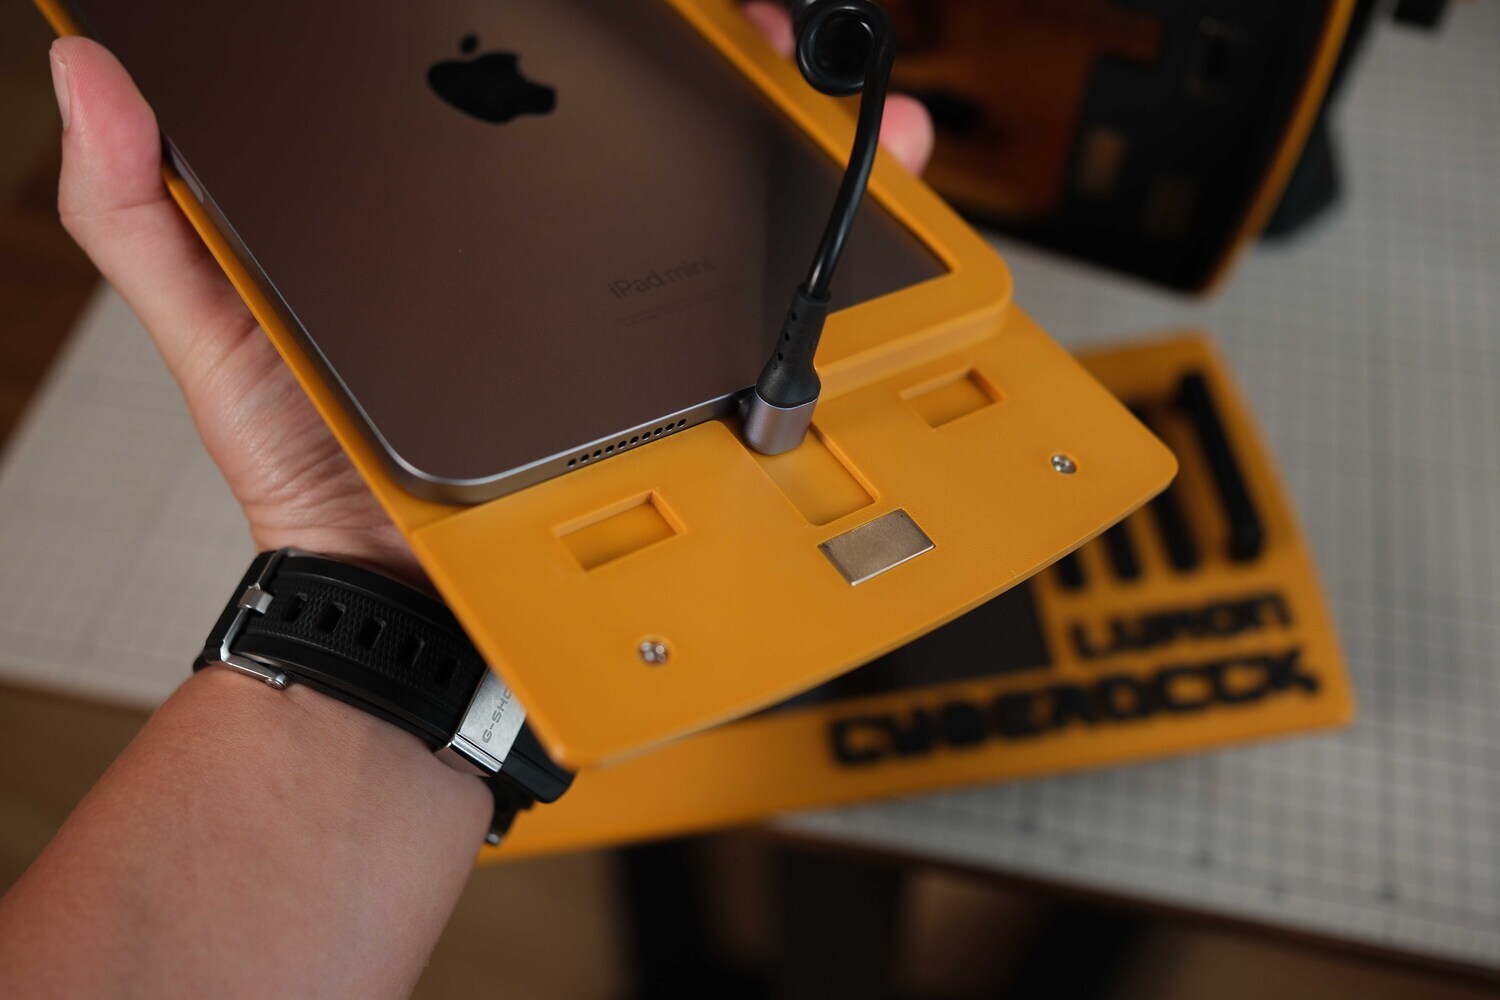
There’s a small ledge behind the iPad that allows you to route and plug in the charging cable comfortably. I used a right-angle cable for a cleaner look and easier installation. The two screw holes you see are for fastening the front handle.
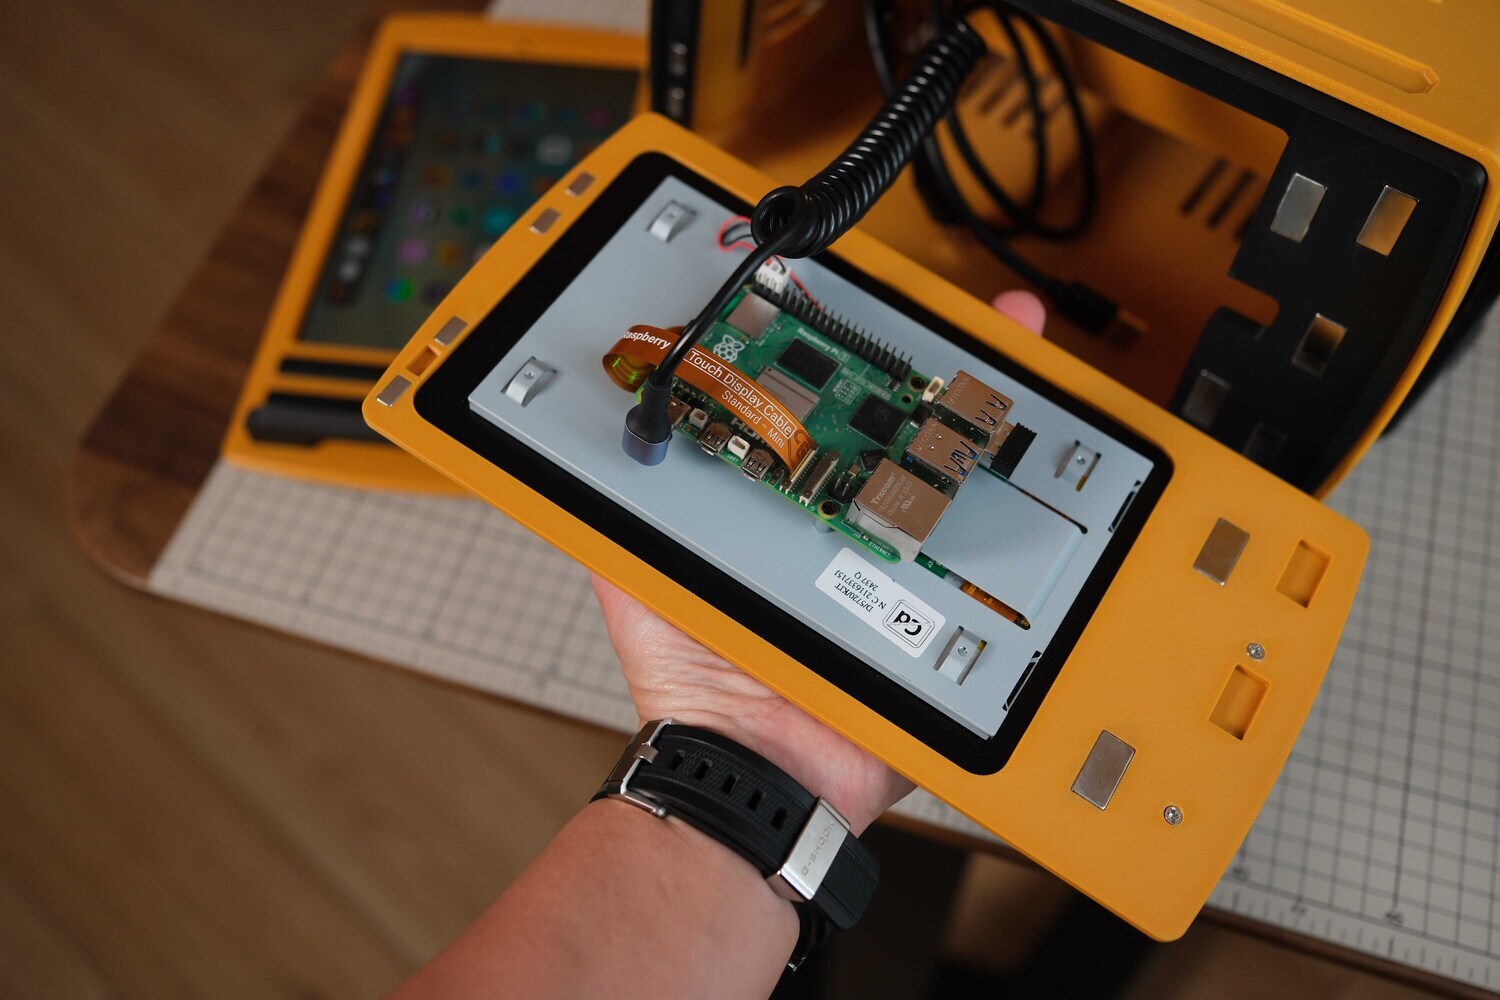
I’m using a coiled Type-C charging cable, but you can use any other cable you prefer. In the image, I’m using a different front mask, the one designed specifically for a Raspberry Pi with the 7-inch Raspberry touchscreen. 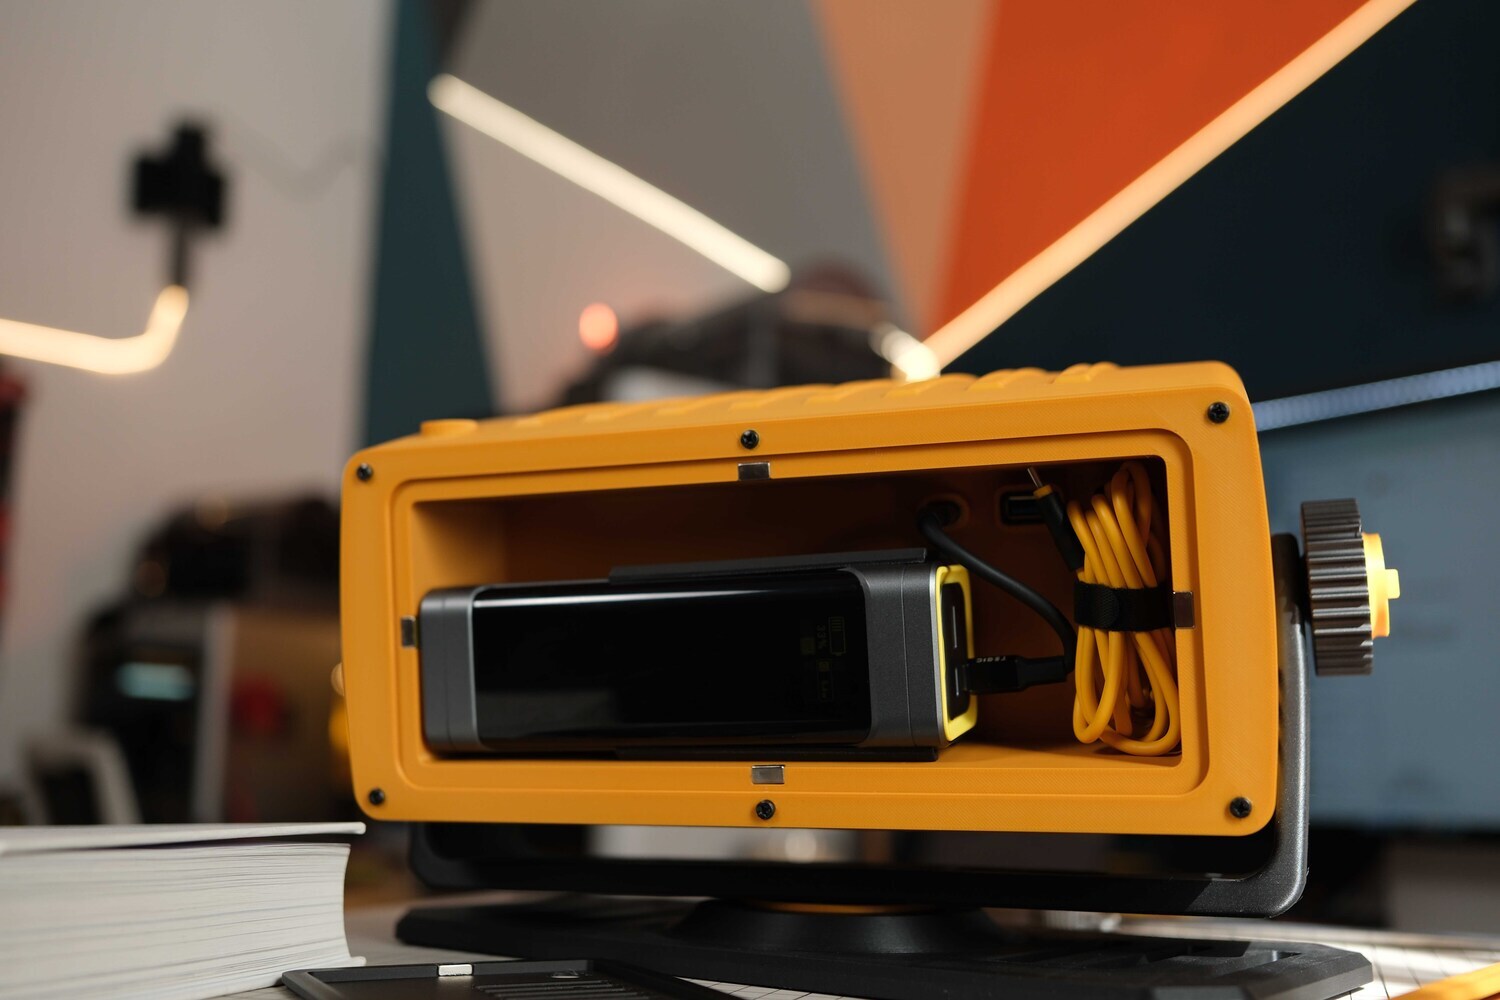
That’s basically it, here’s the back of the Lumon. I’m placing a power bank and a charging cable inside. The power bank has two Type-C ports, one is used to power the device at the front, and the other is for charging the power bank itself whenever needed. Most power banks with two Type-C ports can handle charging and output at the same time like this.
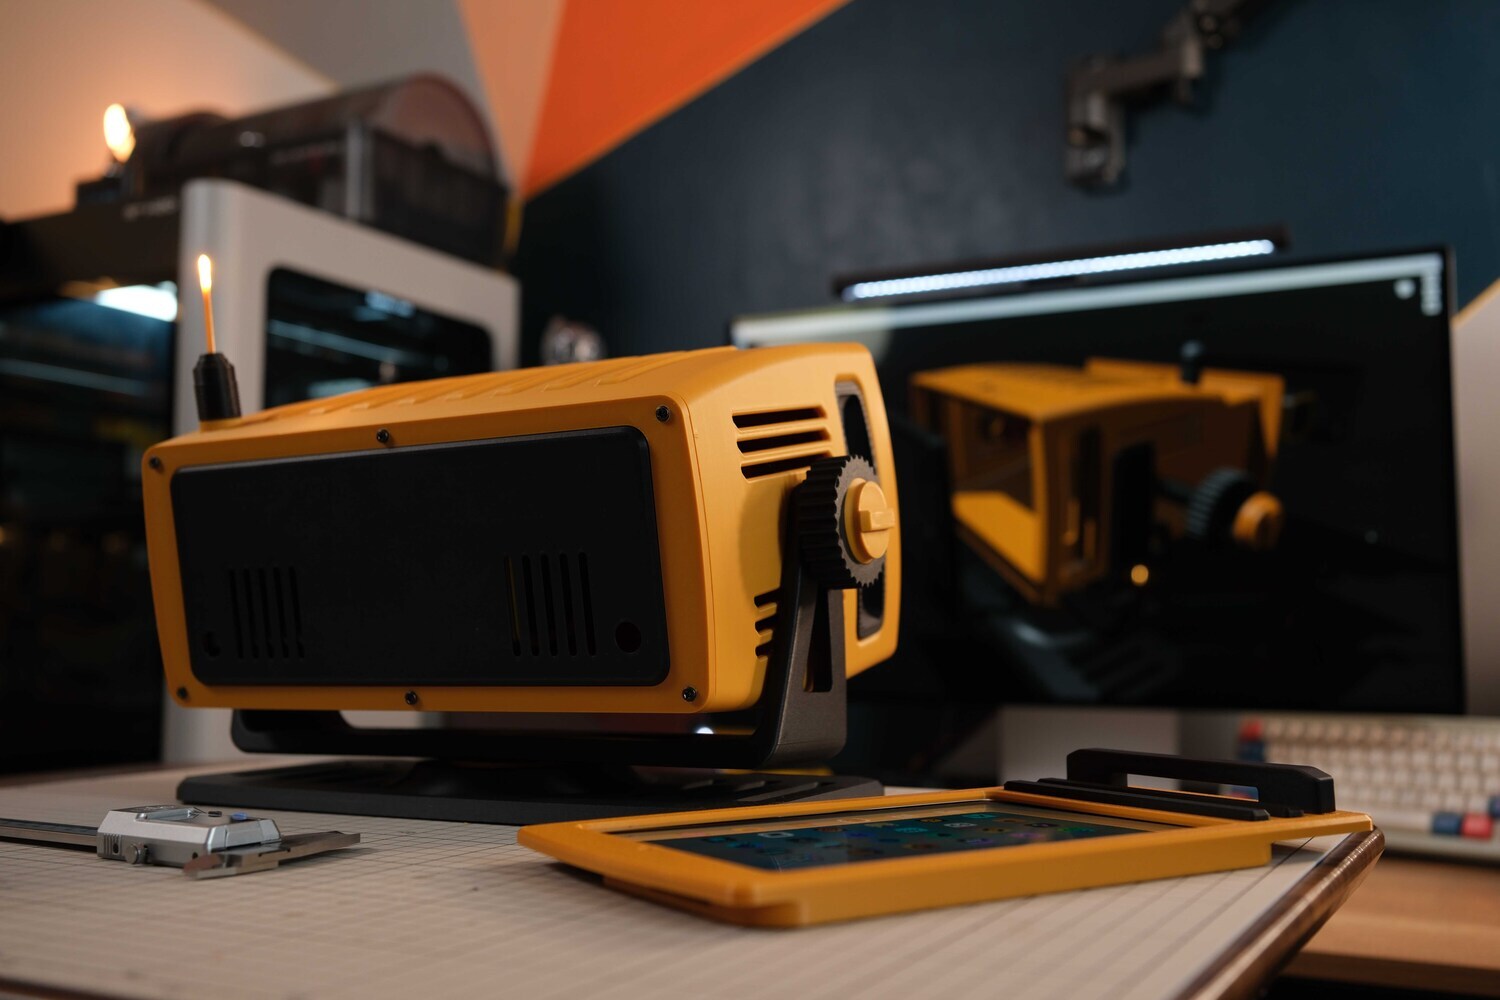
From the back, it feels like it’s watching itself being made. Adorable and full of creative inspiration.
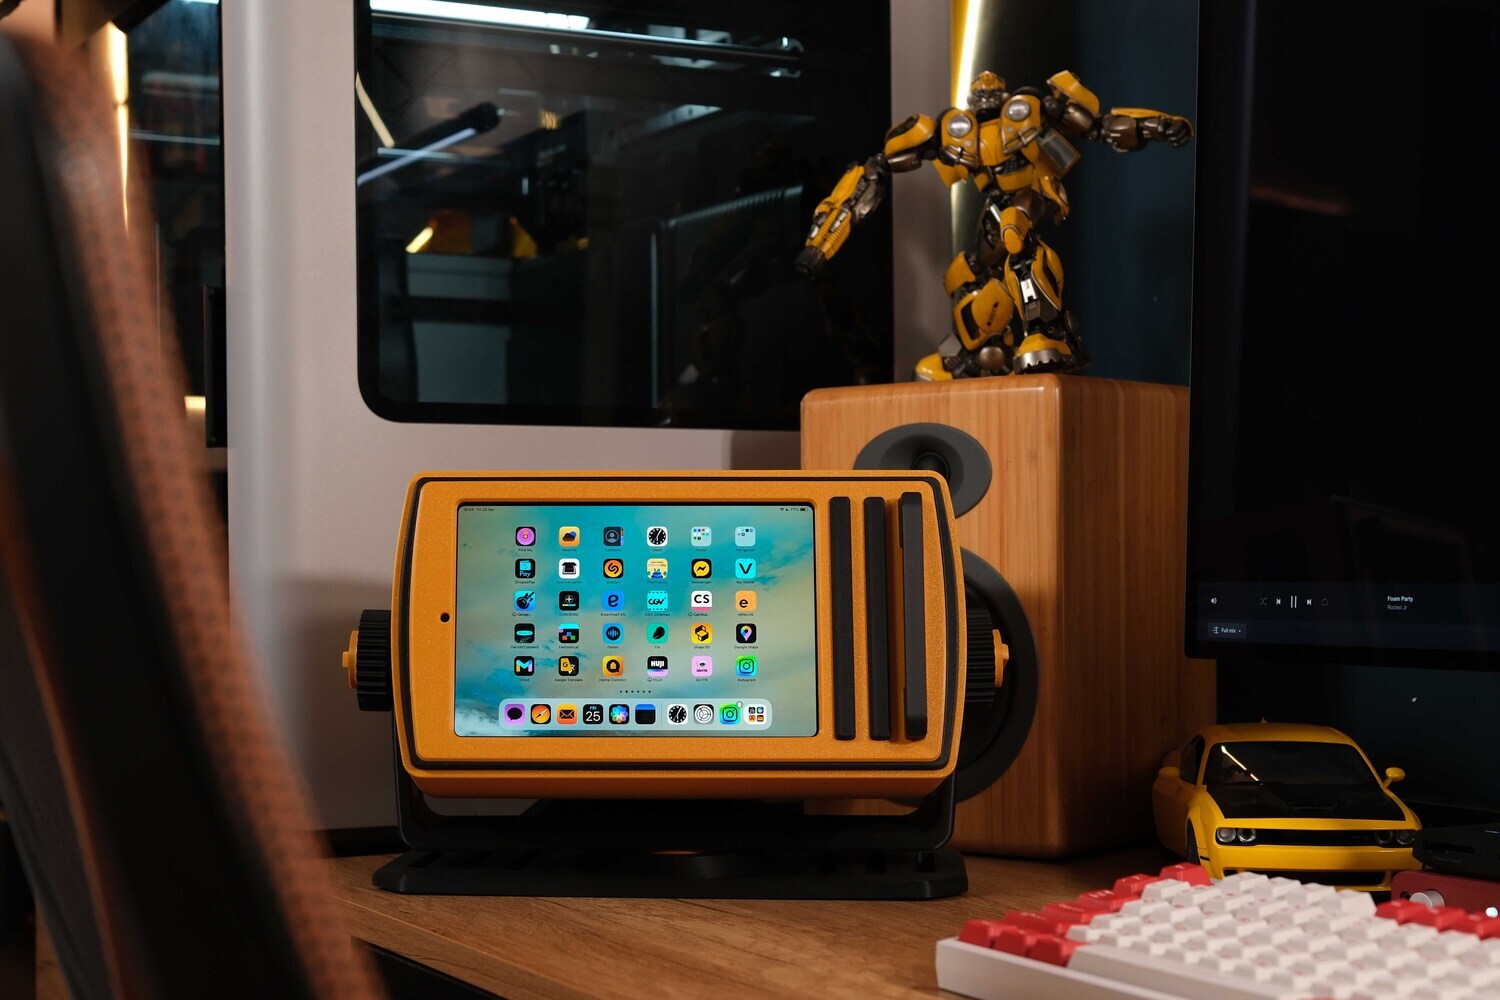
I keep it on my desk, every time I look at it, it sparks creativity and puts me in a good mood. And here's the video showing the process of how I made it. Wishing everyone lots of joy, creativity, and endless ideas to make life more enjoyable, even work better.
—————
If you like this design, you can support the project by purchasing the design files here: ipad-mini-dock-lumon-cyberdeck-style ► Or you can reach out to me here if you’d like to order a fully assembled unit: tại đây.